Monday, May 05, 2008

Widebody Fuel Flap

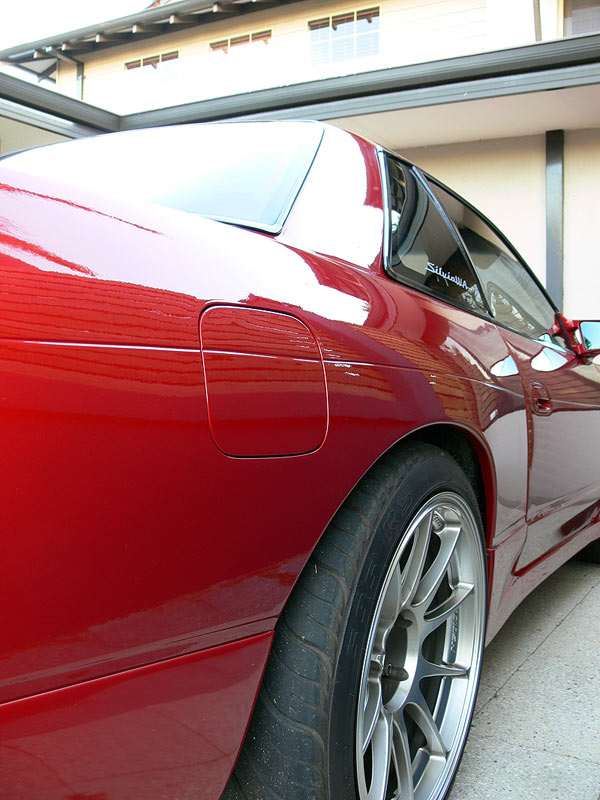
Flush fuel filler flap on widebody

One of the many things I love about the car, is its 'factory look'. An obvious way I did this was by using the Nissan Aero kit, which is now becoming quite a sort after item. But a couple of other ways was the filling of the front guards original vent holes (a necessity with the A-pillar braces behind) and the way the Tom modified and fitted the fuel filler cap to make it look factory. You see when you normally do widebody guards, you would use the supplied fuel filler cap which bolts up in the original located and looks like an after thought because it has chamfer on one side to clear the body. Here's an example:

Example original widebody fuel filler flap

I don't want to say that this car is by any means less worthy, it's a very nice ride. But in my case, the extra effort that Tom made in building up the flap with a small amount body filler and shaping it to suit the new rump really has made a huge, if mostly unnoticed difference...what you want really.

Here's some close up pics on how it looks/works:
- With the fuel flap open
- Closeup of the hinge, silicon hose used for spacers/bolt covers
- Screws used to set the stop point
- Closeup of the stopper screws
- Just a fancy shot of the Spec-B badge while I was at it

The spring on the inside of the flap needed a bit of adjustment so that when the fuel filler flap catch inside was pushed, it popped open. The final product though is just perfect. Thanks Tom.

Cheers
Brendan
Underbelly...by Nissan

Sillbeer's Undercarriage

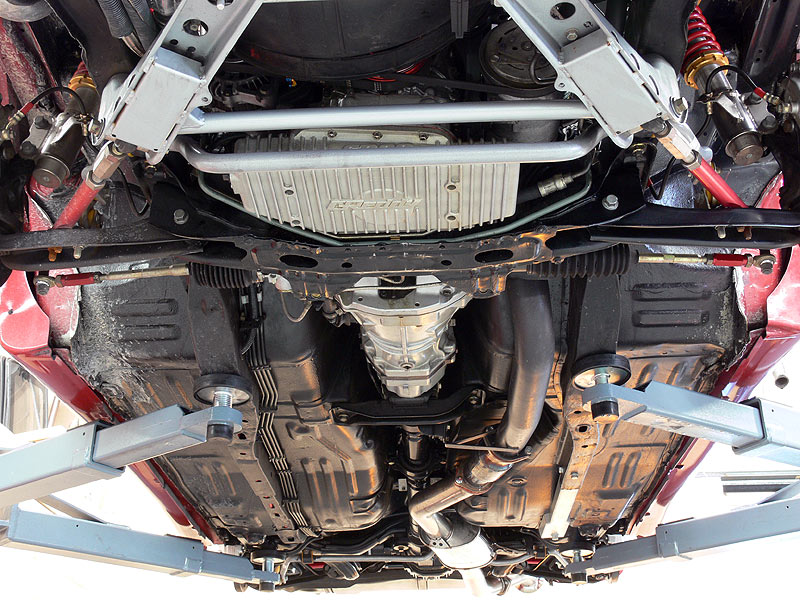
A number of weeks ago now, I did a photoshoot with Rick McDowell, a well known WA based photo journalist. The results of which were brilliant, but with a fair amount of work gone into the undercarriage, and an award to prove it, we needed to get some photos done of the underbelly along with additional engine and interior shots. This being something best done on a hoist of course, so last Saturday we were lucky enough to get some time on the hoist in the C-Red workshop (thanks to Marc, C-Red's Workshop Manager). I went in and first detailed the engine bay, which wasn't too bad really. But as I drive this on a daily basis, and that the road near work as had some work done on it recently (plus rain), I had quite a lot of dirt and mud built up under the guards. With the help of the trusty truck wash and a bit of elbow grease (and mess on the floor) the front and rear suspension on the passenger side came up a treat.

URAS Floor Reinforcement Kit

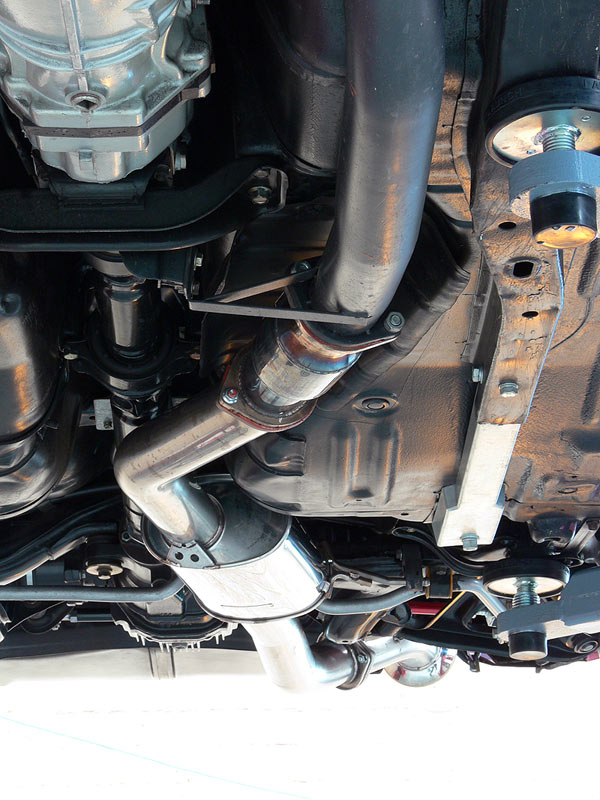
While Rick was snapping away, I thought I'd take the chance to update the undercarriage shots...being there's no longer the Ikeya Formula lower control arms in place, and the exhaust has been completed and changed since the last set I did 6mths ago or so. A couple of things to note though, first being the URAS Floor Reinforcement Kit which extends the chassis rail on the passenger side from the usual S13 cutoff point to the rear. Also, if you look on the drivers side, there's dirt there just to prove that it does indeed get driven. On a whole, I was surprised at how clean the undercarriage is considering the rain we've had lately. Having the fresh'ish paint surfaces certainly helped in cleaning it all up easily though.

Anyway, photos for all to enjoy:
- Rick taking his photos
- Under the engine bay
- Front Suspension
- Front Brakes and Coilovers
- Front Pipe and Gearbox
- Rear Subframe assembly
- Rear Suspension
- Air time

The photos that Rick have done so far were really ace, so looking forward to getting a gander at these new ones.

Cheers
Brendan

Exhaust sings new tune

Tanabe 'Medalion g-FORDAN blue' cat-back exhaust

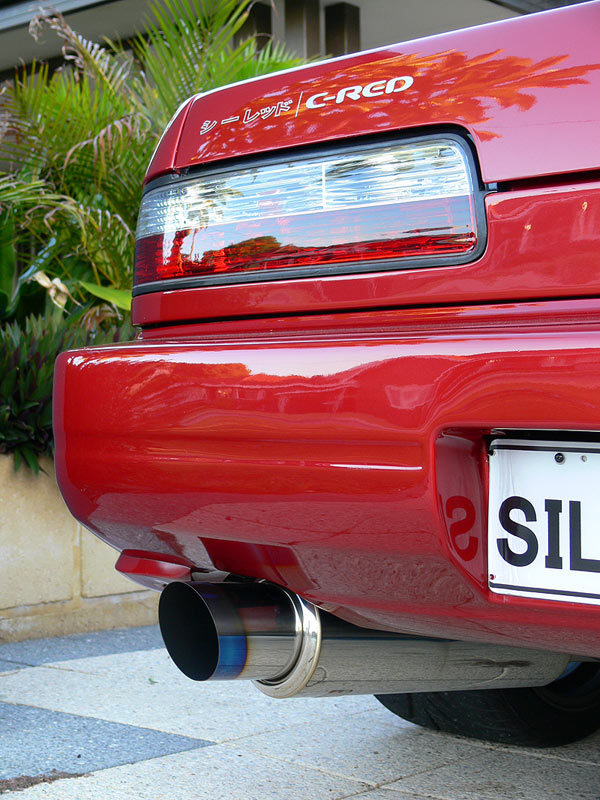
A few weeks back, I had the chance to fit up a new exhaust while doing some other work on Sillbeer and with C-Red being an agent for Tanabe, it seemed a no brainer to go for the Tanabe 'Medalion g-FORDAN blue' cat-back exhaust. Now you might be wondering why I would change, fair enough question. The answer has two parts...the first is that the exhaust that was fitted (XSPower Dual N1) was rather loud at certain cruising rev ranges which made it a little annoying. The second part being that it hung down rather low and was a constant worry on whether or not I would hit it on some driveways. This was more due to the design of dual pipes coming through under the rear subframe. So when the chance came, I took it.

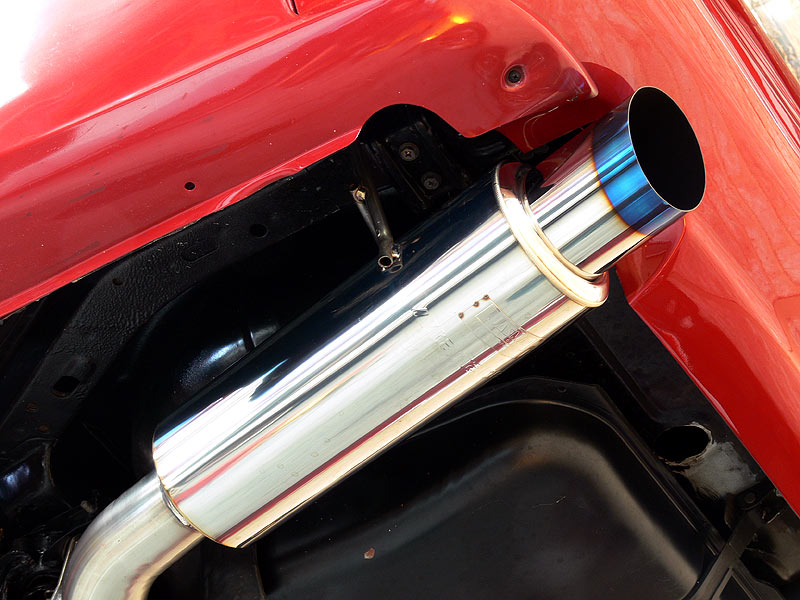
g-FORDAN Rear Can/Muffler

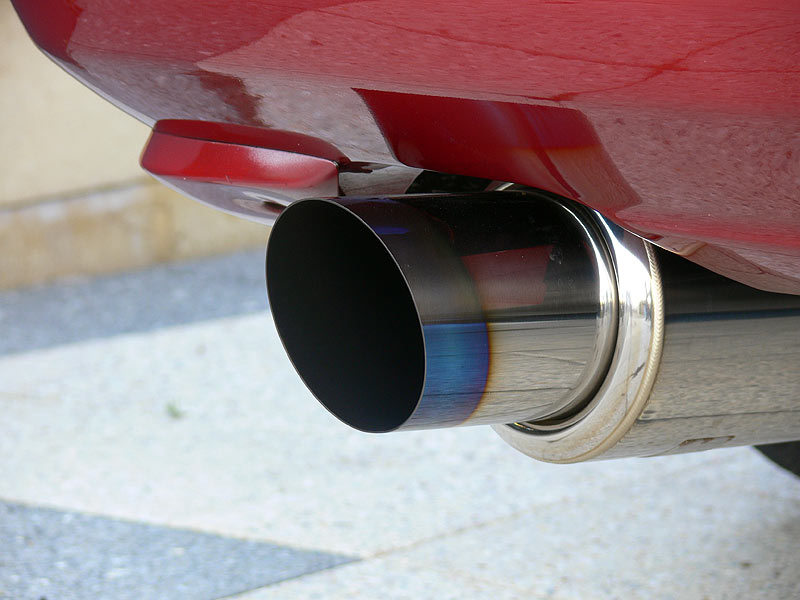
Now I wish I had the obligatory 'box opening' pics for this event, as the experience was incredible. This exhaust is a perfect example of pure Japanese aftermarket quality parts. The packaging was tight, there were all sorts of protection and the product was just beautiful. Fitting the exhaust was a dream, after we put back all the standard rubber mounts we removed to get the china made XSPower exhaust to fit. Within 10mins, it was fitted up and ready to go...it took longer to open the box. As you can see from the pics, this exhaust has a 'titanium look' blue tip. It's a little wanky, but I like it. The welds are a thing of beauty too and all the supplied nuts, bolts and gaskets were all top quality pieces.

g-FORDAN Exhaust Tip

So, it was down with the hoist and a turn of the key. Now coming from the Dual N1 to this exhaust was quite a change sound wise. The Dual N1 was reasonably loud, especially at WOT, but this Tanabe exhaust is very quiet at idle and normal off boost driving. Being a JASMA exhaust, this was to be expected, but the surpise came when I gave the car a quick squirt through the tunnel. OMG, it's like a banshee being let free. Just beautiful. I had the same experience with another JASMA certified exhaust on my 32 V-spec - being a Nismo Weldina item, quiet on running around, then opened it's lungs right up at WOT.

The experience in the cabin now is much more to my liking (I am getting on in years). It's now a huge difference, with no droning at cruising speeds, it means I can hear more of the sound system.

Here's a few more pics of this lovely Tanabe 'Medalion g-FORDAN blue' cat-back exhaust:

- Full Rear View
- Full cat back exhaust 1
- Full cat back exhaust 2
- Centre Muffler 1
- Centre Muffler 2
- Rear 'Titanium look' Exhaust tip 1
- Rear 'Titanium look' Exhaust tip 2
- Exhaust tip side profile
- JASMA Plaque on Rear can
- Metalcat Catalytic Converter
- Cat converter and HKS front pipe

Thanks to Josh at C-Red for assisting in fitting the exhaust too. If anyone is looking to purchase one of these exhausts, I have no problem recommending them.

Cheers
Brendan