Thursday, July 26, 2007

Sunset Photos (before Autosalon)

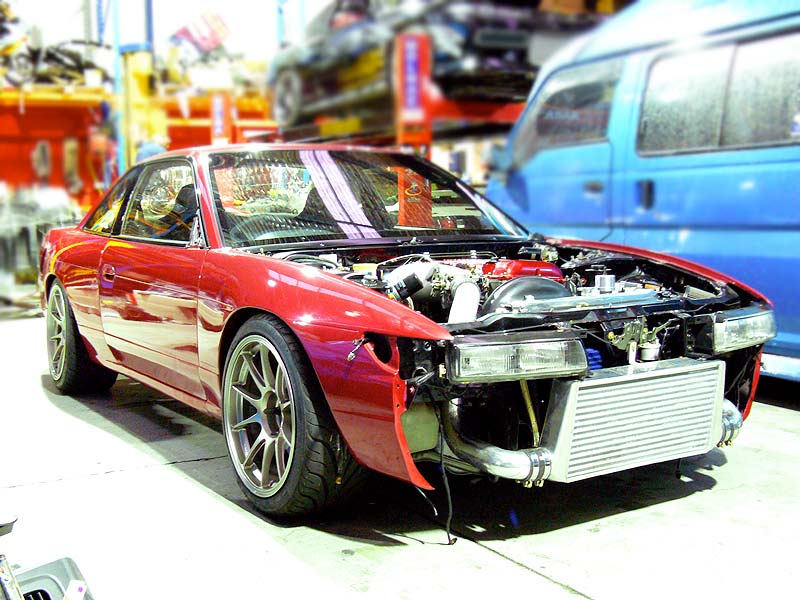
Sillbeer (specB) in the sunset before Autosalon
Photo Gallery

Here's a few photos I took while waiting for the truck to come and take sillbeer off to Autosalon last Friday night. They're a bit rough, but it shows the potential for some nice pics in the future.

If anyone is wanting a larger, desktop/wallpaper sized photo for their machine, let me know and I'll post a small selection up in a few different sizes.

Enjoy
Brendan

Monday, July 23, 2007

The show is finished, but the journey continues...

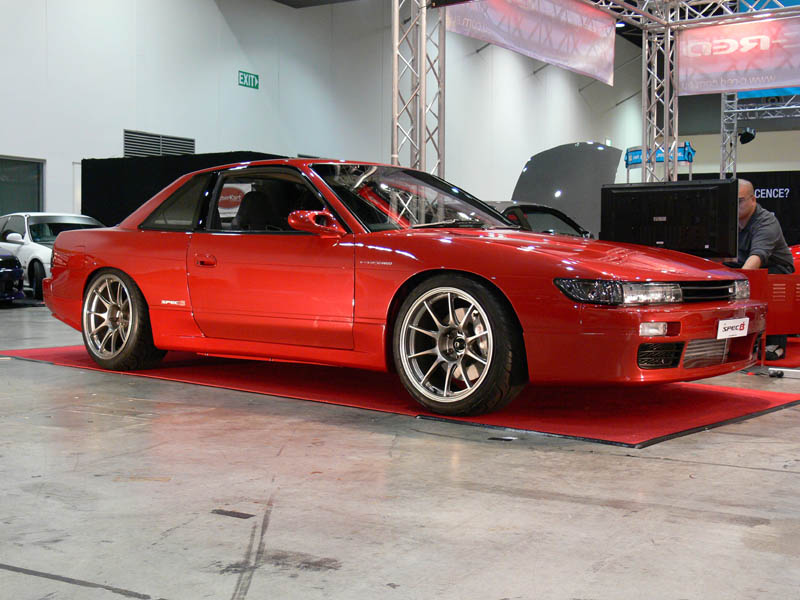
Sillbeer (specB) on the C-Red stand at Perth Autosalon 2007
Photo Gallery

Phew, I'm glad that's over. Yep...referring to the hectic lead up to Perth Autosalon 2007 that I had last week. The target was to get the car pretty much 100% completed, but we had to settle for about 85%. Visually it was complete, but due to the short amount of time left over we didn't manage to turn the engine over and troubleshoot in time so we left it at that.

The week started out with a list, and by Friday afternoon I think I'd managed to cross off about 50% of the items...some big, some small. I was just happy enough to get it looking like it should, even if only the rear exhaust section was just hanging on the rubbers. But during this week, I did have the help of some top technicians in the form of C-Red's Marc, Josh and resident welding gnome. Even though they were busy with the three other C-Red cars, they managed to find time to point me in the right direction when needed...I can only say thank you all so much.

Once we had the cars into the convention centre, it was time for me to pay attention to the bodywork on SILLBEER. I had cleaned up everything else before going on the truck, but left the paint until I was in situ. Thanks again go to 200SXY from Silvia...you're tops. Not having had to really worry about show quality paint before, she kindly lent me her Meguires products and microfibre clothes to initially clean the paint work (which was filthy from sitting in a workshop for 2yrs) and then on Saturday morning, the wax to finish the job. I was completely surprised by how much of a difference these two products made. There's still a few blemishes on the paintwork, but with a proper buff and detail I reckon we can turn it up a few notches more.
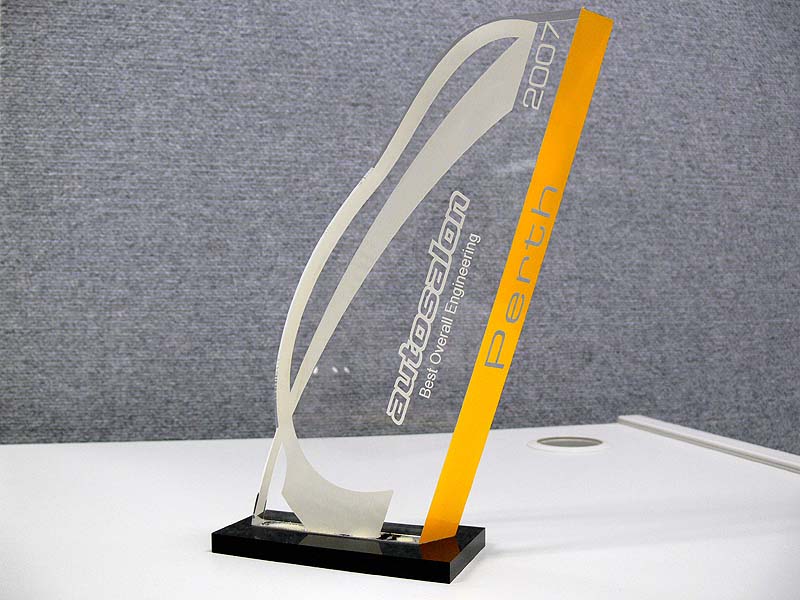
Perth Autosalon 2007 - Best Overall Engineering trophy

The weekend was great in all and I came away with an award for 'Best Overall Engineering' which I was surprised at considering the car wasn't even running. But I suppose they saw the quality of parts and work that was put in by all and sundry.

Am I happy with the result so far? You betcha. The comfiness of the interior is what has most surprised me. The use of the R34 GT-R seats was spot on, and the softer materials used in the trimming and carpets has transformed an interior that I remember as being quite dated, cold and hard to something that you don't mind spending time in. Of course the quality sounds coming from the thumping stereo help.

So to end this post, I'd like to thank a few people. First and foremost would be my wife and three kids for supporting my efforts thus far with the car...you patience has been worthy of your own trophy. I've already thanked the boys at C-Red, but additional thanks go to Jeff Ash, the MD for C-Red...cheers buddy.To Roy Robinson - now heading up Kensei for his work and support in the earlier stages of the project (larv ewe). To Greg Dally for sitting in during the early parts of this year and knocking a lot of work off the list. To Pete and Chris at Trimcare for doing an awesome job on the interior trim work and carpets. Daniel Jurkovic from Audio Addict for his immaculate work with the stereo install. Phil Foster from A.F.M. Enterprises for helping out with some final painting bits (he also painted the C RED S14 with 1JZ). SilviaWA members for continuous support and kind words. And last but not least...myself, cause it was hard work.

Where to from here you might ask? Engine will be first off the rank followed by a run-in tune. Then we'll be getting the help of an engineer to see what we need to get done to have it all registered. Then some kms to run everything in and shakedown support systems. And somewhere in there a decent alignment and tweaks to the suspension to get a baseline to work from with regard to tuning the chassis.

...the journey continues...

Cheers
Brendan

Thursday, July 19, 2007

Busy, busy, busy

A quick one.

Well this last week has been nuts trying to get ready for Autosalon this weekend. The kit and stereo are in, but there's been many many small things to do. Made a list at the beginning of the week, and I'm only half way through it so a few things will need to be missed unfortunately just to get it to the show in a worthy state.

So the next time I see you I hope to have heaps of photos to show you from the show.

Cheers
Brendan

Monday, July 09, 2007

Tick...tock...time is a racing!

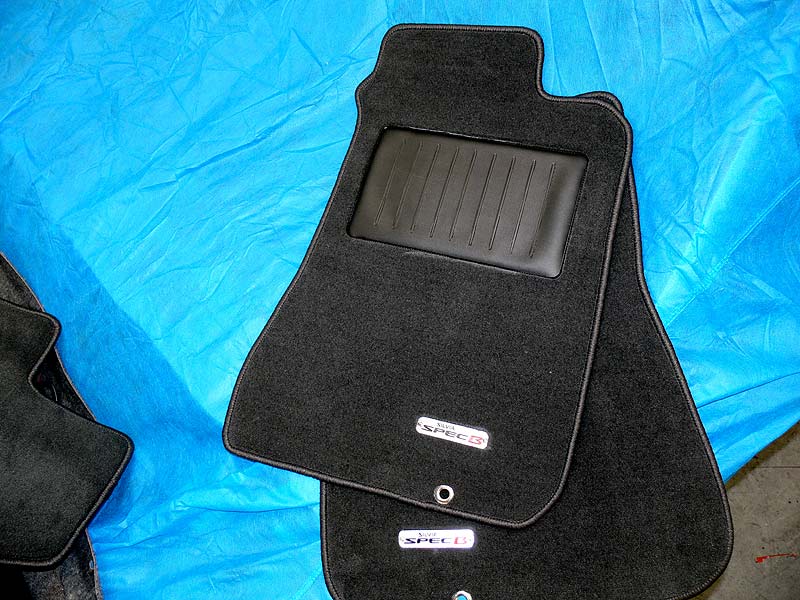
New Floormats with specB logo

Jeez, the pressure is really on now to get the car done. And now I'm taking a holiday! Last week was a little hectic with a lot of little things to do. Of the main things, the interior is all in (just need to bolt in the glove box once the loom's been tied away), the fuel system is finished, the mirrors are being painted and the carpets are done. The main battery line has been secured in its final resting place, the stereo installer is all set to do his magic (Daniel Jurkovic - 0408 792 466), and Tomas is scheduled to come in later in the week to refit the body kit.

So, how does the trim work look...in two words - bloody fantastical. Pete, Chris and the guys at Trimcare have done a great job, in minimal time and fuss...if you need any trim work done, please don't hesitate to go see them (Trimcare - Unit 3, 233 Bank Street, Welshpool - 9470 3381).

With the floor mats, they used originals as a template for the main shape and had the edges bound. For the specB badge, we mounted in the factory position, but as it wasn't as solid as the original, and the carpet is rather plush, they had to melt the fibres under the badge so it didn't bow in the middle once riveted into place.

- S13 specB Floormats
- S13 specB Floormats (closeup)
- Boot Carpet (centre)
- Boot Carpet (drivers side)
- Boot Carpet (passenger side)

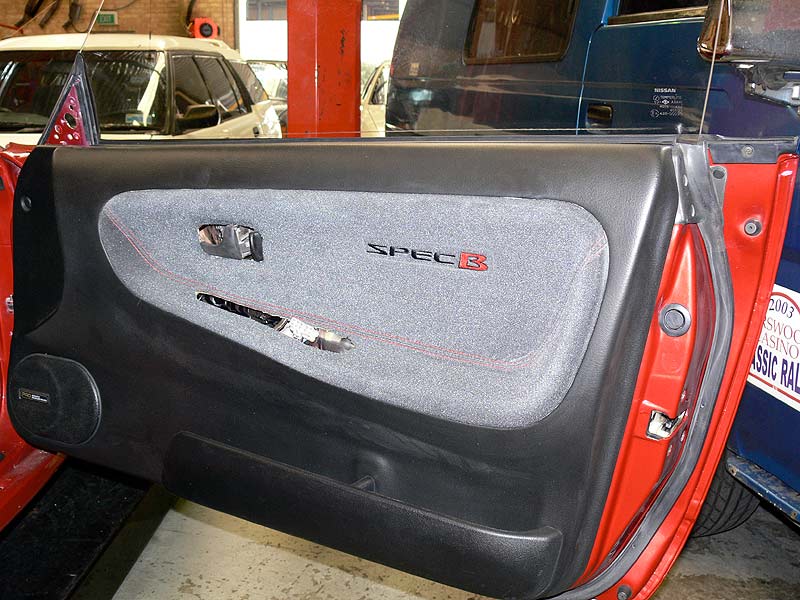
specB Door Trims

The door trims came up a treat - ignore the whitish tinge, it's chalk marks that I'm yet to clean off. The plastic trims and centre console were all sprayed back to the original black colour, and the gearboot and handbrake cover are now in place. You can also see that the centre console box lid is trimmed in the same material as the back seat, door trims and glovebox.

- Centre Console
- Dash all fitted
- Air-conditioning Controls

I tell you I had a rabbit of a time with the air-con control. Firstly the head unit I had hadn't been cleaned once in its lifetime and it took me 30mins of rubbing hard with the prepsol to get down to the shiny plastic again. Once it was all clean, it was time to fight the octopus which was the wiring. I had to go track down a fuse, and missing solenoid for the airbox - along with a bunch of running around to different cars trying to figure out what went where. I also found one of the Nissan console DIN-sized storage boxes too (woohoo).

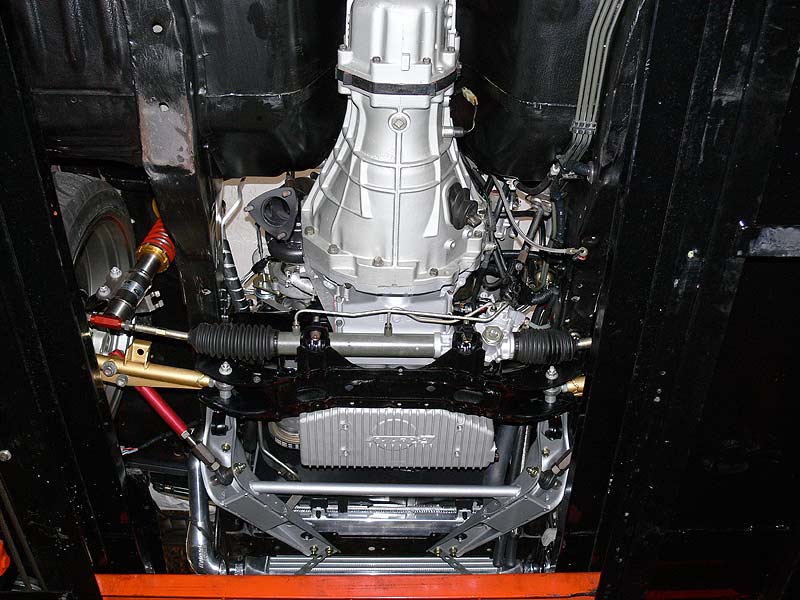
Underside of engine

Doing all this work took place on the hoist, so while it was in the elevated position, I took a few pics of the underside for all those that haven't see it yet. Note you may see some flaking red paint in bits which is actually the hoist, not the car.

- Back of gearbox/tunnel
- Diff from the front (R33 GT-R Diff and Half-shafts)
- Diff from the back
- Rear Wheel suspension etc from the back
- Rear Wheel suspension etc from the front
- Front Wheel suspension etc from the back

Taking the weekend off as we've had a place booked down south for quite a number of months now, then next week I'm focussing only on the car to have it ready for Autosalon. Hopefully I can get one more post in before the show.

Cheers
Brendan

Wednesday, July 04, 2007

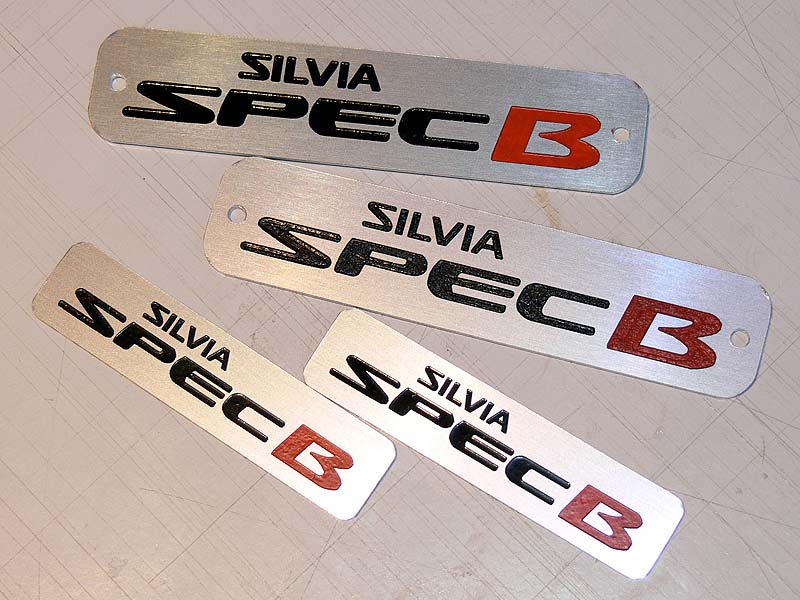
specB in metal

specB Emblem in Aluminium

A few weeks ago I decided to take the logo application to the next level and commissioned a company call Badge-a-Minit to turn it into a plaque/emblem/badge thingy. The price was reasonable too for a custom one off piece of work. The process goes like this, the take the artwork I created (a vector file format called EPS), digitise it into a bitmap that their engraving machine can read which turns it back into vector artwork. The engraving then happens on the aluminium material - in this case branded Gravoxal. Once the engraving is done, the areas are paint filled and finally the top surface is linished back for a clean final product.

I had two different sizes made up, the larger ones will go on the new floor mats being made (fixed using rivets), and the smaller ones are yet to find a home, I think one will go on the dash somewhere, the other possibly in the engine bay. I still need to apply a final coat of clear for their protection and then they'll be ready for fitting.

I'm pretty happy really.

Cheers
Brendan

Tuesday, July 03, 2007

Windows with a view

Sillbeer has windows

Last Friday was a big day for me. It was the day the windows were being installed...finally changing sillbeer from a shell, to a car. But before they were done, I had to do some final prep. The interior needed to be removed for one, and the last bit of Dynamat was applied to the rear parcel shelf. While the rear glass was still out, I also drilled some holes for a future harness bar that we'll mount across the parcel shelf because once the glass is fitted, the area will be too tight for a drill.

- Dynamat on rear parcel shelf

Now once the windows were fitted by the kind fellows from Wayne's Windscreens, I took some pictures to remember the moment...you can tell now it's completely changed the outlook of the car.

- Windows installed from rear
- Windows installed from above
- Windows installed from above rear

While that was all going on the last of the interior pieces were gathered together and taken down to Trimcare to be refinished. You can see from the pics that some of the pieces were painted in a marble effect paint...this just isn't my bag, so it'll be brought back to stock.

- Centre console with marble effect paint
- Interior pieces for refinishing

Now as much as I wanted to on Saturday, I had to wait the obligatory 24hrs for the window sealant to cure so I've split my weekday in the workshop this week and spent the Monday PM refitting the interior (well what I had of it anyway). This included the newly trimmed rear seats and front door panels.

- Rear Seats now in place

I even sat in the back and belted myself in to see how comfy it is. I must say the logo really works well. I also went down to Clark Rubber and picked up some nice trim for the holes over the rear strut towers where the brace comes through. The final product looks great, noting also the plastic trim now looks new.

- Rear Strut Tower trimmed and ready to go

Nismo 'Style' Boss Kit for S13

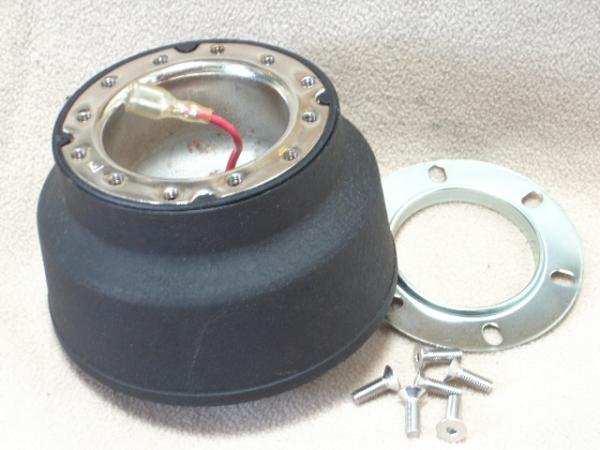
Now one thing that I've been trying to solve is the problem with the Nardi boss kit just not covering up the hole in the steering column surround. I did a bit of research and the only ones that seemed to be what I needed were from Nismo. After chasing that up and finding out they're discontinued, I turned to the Yahoo Auctions...and found quite a few of the correct design. Now whether they're genuine Nismo or not is yet to be determined, but I bid on two of them and won both so hopefully they'll be sent over asap. Oh, and I used Slidewise Imports to do all the dirty work, thanks Zac. Here's some pics of the boss kits I won:

- Nismo 'Style' Boss Kit for S13 - 1B
- Nismo 'Style' Boss Kit for S13 - 1C
- Nismo 'Style' Boss Kit for S13 - 2

Ganador Mirrors for S13

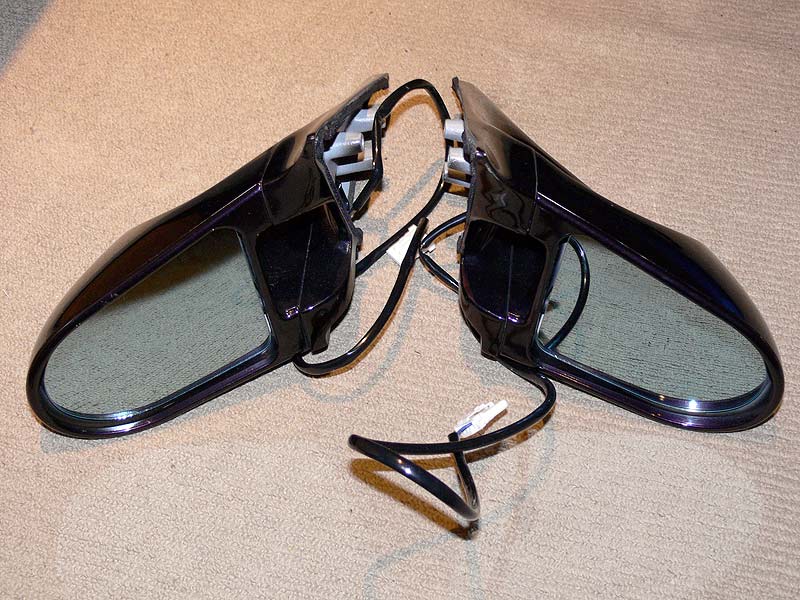
And finally on Monday I got my Ganador mirrors. Bought from someone on NS.com, they're in great condition and have been dropped off to Phil at AFM Enterprises Osborne Park to be resprayed in the correct colour:

- Ganador Mirros from Front
- Ganador Mirrors from Top
- Ganador Mirrors sail
- Ganador Mirrors plug

Only three weeks or so now until Autosalon so the race is really on to get the car completed. Yet to do are bodykit fit, fuel system completion, catch can, stereo and battery along with a myriad of small bits and pieces.

Wish me luck, going to need all of it.

Cheers
Brendan

Recaro SR-II's for sale

Recaro SR-II from Honda Integra Type-R

Well as I'm now using the R34 GT-R seats now, I sort of sold the Recaro's to a close friend. Unfortunately he's needing to sell them now for his own reasons. If anyone is interested (probably more people from West Coast and than east due to possible shipping costs involved), please email Clint on clinton 'at' cceg.com.au to find out more.

Cheers
Brendan