Thursday, October 25, 2007

Sillbeer runs...and other stuff
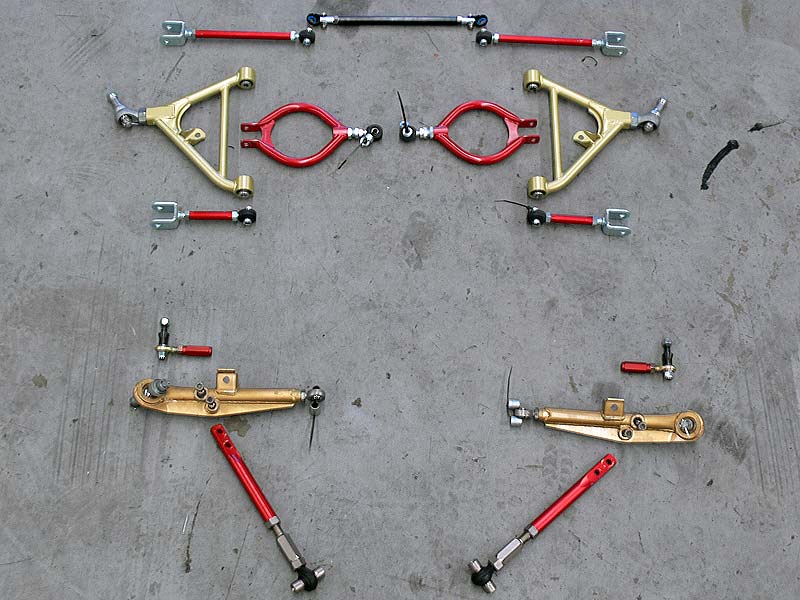
Adjustable suspension arms front and rear

Good news first up. After some troubleshooting with the engine, the blokes at C-Red found the problem with the engine. It was found that with the standard shims in place, valves were not able to close completely as the head had basically been over serviced. After ordering a set of undersized test shims in from Precision Shims Australia, the valves were all reshimmed and all is working again. A big thanks goes to Precision Shims Australia...I sent them an email from the workshop on a Saturday morning, I got a call back in 15 minutes from Chris who advised that they were available and could be sent Monday, for delivery by Tuesday. I paid and all said and done...top human.

- Precision Shims storage box
- Shims - from 2.00mm to 3.00mm in 0.05mm increments

In the meantime, as can be seen by the top photo, I have been busy in preparation for compliancing. To ease that process all the adjustable arms have been removed, and a stock set re-fitted. I had this set already cleaned and painted, so it all looks new. Here's the photos of all the adjustable arms laid out on the floor:

- Front adjustable Kazama and Ikeya arms
- Rear adjustable Kazama and Ikeya arms

And here's a couple of pics of the front setup as it is now with the stock arms fitted:

- Front stock arms (from rear)
- Front stock arms (from front)

You can see a small Nismo logo on the front lower control arms, there are original Nismo LCA's, but I've repainted black and applied the logo myself. Also in view is the end of the Whiteline front sway bar.

An interesting result of putting the stock arms back on is the way the rear wheels now fit in the guards. With the Ikeya Formula arms, I couldn't get a good compromise to good fitment, and before the changeover, I had a set of 20mm spacers fitted. Below are a couple of photos with all the stock arms in place (but still lowered on coilovers), and although there's still to have an alignment done, they're sitting pretty.
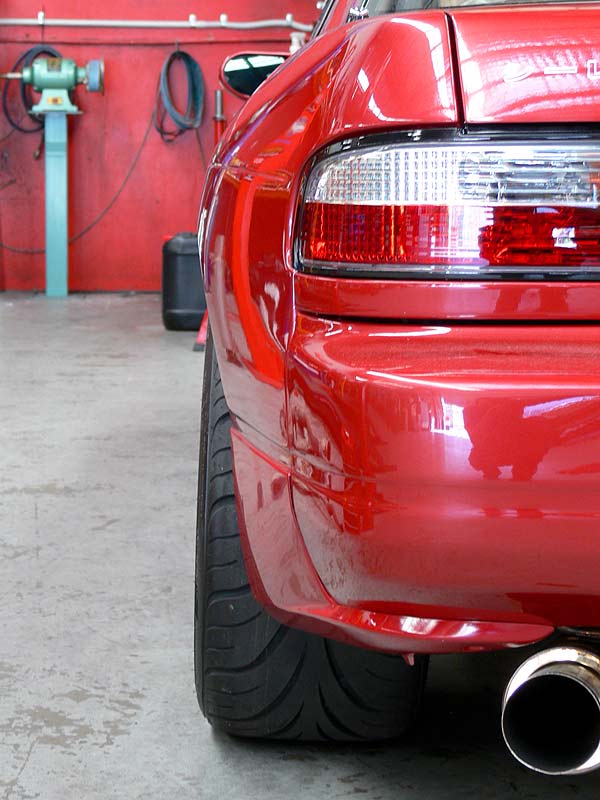
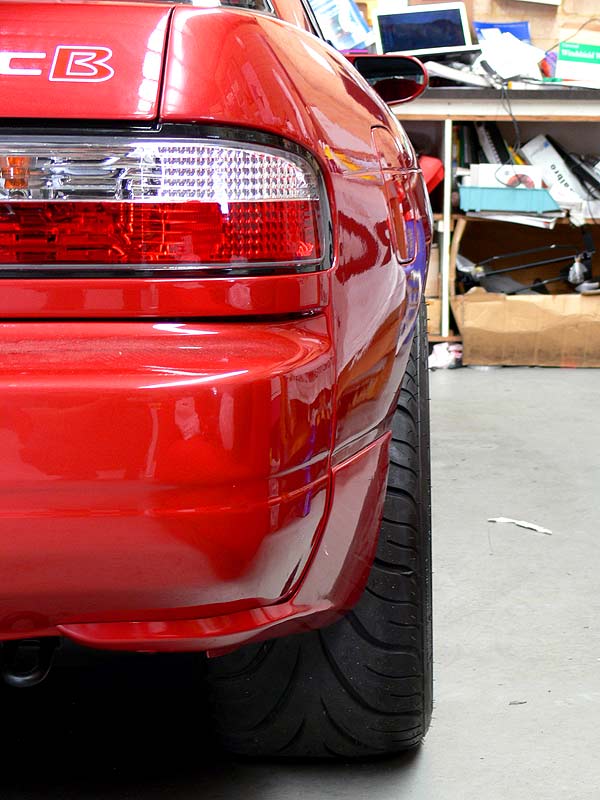
Wheel position on stock suspension arms

Wheel position on stock suspension arms

At this stage, I'm seriously thinking of leaving the stock lower control arms on and not refitting the Ikeya Formula front and rear lower control arms. I think if it was a full race car, that was super super low and full total control over alignment was required, they would be great...but for my purposes, I think they could be overkill. Decision yet to be made. I will however be using all the other Kazama arms including upper camber arms, tension rods and toe rods on the rear, castor arms and tie rod ends on the front.

Now all this time I've been driving the trusty (and rusty) Mitsubishi Sigma (Galant) Turbo around as my daily driver. It's actually a Japanese import, now an Aussie delivered car, and is basically a Starion four door complete with four-wheel vented disc brakes, rear independent suspension and 4G63B engine (Sirius). It's done over 315,000kms and is showing it. The latest item being the driveshaft - with the front universal joint being completely shagged and causing one hell of a vibration. So we had the driveshaft sent off for reconditioning. So what did I drive in the meantime:
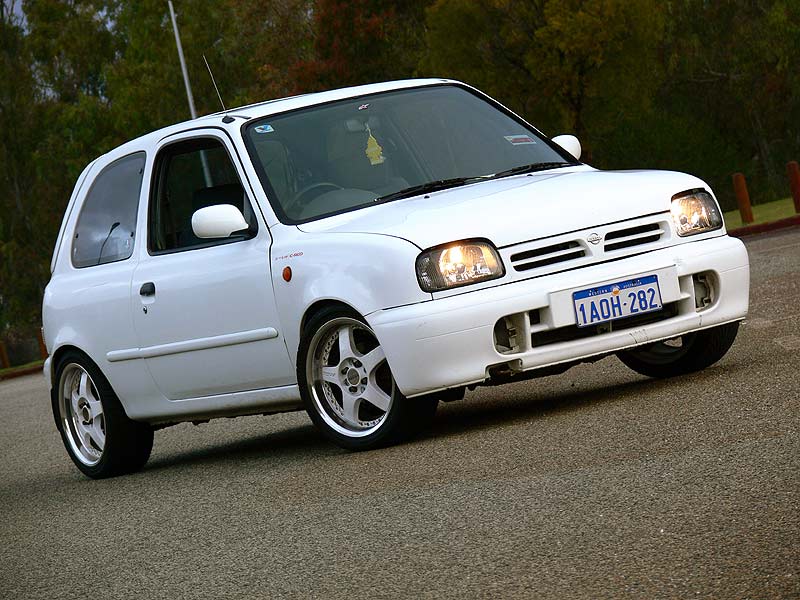
K11 Nissan Micra Super S from the front

I was fortunate enough to borrow Jeff Ash's from C-Red's little Nissan Micra Super S. This little thing although not powerful, was very zippy. Jeff's in his usual mode has changed a few items though, including new front and rear lights, Lenso rims and Tanabe coilovers. This thing, although a little rough, was a great segway from the usual Sigma drive. Think go cart and you're not far off, although I think the beautiful Personal steering wheel and 8-ball gear stick knob had a good deal to do with the driving experience. I also created a little logo based on the March Cup branding use for the K12 March one-make racing series in Japan, and a little Porsche Carrera RS treatment. Some stripes down the lower side including logo may go on in the future.

- Micra from the rear
- Micra from the side
- March Cup logo

Anyway, we're racing to get the car on the road for the next SilviaWA club meet on 7 November. I can't guarantee it, but we're giving it a good go. Because it's a little odd for the club president to be driving around in a Sigma!

Cheers
Brendan

PS> Shameless plug for Woody who's selling Angry13, one of the nicest Nissan S13 Silvia's in Australia.
Friday, October 12, 2007

All washed up...

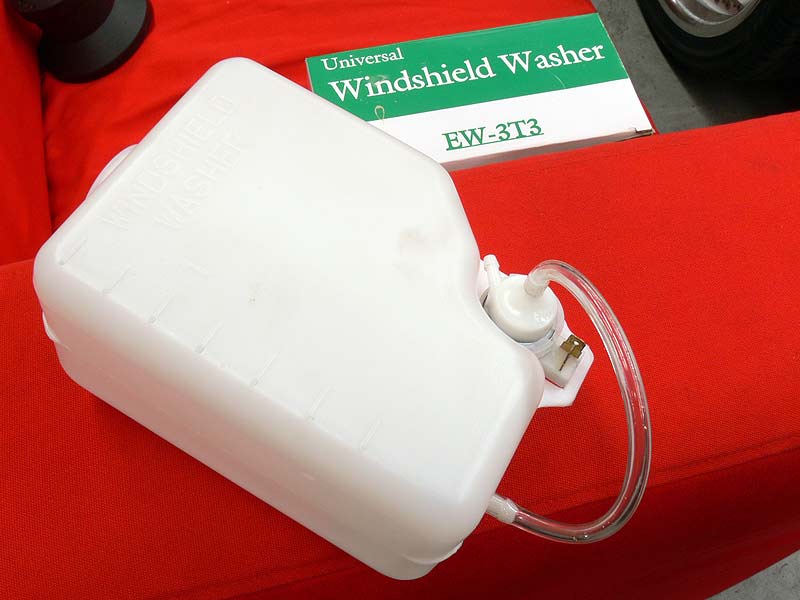
Universal Washer Bottle

One of my pet hates when it comes to driving is a dirty windscreen, and of course to be registered, the car needs windscreen washers (squirters) working, so I needed to get them into working condition. Now, in an effort to clean the engine bay up a bit, the fuse box was moved to a position right next to the guard. This position however covered up the hole where the original washer bottles filling pipe comes up...so another solution was required. As the battery is now in the boot, it left a bit of space where it was, next to the intercooler pipe.

A quick trip down to Supercheap Auto found a universal washer bottle at a perfect size. We looked at a bunch of different locations, including down underneath the guard, but all solutions still has the problem of being able to fill the small capacity bottle, thus the location in the engine bay itself. After making up a bracket from stainless flat strap and giving it a coat of paint it all bolted in pretty effortlessly. I pulled the original washer plug and hose through, filled the bottle and connected the hose and electrics. To my surprise, the electrical plugs were a match and after dropping the battery onto charge, the squirters were all working mint. Photos off the stuff below:

- 'L' Bracket 1
- 'L' Bracket 2
- Bracket installed with additional bottle attachment
- Bottle installed and filled

Now that that was done, it was time to start thinking about putting the suspension back to stock for registration. The adjustable arms may or may not be re-installed. I'll take some pics of the position of the rear wheels for reference, but with the stock rear lower control arms, the rear wheels sit almost perfectly...and I'm rethinking my decision on whether I really 'need' the fully adjustable Ikeya Formula lower control arms. We'll get to that decision later once it's back on the road.

Cheers
Brendan

Tuesday, October 02, 2007

Don't go away, I'm still here...

Engine Bay Detail

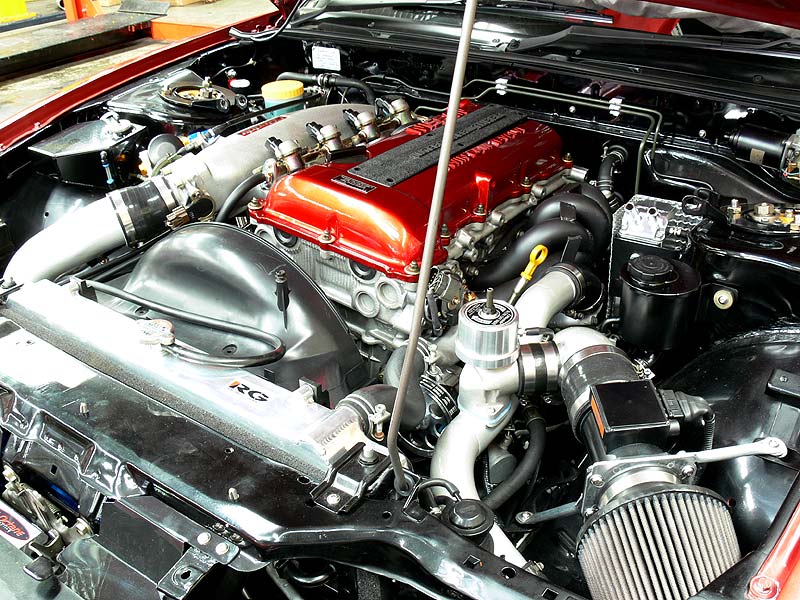
Wow, time flies...full stop. But yes, I have still been working on the car. We're currently going through some changes under the bonnet that are taking longer than expected which is causing a knock-on affect in having the car on the road. While this has been happening though, I have been continuing to do things on the car in preparation for its eventual trip over the pits. But first up, I never took photos of the engine bay while at the show which was a complete oversight on my part, so here are a few photos now:

- Engine Bay from front
- Engine Bay from driver's side
- Engine Bay from Passenger side
- Exhaust manifold detail
- GReddy Remote Oil Filter
- GReddy Oil Cooler

You may have noticed in those pics a nice shiny GReddy oil catch can (breather) sitting on the passenger side strut tower. Well this was fitted by me, using a custom mounting bracket and heat shielding that I fabricated (which I was very happy with). Final result looks reasonable clean.

- GReddy Oil Catch Can from front
- GReddy Oil Catch Can from rear

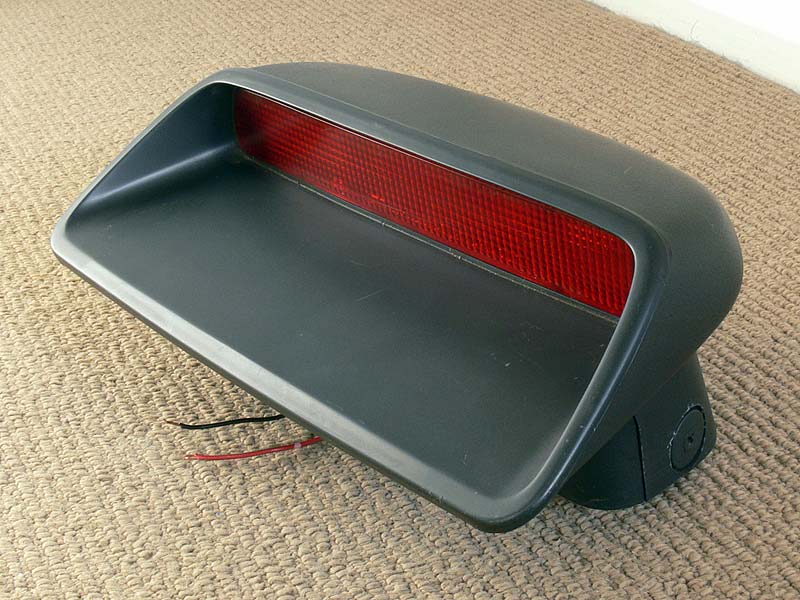
Nissan S13 Silvia High-mount Brake Light

As part of the registration process, there are a number of items that needed to be addressed. The first is the rear high-mount brake light. Now I was originally going to get a Hella light from the local light store (Alanco), but remember that the S13 Silvia came out with one of the factory. As fate would have it, when I had a look on eBay, someone in the east was selling one...and after a frantic last 10sec bidding war, I came away the new owner of a genuine Nissan S13 Silvia High-mount Brake Light.

- S13 Silvia Brake Light (Front)
- S13 Silvia Brake Light (Back)
- S13 Silvia Brake Light (Side)
- S13 Silvia Brake Light (Bottom)
- S13 Silvia Brake Light (Lamp)

Now the sorta trick bit was figuring out how to mount the little bastard (note: it's not that little). After removing the rear parcel shelf (and the sub woofer), I found mounting holes on the metal shelf. Unfortunately the same couldn't be said for the wooden parcel shelf, which I went ahead and guestimated where the holes should be cut after doing a bit of measuring. Next up was figuring out how to get power to it, this is where I could kiss the Nissan engineers as they left the plug sitting on the loom that runs across the rear window. I cut the retaining tape and hey presto, all it plugged straight in. After bolting on the mounting bracket and a few backwards and forwards with the wooden parcel shelf, it was installed.

- S13 Silvia Brake Light Mounting Bracket
- S13 Silvia Brake Light Plug (Wire/Loom)
- S13 Silvia Brake Light Parcel shelf modifications
- S13 Silvia Brake Light Fitted (from inside)
- S13 Silvia Brake Light Working

While on the parcel shelf, I installed the child restraint belt brackets. Now I installed the bolt holes a few months ago, so this was a very simple job. Using the Klippan Child Restraints from Repco (I think), it was just a matter of removing the pre-cut piece in the wooden parcel shelf, a hole made in the material and bolt them in. All done in about 5 minutes, but crucial for registration and taking my 1yr boy for a spin.

- Klippan Child Restraint
- Child Restraint (fitted)

As the car is getting registered, it will no doubt be subjected to their height test which usually equates to the car needing to be 100mm off the deck at any point under the car. After fitting up the exhaust a few weeks ago, a quick check under the car revealed it had a lot of height required to clear. At only 55mm off the deck, I needed at least another 55mm to get me in the safe zone. The procedure to do so was reasonably easy though with just a matter of taking off the bottom coilover mount and winding both sides out until it all cleared. This was done for the front too, but this consequently cancelled out some of the clearance done on the rear. I'm in two minds yet as to whether I will just put stock shocks/springs on to get the registration process over and done with. Here's a before and after shot anyway:

- Wheel height before
- Wheel height after
- Exhaust clearance after

Another reason for all these delay's is the fact that I'm also spending more time with the family, which means less time on the car...and without doubt, family comes first. I promise not to leave it so long next time (like you've never heard that before from a blogger).

Cheers
Brendan