Monday, March 26, 2007

Gettin' some Vitamin D!
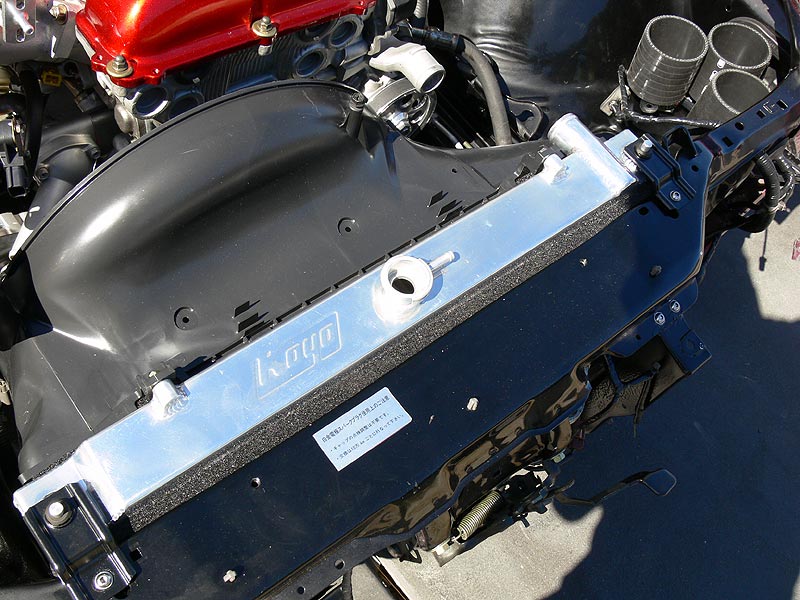
RG Radiator Installed

Progress is happening, but to coin the old phrase, the devil is in the detail is an understatement. And with two of the most anal people I know (Greg and I) working on the project, everything must be done to the best of our abilities (his are higher in this regard than mine). This last week or so has been spent getting the A/C condenser cleaned (and fins straightened), more rummaging through wrecks getting much needed pipe work and bits and pieces. The radiator, an S14 Racing Gear jobby (re-branded Koyo), is now in place along with the S14 shroud. There was a plan to fit up thermo fans, but we've changed tack now and gone back to the clutch fan and shroud. I went and got some foam and rubber stripping for Greg to use in the radiator mounting and the job is beautiful. You'll see the foam in and around all the gaps in the pics above and below.

- Air conditioning Condenser Installed
- Grex (Trust/GReddy) Oil Filter Sandwich plate for Oil Cooler and Remote Filter mount
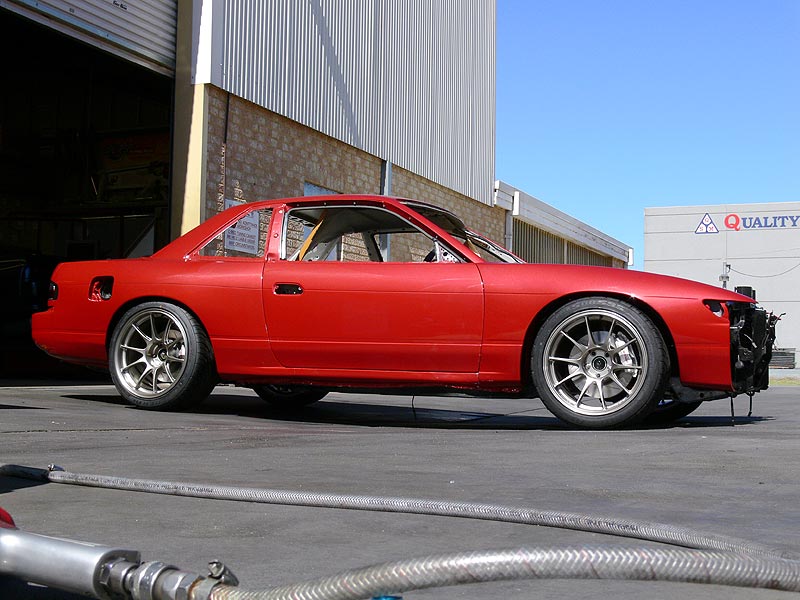
Sillbeer in the Sun

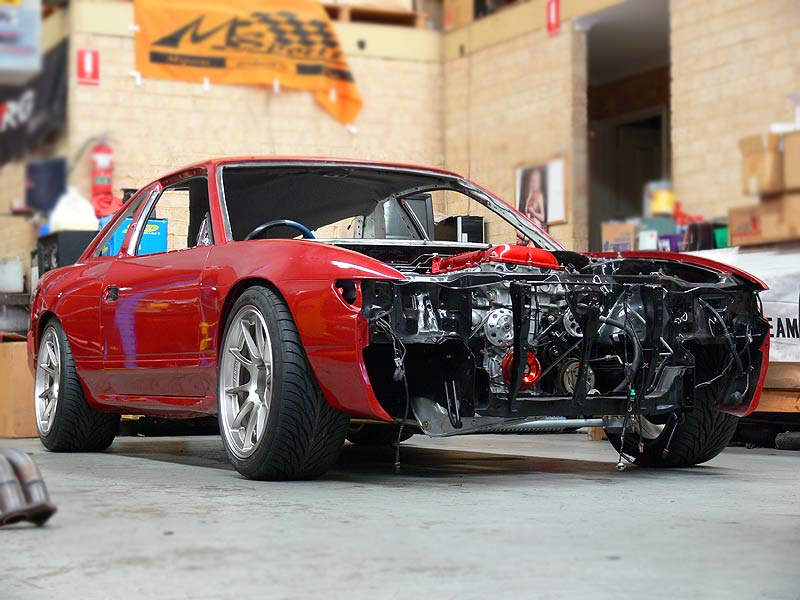
On Saturday, I decided it was time for Sillbeer to get some Vitamin D, so with the help of Josh and Woody, we pushed it out into the sun and OMG...isn't it just jaw droppingly beautiful. It's the first time I've seen it from the rear as it's usually parked up in front of a wall. You really see how wide those guards are and the width of the tyres isn't really as big as first thought. Our current thinking is that some spacers will be required to get the rims out to the lip, but that will come after she's up and running. The view from the front is just awesome, looking more like it's about to pounce with those massive guards looking more like a danish strong man's shoulders...grrrrr (sorry lame). The colour really is shown a lot better in the sun, with a slight orange shown in the highlights that compliment the wheels. And speaking of wheels, they just shine. So enough of my rabbling, enjoy the pics:

Sillbeer in the Sun:
- Front View 1
- Front View 2
- Front View 3
- Rear View 1
- Rear View 2
- Rear View 3
- Side View 1
- Side View 2
- Front Wheel
- Rear Wheel 1
- Rear Wheel 2
- Engine Bay
- Colour close up

Breathtaking hey?

Anyway, this week it's onto fitting up the Hybrid Intercooler and GReddy Type-R BOV. Because of the size of the BOV, this is where our main problems will lie. It will be plumbed back, as I don't really want huge noise, it will be loud enough just coming back through the air filter. The intercooler couplings etc have now all be replaced from the standard blue silicon to some Samco Black silicon pieces. A big thanks goes to Steve at Hyperflow (the Australia distributors for Samco hoses) in Sydney for sending these over so quickly. Much appreciated.

Speak to you all later.
Brendan
Wednesday, March 14, 2007

Engine..meet gearbox...meet car!

Engine and Gearbox meet

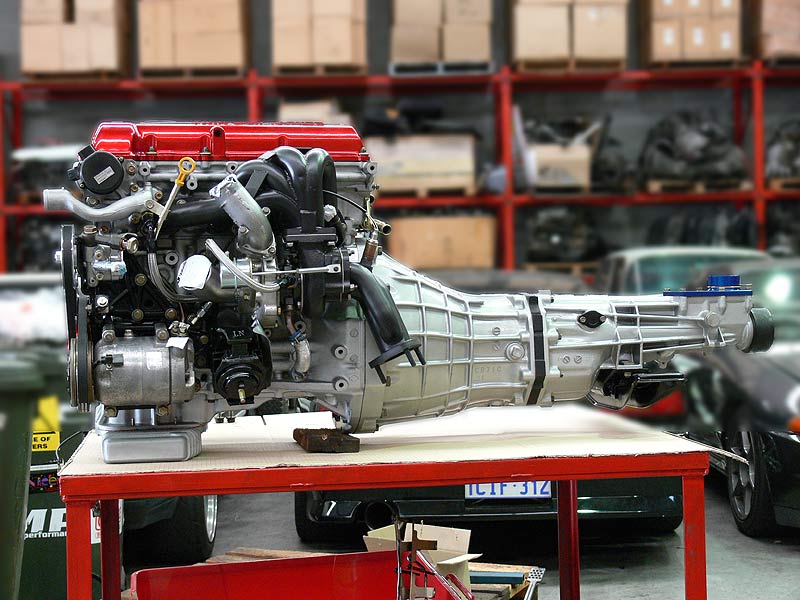
Well these past couple of weeks have been pretty exciting around the Sillbeer project starting out with the engine meeting up with the gearbox for the first time...and doesn't it just look fantastic. Makes me want to mount it on a mantel piece in a clear plastic box. Also the stainless screws I got last week are now holding the injectors down.

- OS Giken Twin-plate Fitted to Engine
- Inside S13 Gearbox Bell Housing
- Engine and Gearbox (Driver's Side)
- Fuel Rail and Nismo 740cc Injectors
- Detail shot of under plenum
- B&M Short Shifter fitted

So now is where it gets really exciting...the engine was fitted into the car on Monday. All went in or up, or down depending which way you look at it - with the front crossmember being dropped out, the car raised on a hoist, engine fitted to crossmember, then car lowered over and crossmember bolted back onto the car. This means it's the first time it's sitting on its new suspension and wheels. Enjoy the photos:

Finally wheels touch the ground

- On Wheels (Side View)
- On Wheels (Rear View)
- Engine Fitted (Driver's Side)
- Engine Fitted (Passenger's Side)
- Engine Fitted (Under from front)
- Engine Fitted (Under from Rear)

Oh, and those with a keen eye may have noticed the oil lines coming from the engine block...that's the start of the new GReddy Oil Cooler kit that C-Red got in for me...they're now an official Trust agent.

A couple of problems cropped up of course which were that we had fitted a non-Nissan Clutch Master Cylinder from another S13 in the workshop which had a bleed nipple at the top, and was longer in the body that the Nissan one. Needless to say it fouled on the GReddy Intake Plenum, so we've ordered an OEM one. This will then have a new HPI Stainless Braided clutch line kit installed. Also looking at my best options for the Brake Master Cylinder at the moment - will keep you posted on that.

Had a few pieces painted last week too - Nismo Grill, Nismo Front Bar insert grills, B-pillar covers and top side window trims. These are in storage and will go on when the time is right. We'll be fitting up the Hybrid Intercooler and RG Radiator very soon along with a test fitting of a set of thermo fans and shroud from an AU Ford Falcon. Stay tuned on that one. I've changed my mind once again and have decided to add just a little bit of rice with regards to the gauges. The original plan was to fit a gauge hood...but this was going to be a world of pain in itself, then the Defi DIN Gauge was a possibility, now I'll just use what I've got which are a set of Def-Link Meters with Hoods mounted on the stands directly to the dash. If they look bad, then I'll look at other possibilities.

Cheers for now
Brendan

Friday, March 09, 2007

Engine Hot, Red Hot

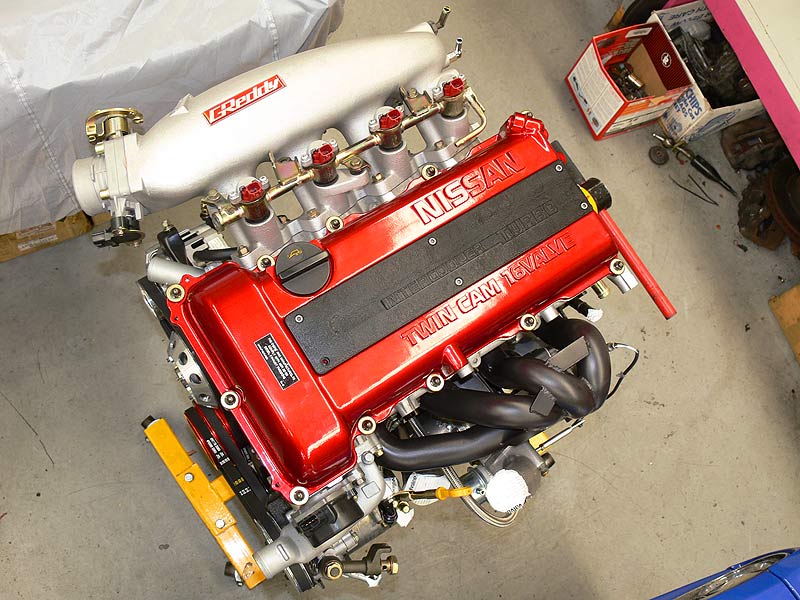
Sillbeer's SR20DET from the top

I can't stop looking at this engine. It just looks mint. The red ceramic coating on the rocker cover, with the contrasting coilpack cover in wrinkle black is a combo I'm yet to see. This is the engine as it was last Saturday morning, with just some new stainless screws to be put in to replace the steel ones in the coilpack cover and the fuel injector caps. And for a bit of Dally humour, he's fitted up a small plaque (see pic below) that pays homage to the SR20's beginnings as a diesel truck motor. All the pulley's and belts have all been fitted up - I think all being custom ordered according to the new lengths required by the downsized pulleys.

- Under the Intake side
- Meets diesel emission standards
- SR20DET Belt/Pulley Setup

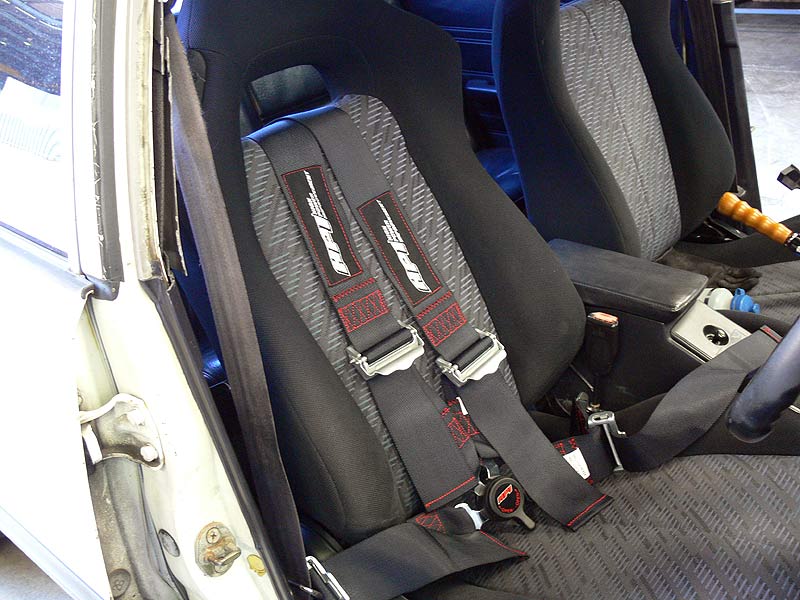
Now with the upcoming SilviaWA track day (or skid pan day) coming up tomorrow, I had to install my HPI harness into the Sigma as the original belts don't lock unless you really put the anchors on. So last Saturday, Greg helped (read did 99% of the work) put the harness into the Sigma. These belts are just beautiful, and are available through C-Red for $400...not bad for full FIA spec harnesses. I still have a second one to come, which will be setup for each in/out attachment in Sillbeer.

HPI Harness fitted to the Sigma

For those interested, I have fitted a set of seats from a Mitsubishi FTO into the Sigma as the original seats were completely shagged (as attested by my back giving me grief). They're actually very close in shape to GT-R seats, just a little more sectioned on the side and thigh bolsters. No work will be done on Sillbeer tomorrow morning as I need to fit new tyres up to the Sigma and do a minor service ready for a bit a thrashing in the afternoon!

Cheers
Brendan

PS> Also just made an update the 'The Plan' based on recent changes.

Friday, March 02, 2007

Continued progress

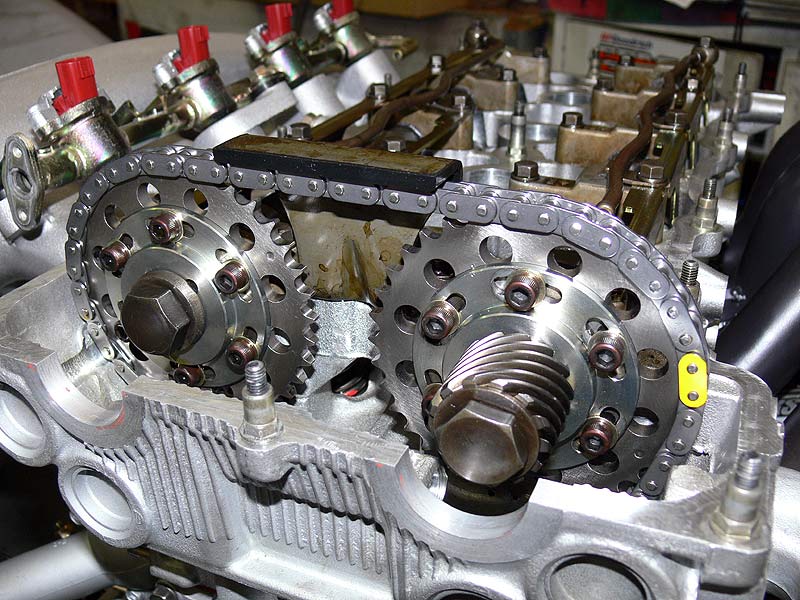
SR20DET Adjustable Cam Gears

Progress continues on getting the engine all tied up and ready for fitting. We had some slight problems this week with the lightened GFB crank pulley not having enough clearance to the oil pump. Now remember that the pulley is meant for an S13 SR20DET oil pump, where I'm running a GTi-R SR20DET oil pump. Initially the machining was done, and it did turn once all torqued up, but it was fouling ever so slightly on the edge of the oil pump casing. This has now been rectified and it's all good. Here's a couple of pics of the adjustable cam gears while I was in there just for good measure:

- SR20DET Adjustable Cam Gear - Intake

And along with this was a quick update from the irreplaceable Greg:


  • Pulley machining has been done and is perfect. Pulley fitted. Crank bolt
    and washer sand blasted and fitted.

  • All belts fitted.

  • Cam bolts torqued.

  • Timing chain tensioner fitted.

  • Crank angle sensor fitted.

  • Throttle body sandblasted and all cad plated parts fitted. TPS fitted. TB
    installed on manifold.

  • Rocker cover installed.

  • Spark plug cover bolts sand blasted and temporarily fitted.

  • Solid coolant lines under intake manifold cleaned and fitted.

  • Replacement boost/vacuum fittings on manifold sourced and fitted.


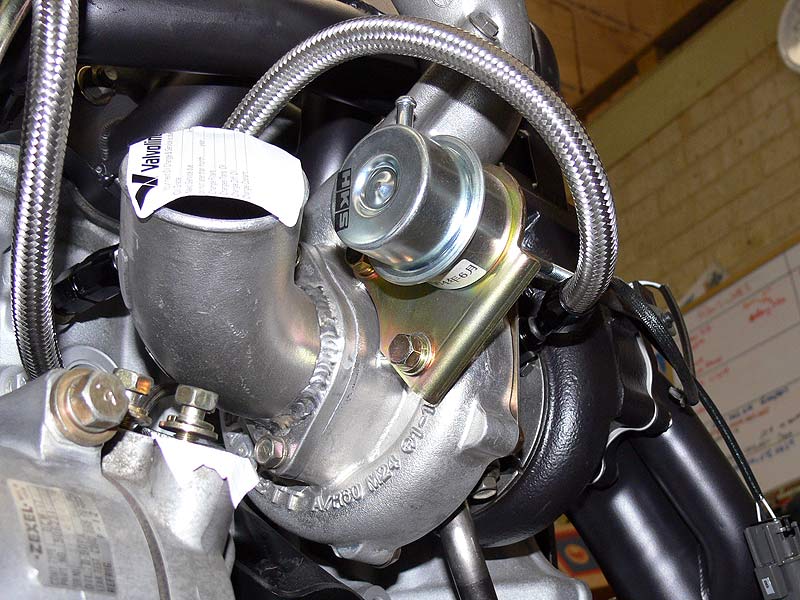
HKS GT-RS Compressor Inlet/Outlet

While Greg was doing the exhaust side of the engine, he's had the turbo compressor housing inlet adaptor modified for a different angle. The results you can see in the image above along with some slight redirection of the braided oil and water lines to suit this updated setup.

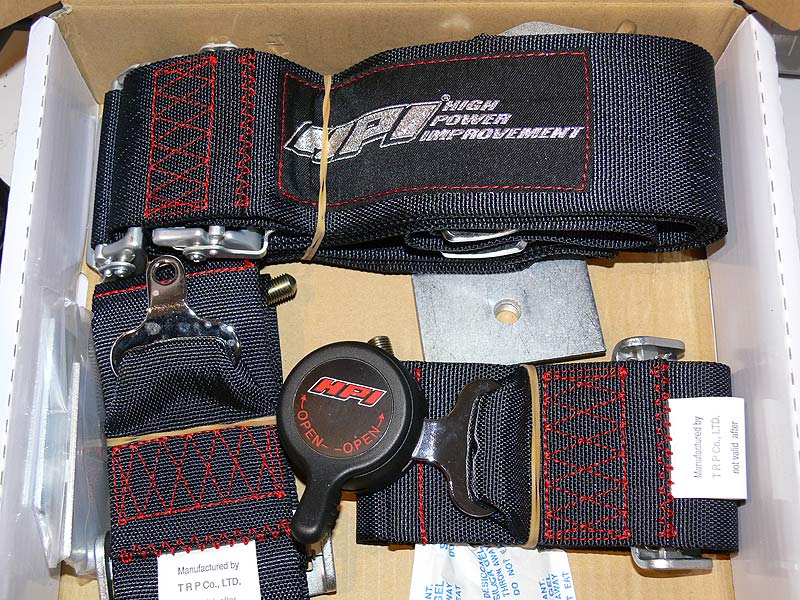
HPI Harness - Black with Red Stitching

As the car will be used for the occasional bit of motorsport, I thought it prudent to grab myself a couple of harnesses. Now what better suited than the HPI 3" 6 point harness in Black with Red stitching...a common theme I'll be using in the rest of the cabin. Aren't they just horn.

- HPI Harness Box Label
- HPI Harness logo patch
- HPI Harness Buckle

The harness will be temporarily fitted into the Sigma as SilviaWA has an MC Motorsport Track day coming up on 10 March...so I'll be ripping it up in that. Hopefully will get some pics of the Siggy sideways.

Cheers
Brendan