Monday, December 11, 2006

Out of control

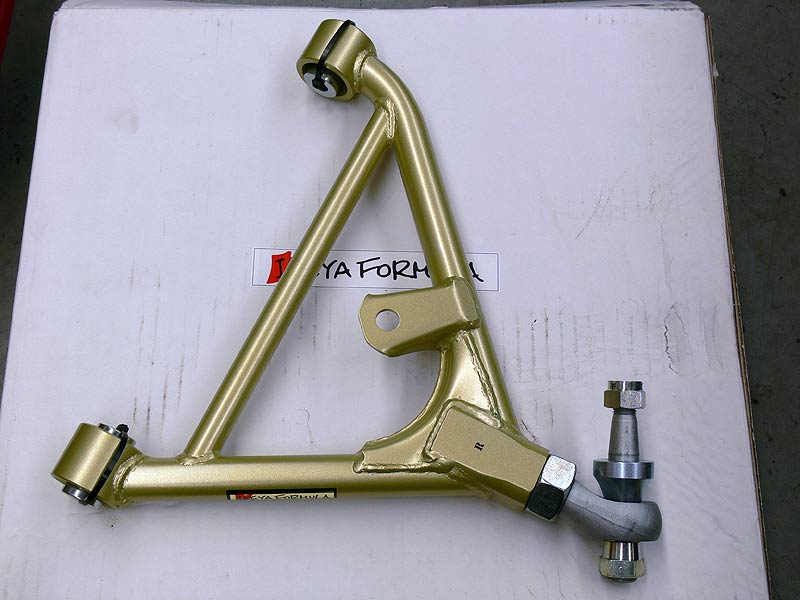
Ikeya Formula Rear Lower Control Arm (Adjuster Rear Lower Arm)

I have managed to get my hands on a set of the Ikeya Formula Rear Lower Control Arms (Adjuster Rear Lower Arms) earlier than expected. These were actually Roy's, but he's kindly let me have them and then he will get mine when they come in from JShop. They're a rather nice bit of kit that's for sure, and I can't wait to get them fitted (and I only just put the damn rear subframe up last week).

- Box
- Label
- Top
- Side
- Documentation

The main function of these front and rear adjustable lower control arms is for roll centre adjustment. Here's a piece of information from the Ikeya Formula web site explaining it further:

Drivers tend to consider that center of gravity would be lowered and have more stability if car height is lowered. However, if you are using the normal arm, the arms would be raised and opened up outwards and the center of gravity of car and roll center would be apart . And the roll amount unnecessarily increases while the suspension stroke decreases, and causes the condition of " Grip limitation between tire and ground surface will be lowered".

By using Ikeya formula's "Front lower arm", "Rear lower arm" and "Tie-rod end" which possess the roll center adjuster function will correct the roll center and set back to the position where has the shorter distance between center of gravity and roll center and then decreases the roll amount.

Additionally, we would like to recommend to install both Front and Rear at the same time. Because the roll center of Front and Rear would be "shifted", if mounting only on Front side, and the roll axis will be shifted on Front and the roll amount changes on Rear, and causes loss of the stability in the car behavior.

From these points, we would like to recommend to wear both on Front and Rear.


Wasn't much work done on Saturday. I had intended to get the engine bay all ready for ancilliaries to be installed by giving it a cut & polish to remove some overspray, but it wasn't budging. I will now give it a rub back and have it resprayed properly. Wouldn't want to do all this work to have a crap looking engine bay.

Cheers
Brendan
Monday, December 04, 2006

Step by step...jeez this is taking a while

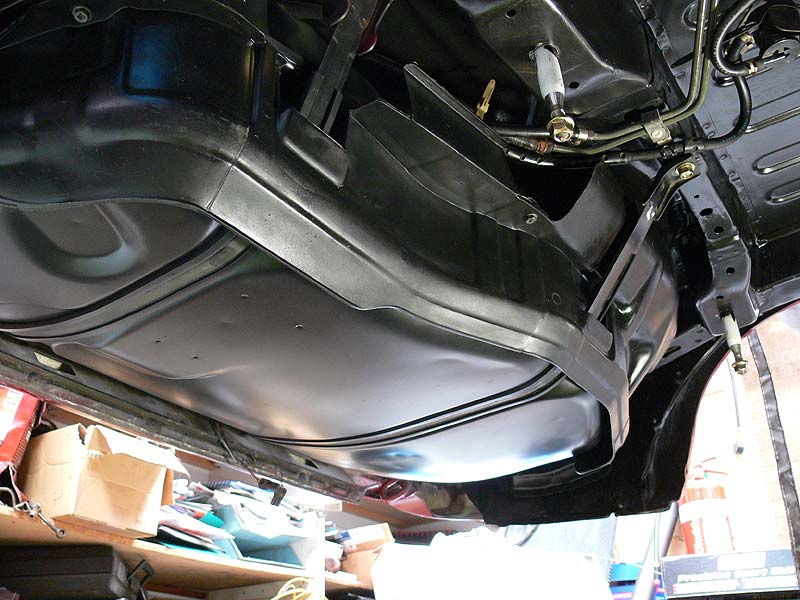
Fuel Tank Fitted

OK, so here's how it goes. The week before last I went ahead and painted the fuel tank using some of K&H's Chassis Black paint. Was touted as being chip resistant yada yada. So after prepping the tank with a quick wet sand using 400 grit paper, I sprayed it on...outside...in the sun. This turned out to be bad move. Number one problem was the dusted, number two was the tank getting hot making the paint finish a little strange and three the slight breeze present was blowing the spray away before it hit the tank. Needless to say I wasn't happy with the finish...plus it was way too shiny.

- Wetsanding the tank
- Finish using K&H Chassis Black

So I let it dry for a week hoping the shine would subside a little but on Saturday, it still didn't look any good. So out it came for another coat of paint (which in the process of moving it, I scrapped it back to bare metal...so much for chip resistant). I think next time I'd use the VHT Epoxy Paint in Satin Black, but this time I used the VHT Caliper Paint in Satin Black, along with painting it inside for minimal dust flying around. All in all I gave it about 3 coats of this early in the day and the finish was much better and I'm glad I did it. While it was drying, I cleaned up the metal straps that hold the tank in place along with getting a hand from Clint (cceg) to clean the rubber strap covers (so the tank doesn't rub metal-to-metal on the straps). Along with the rubber straps, we cleaned the plastic tank surrounds as well which took a little bit of elbow grease to clean with some prepsol, but was worth it, giving it a final coat of tyre shine to bring it up to spec.

- S13 Fuel Tank Fitted (from front of car)
- S13 Fuel Tank Fitted (from rear of car)
- Fitting rubber nozzle surround

S13 Rear Underbody

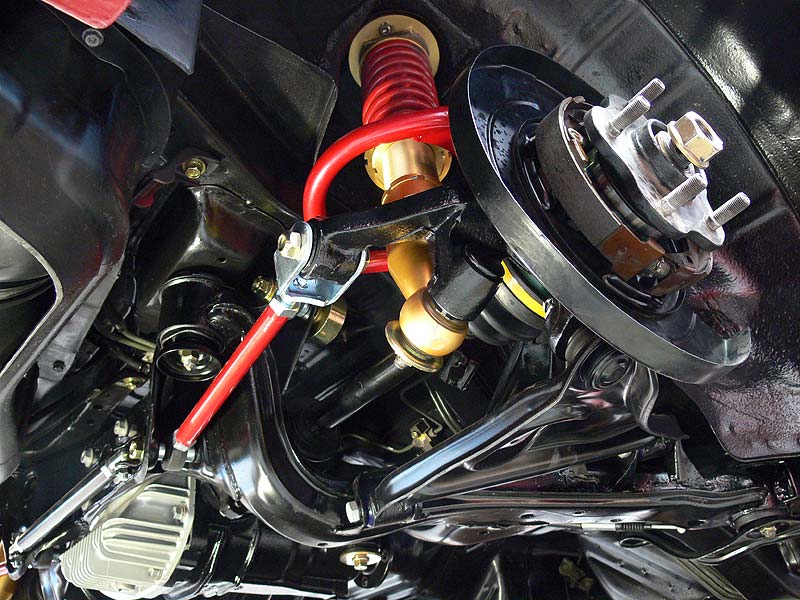
We were on quite a roll on Saturday, and Roy was staying back later than the usual close time so with Clint helping out, we bolted the subframe up and fitted the rear RG V-Stage coilovers as well. As you can see from the photos, it's looking mint with all the Kazama parts in place!

- S13 Rear Underbody 2
- S13 Rear Underbody 3
- S13 Rear Underbody 4
- S13 Rear Underbody 5

Now due to a bit of peer group pressure from Dally and Roy, I've gone ahead and purchased a full set of the Ikeya Formula Lower Control Arms (front and rear, otherwise known as roll-centre adjusters). The reasoning behind this is that I've done pretty much everything else, why not do this as well. The fronts I managed to pick up second hand for a good price (pictured), but the rears will be new and have ordered them through Aston at JShop. I've received the fronts already as they were already in Australia, but the rears will be coming from Japan, so your guess is as good as mine when they'll be arriving...hopefully prior to Christmas.

- Ikeya Formula Front Lower Control Arms for S13 Silvia/180SX
- Ikeya Formula Front LCA Bolts etc

And news just to hand, my rims are on their way downunder...but coming by ship it will be slow going. Should be here later this month or January. And for those who didn't read the previous post back in late May, here they are again:

WedsSport TC 105N
WedsSport TC 105N - 18x10.5+12
Front: 18x9.5+10 (8.0kg)
Rear: 18x10.5+12 (8.35kg)

I've also ordered in a new steering wheel. The one I had pegged will be fine for track duties, a Sparco #215 Competition Steering Wheel suede job, but I need a durable leather one for daily driving. The winner was a Nardi Rally 35 Deep Corn with about a 90mm dish, black leather and red stitching...perfect!

Cheers
Brendan