Friday, 2 March 2007 | | Categories: Engine, Interior
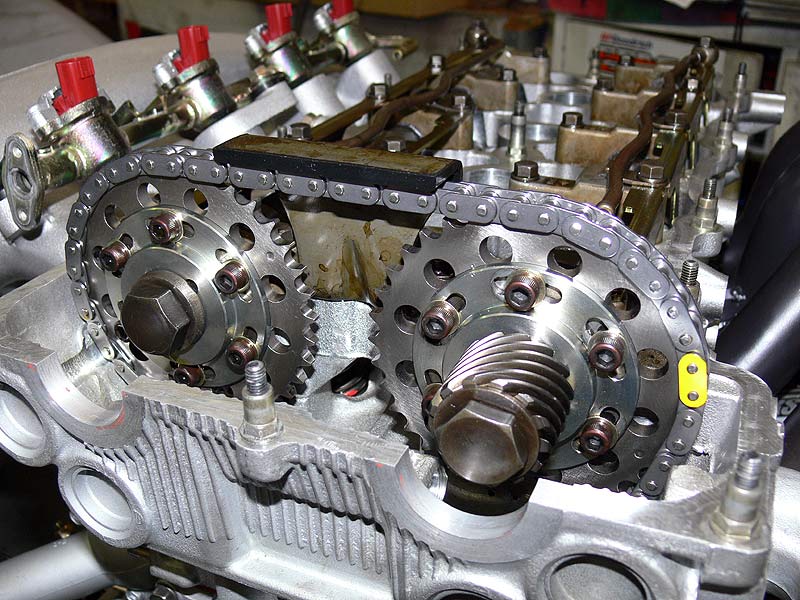
Progress continues on getting the engine all tied up and ready for fitting. We had some slight problems this week with the lightened GFB crank pulley not having enough clearance to the oil pump. Now remember that the pulley is meant for an S13 SR20DET oil pump, where I'm running a GTi-R SR20DET oil pump. Initially the machining was done, and it did turn once all torqued up, but it was fouling ever so slightly on the edge of the oil pump casing. This has now been rectified and it's all good. Here's a couple of pics of the adjustable cam gears while I was in there just for good measure:
And along with this was a quick update from the irreplaceable Greg:
-
Pulley machining has been done and is perfect. Pulley fitted. Crank bolt
and washer sand blasted and fitted.
-
All belts fitted.
-
Cam bolts torqued.
-
Timing chain tensioner fitted.
-
Crank angle sensor fitted.
-
Throttle body sandblasted and all cad plated parts fitted. TPS fitted. TB
installed on manifold.
-
Rocker cover installed.
-
Spark plug cover bolts sand blasted and temporarily fitted.
-
Solid coolant lines under intake manifold cleaned and fitted.
-
Replacement boost/vacuum fittings on manifold sourced and fitted.
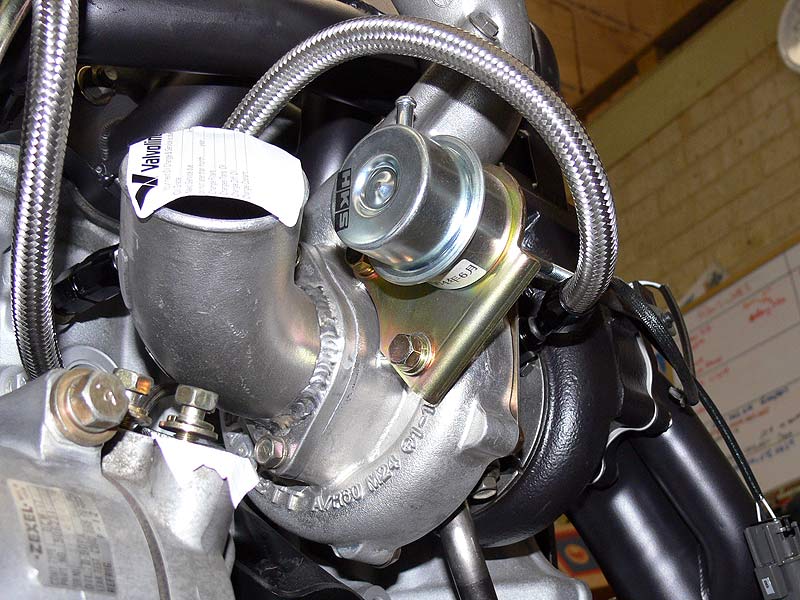
While Greg was doing the exhaust side of the engine, he's had the turbo compressor housing inlet adaptor modified for a different angle. The results you can see in the image above along with some slight redirection of the braided oil and water lines to suit this updated setup.
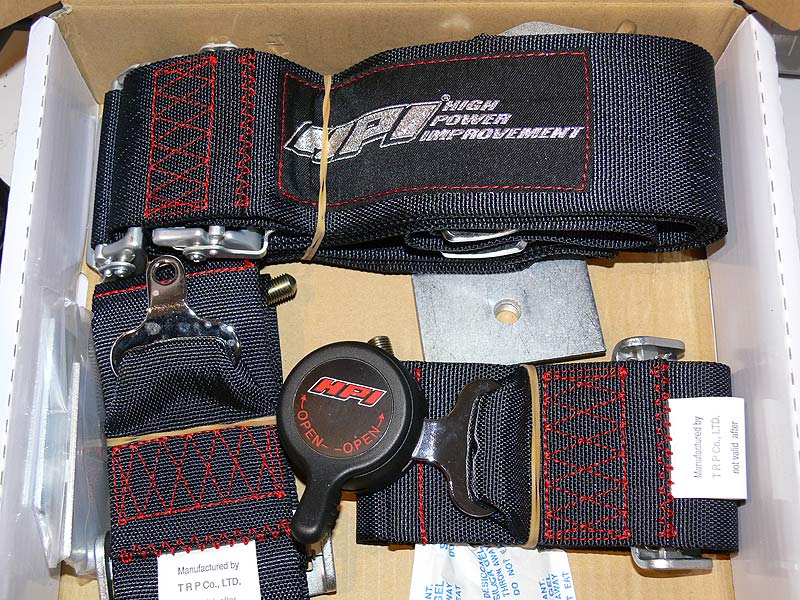
As the car will be used for the occasional bit of motorsport, I thought it prudent to grab myself a couple of harnesses. Now what better suited than the HPI 3" 6 point harness in Black with Red stitching...a common theme I'll be using in the rest of the cabin. Aren't they just horn.
- HPI Harness Box Label
- HPI Harness logo patch
- HPI Harness Buckle
The harness will be temporarily fitted into the Sigma as SilviaWA has an MC Motorsport Track day coming up on 10 March...so I'll be ripping it up in that. Hopefully will get some pics of the Siggy sideways.
Cheers
Brendan
Friday, 23 February 2007 | | Categories: Engine
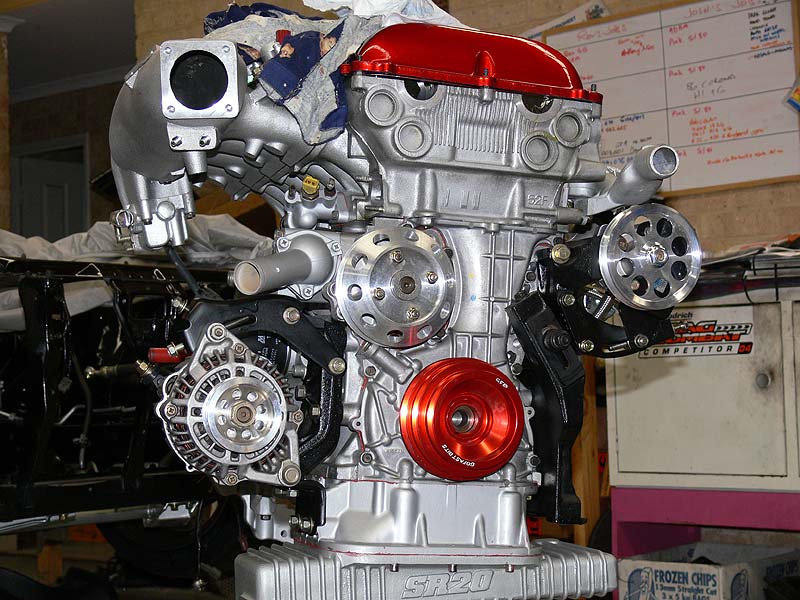
So as Greg has been working on the engine and gearbox over the last couple of weeks, it's been my task to find and clean up a starter motor, alternator, power steering pump and airconditioning compressor. The finding bit wasn't too bad, a couple of weeks ago I tracked down an S14a engine that was FUBAR, but had good bits left over, so off came the alternator and power steering pump...and as it was an S14a, the parts were relatively easy to fix up. There was an auto gearbox nearby with a starter motor in good condition, and after a quick scrub to eliminate the usual alumunium corrosion marks it was good to go also. That brought us to the aircon compressor which was a bastard to remove in the tight confines of an engine graveyard...with many bruises on my left arm to prove it. This wasn't looking so flash with many years of grime all over it. This needed a good couple of hours with the brass brush to clean up, but it still wasn't fantastic. The good thing I suppose being that it wouldn't be seen much from up top anyway. Note in the above pic, the genuine Trust Sump is now on.
After giving the majority of the mounting bolts a bit of a scrub too, I replaced the dull ones temporarily in place on the engine and then proceeded to bolt up these parts. Most went on pretty easily, but the S14a Power Steering pump uses a different slide plate, so I used it rather than the S13 one...all good.
And so here's the obligatory pics:
- Starter Motor
- Alternator (Front)
- Alternator (Side/Rear)
- Power Steering Pump (Front)
- Power Steering Pump (Side/Rear)
- Airconditioning Compressor (Front)
- Airconditioning Compressor (Side/Rear)
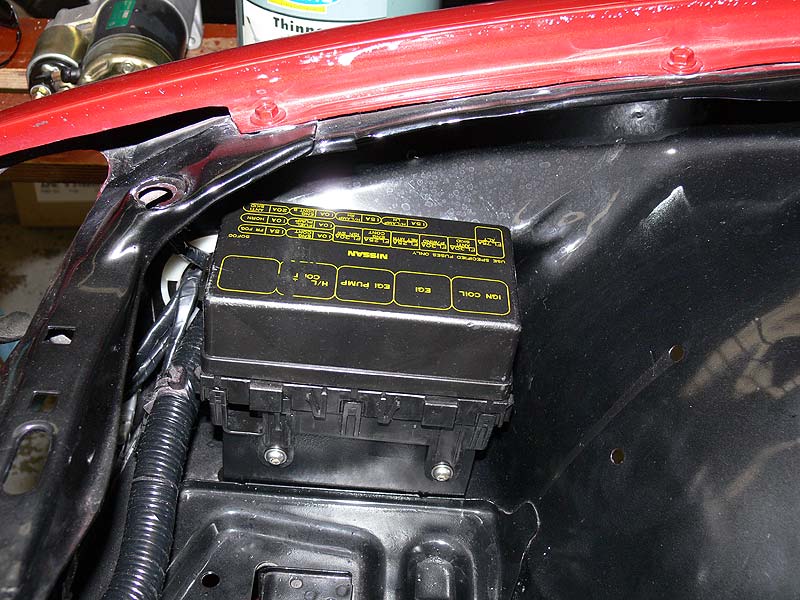
Now onto some of the stuff that Greg has been doing. That big hole where the engine goes is slowly being fitted out...but not because Greg's slow, but because he's got to find the bits, then clean them, and finally fit them. So far the power steering lines, most of the brake lines and aircon lines have been run along with fitting of the brake booster and clutch master cylinder. Unfortunately the Z32 Brake Master Cylinder that came in was for an Australian model, where we need the Japanese version which has the 3rd output for the front brakes, rather than just two which is fine for ABS equipped cars. The wiring looms are also now in place, and the fuse box has been moved to make more room in the engine bay for other 'stuff'.
- Clutch Master Cylinder
- Engine Bay Piping (passenger side)
- Engine Bay Piping (drivers side)
Much of the original clips that were in place will also be replaced with new ones, as even good condition used ones have now been affected by many years of heat cycling and are as such quite brittle and prone to breaking.
There was a possibility of fitting the engine and gearbox this week, but due to unforeseen parts missing that need to be found, we'll be delaying that action a couple of weeks now until all is completed on the engine.
In regards to the interior, I'm now in two minds about the dash treatment and the triple gauge hood. Although it would look mintox (haha, have used that in a while), it's going to take a long time to get right...and not cheap either. In the meantime, though I'm looking at using a Defi DIN Gauge and keep working on the dash as something special, maybe in time for one of the major shows. I want to keep going on with the larger gauges as they do provide warning indicators which are very handy in a high performance (here's hoping) car such as Sillbeer.
Until next time amigo's, adios.
Brendan
Thursday, 8 February 2007 | | Categories: Audio, Engine, Interior, Driveline
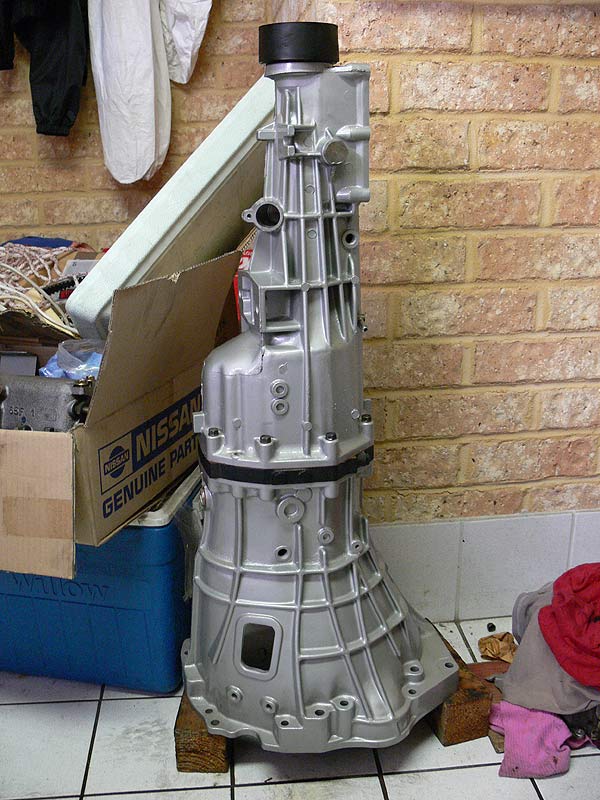
Alright, so a couple of weeks ago, I was lucky enough to start getting some help on moving Sillbeer closer to completion. Enter one Mr Greg Dally. He'll be doing a few days a week working on my car to get things moving along. I have so much work on now just to pay to get it over the line, that I have minimal time to actually work on the car so I'm glad to have his expert hand on the job...and to those who don't know how he works, he's about as anal (if not more) as I am.
So first on his agenda was to complete the gearbox. Now it's really just been a shell for quite sometime now, so with the internals of an S14 5-speed gearbox identified, Greg made up mine to as you see it here. Apparently there was a bit of polishing that took place on some components that will never get seen so that just goes to show his enthusiasm. It just looks mint and with the clear coat, should be relatively easy to keep clean too.
- S13 Gearbox Top View
- S13 Gearbox Closeup Middle
- S13 Gearbox Closeup Rear
- S13 Gearbox Closeup Selector
A little bit that I've done in between other things is to paint the taillight cluster units with a chrome paint. As I'm going to use the 'crystal' clear/red taillight lens, there needs to be a little more reflection from behind so a coating of chrome helps that out. Also to assist in a nice neat seal around the taillight, I cleaned all to old sealer from the taillight surround...using a bit of Rostoff and/or Prepsol and elbow grease, it came off easily enough.
- Taillight Cluster Unpainted
- Taillight Cluster Painted
- Taillight Surround Before and After
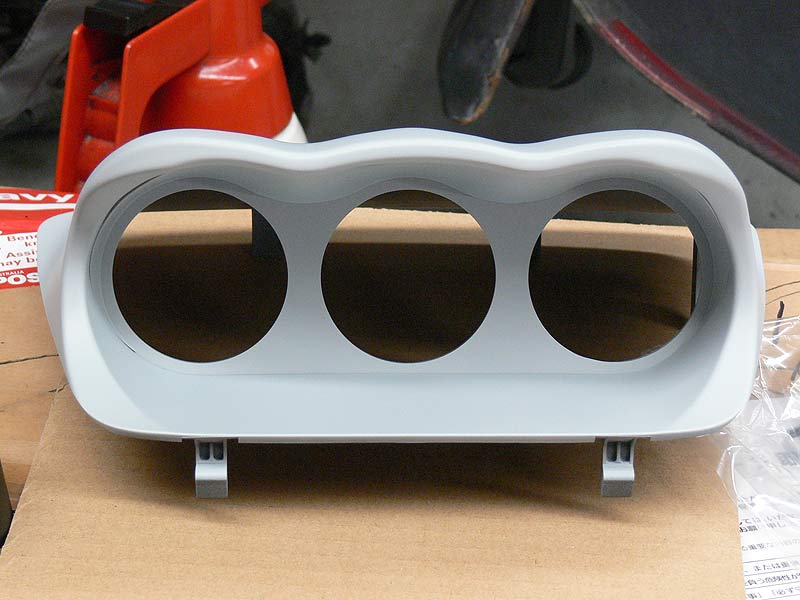
As the exterior and mechanicals are coming along now, it was time to start looking at what's happening with the interior. Now I have had a set of 4 Defi-Link gauges for some time, and have been tossing up on how to mount these. I had bought a set of Defi-Link Single Meter Visor's, but I didn't really like the thought of these things sticking out like dog's bollocks on the dashboard. So the only other option was a 3-gauge hood of some sort. Most of the stuff available for the S13 dash looks mighty naff, but those made for the WRX and EVO by Defi are so so nice...cue purchase to ET Performance and they had a Defi Triple Meter Hood in my lap inside a week. Now as this was made originally for a WRX (MY2000+) I will have to modify the dash and the hood appropriately to fit. This could take some time, but after an initial fitting - it'll look mint. Note that it comes in a primed plastic ready to be painted in your own chosen colour. Once fitted, the dash will get reskinned as close as possible to factory so it looks like the cluster was a factory option.
- Defi Triple Meter Hood Profile
- Hood Test Fit Front 1
- Hood Test Fit Front 2
- Hood Test Fit Top
- Hole in Dash
Please note that the dash used is stuffed anyway having had a set of gauges mounted on the passenger side. Once we have the basics sorted, we'll used a fresh dash to work with.
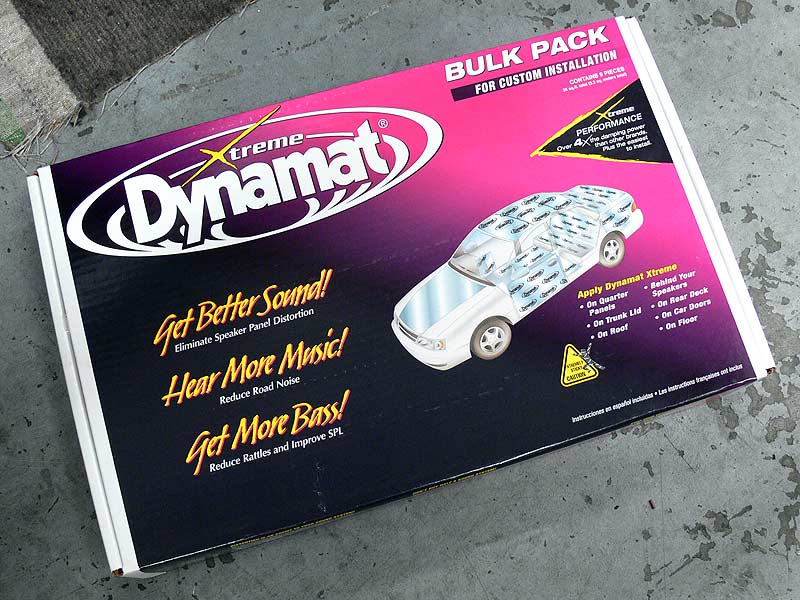
Now there's one thing that may or may not sit well with some people when building a car like this, and that's adding weight in the form of sound deadening. But as this really needs to be a comfortable (as well as quick) car to drive, it will be required...especially when taking into account the sound system planned (will be revealed in a future post). So as is done to all of Chip Foose's cars on Overhaulin', the interior will be fully decked out with Dynamat...improving on both sound and temperature in the cabin. This will be applied to all areas of the boot, the floor, roof and doors. Yes, it'll add weight, but at the same time make the car feel more solid (think thud rather than clink when closing the doors) and liveable especially when driving down south.
Next up for me is to find some components in the engine such as Power Steering pump, A/C compressor, alternator and starter motor and get them ready for fitting. The front and rear window seals should arrive from Nissan any day now and we've also ordered in a new brake master cylinder from a Z32 300ZX in the larger 1 1/16" size. An article on SportCompactCar's web site notes the particular's around using this master cylinder with Brembo's.
Also on the subject of interior, I need to start gathering the pieces that will get refinished (ie. plastic trim) and the bits that will be retrimmed to match the Honda Integra DC2 Type-R Recaro's that will be fitted. So much to do, so little time, but with Dally on the job things are looking great.
Cheers
Brendan
Tuesday, 23 January 2007 | | Categories: Brakes, Exterior, Wheels/Tyres
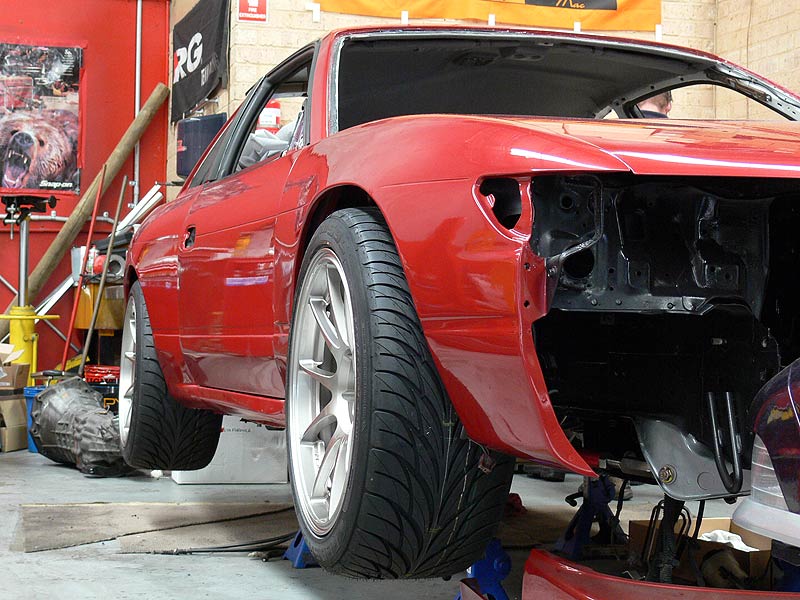
So Saturday morning I was very excited know that today was the day I'd get to see my car finally with some proper shoes on. Firstly though, I made a quick dash down to Jap Parts Plus to pick up a drivers side window glass, regulator and motor as my door was just empty (thanks to Raj at JPP). Then swung back through to Exley's Tyre Service in High Road, Willeton to grab the wheels which had been fitted with the tyres (thanks Shane). Quite a few people commented on how fine they look while I was there...and after squeezing them into the Sigma, it was off to the workshop for some rubber love.
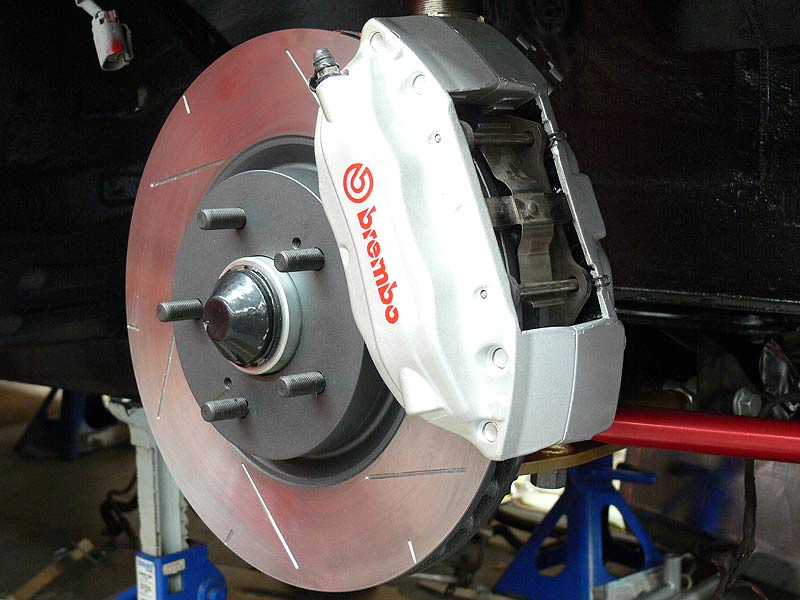
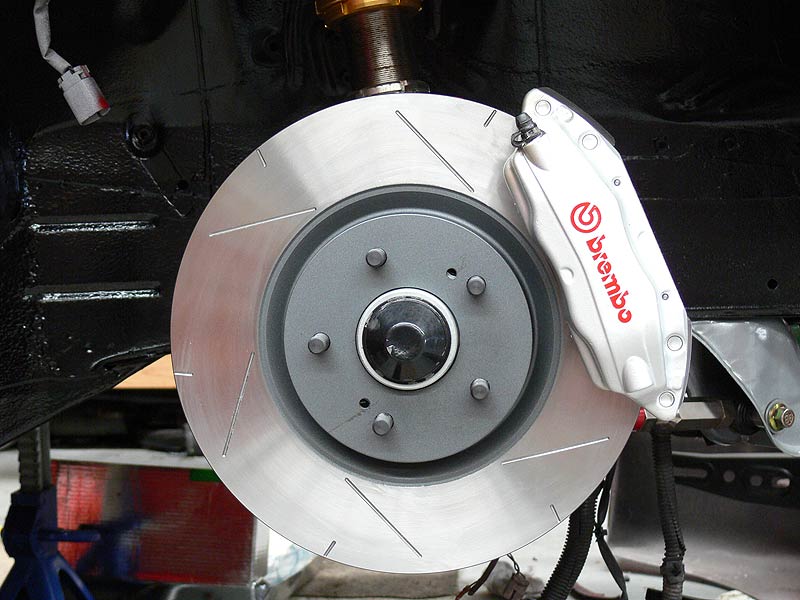
Before I could fit up the wheels though, I needed to complete the fitting of the calipers. One was already assembled, so after pushing the pads out a bit to clear the the massive DBA rotors, the front 4-spot Brembo calipers were bolted on. They look bloody fantastic.
So with a quick adjustment to the rear camber to bring reduce a lot of the negative camber that was in it, the rims went on. One that really strikes you is the solidness that you get when fitting large rims and tyres to a car of this stature. I mean when you stretch tyres on big rims too much, IMHO it looks too 'try hard'. These look like they were meant to be there...a little GT-R'ish from the rear too. You'll notice I have quickly chucked in the rear taillight to see how it looks. I was a little unsure before fitting it up that it would look cheap, nasty and common seen as quite a few people have them now, but I love it...looks factory.
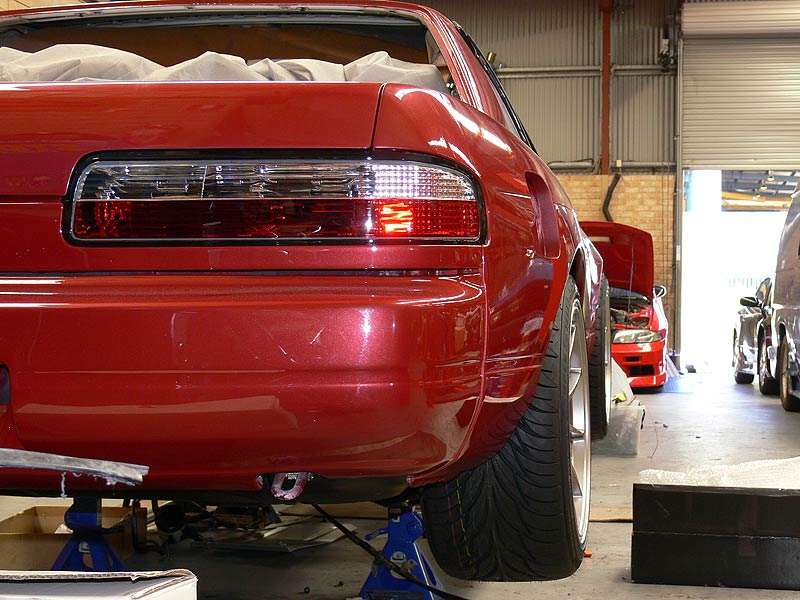
- WedsSport TC105N Fitted - Rear Quarter view
- WedsSport TC105N Fitted - Side view
- WedsSport TC105N Fitted - Rear Wheel closeup
- Sillbeer wrapped up tight...night night
So, now that that little climax is over, it theoretically can roll...although I should connect up the steering rack so it can be coaxed into a particular direction now. Really need to get stuck into the engine bay, engine and gearbox now...and for those that haven't read previous posts, the engine is built, the gearbox needs doing.
Cheers
Brendan
Monday, 15 January 2007 | | Categories: Brakes, Suspension, Wheels/Tyres
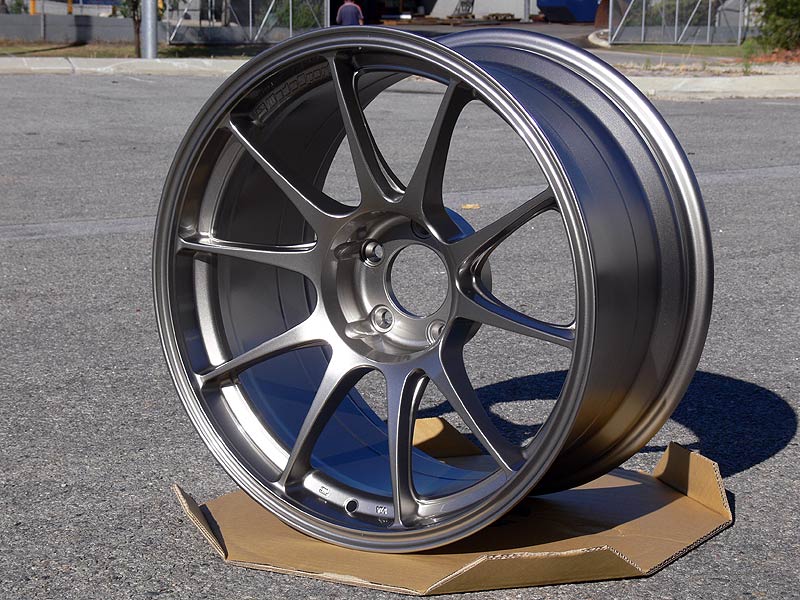
The call came about 11.00am last Friday morning from Jeff Ash at C-Red to say my wheels had arrived at the workshop. Although I felt like jumping in the car and racing out there to see them, I held off and waited until Saturday morning.
And was the wait worth it...abso-freakin-lutely! For those who haven't seen previous posts, they're from Japanese manufacturer Weds Co Ltd, and are part of the WedsSport range called the TC105N (released in 2006). These rims are just gorgeous and will suit the build down to a tee. They're very race oriented, with minimal obvious dish, and a spoke the goes from the outer lip into the centre hub which is very important for me aesthetically. The colour, which is best described as Titanium Silver (TS colour code according to Weds). The sizes are as mentioned before:
Front - 18 x 9.5 +10 @ 8.0kg
Rear - 18 x 10.5 +12 @ 8.35kg
They're seriously light and very well made. Here's a selection of pics to help you get a feel for how nice these are:
- WedsSport TC105N
- WedsSport TC105N
- WedsSport TC105N (Detail 1)
- WedsSport TC105N (Detail 2)
- WedsSport TC105N (Detail 3)
Tyres have been ordered in the form of Federal 595SS in 245/40R18 for the front and 265/35R18 for the rears. May even have by weeks end.
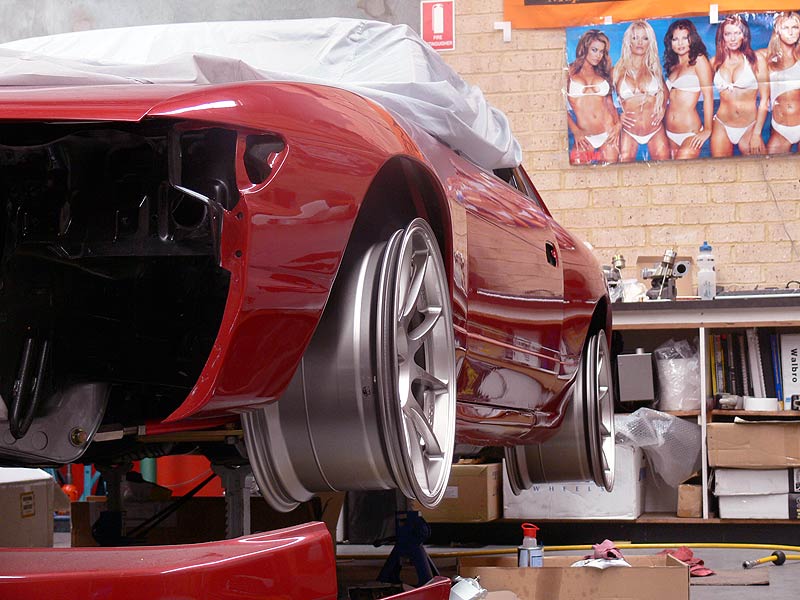
The offsets were always going to be hard to guess, especially with such a wide car (as it is now), but we nailed it I reckon. Not that we had much choice we ordered them as big as was available. When it came time to fit them up, I was a little disappointed with the amount they say in the guards, but on closer inspection, it was more that I had not adjusted the camber arms or lower control arms as yet. Here's a couple of shots before and after the adjustment:
- Rear Wheel fitted Before Adjustment
- Rear Wheel fitted After Adjustment
The front is on and sitting out from the guards just a smidge, but again nothing has been adjusted yet and we have about 2-3mm clearance on the coilover at the moment.
- Front Wheel fitted no adjustment
And check this out, it shows how much width I really have front and rear...it just looks so brawny it's nuts! It even has glimpses of GT-R in the rear now.
While in on Saturday, by myself mind you, I managed to get the rear Brembo's fitted up. The pins and retainer clips required a bit of scrubbing with a metal brush to remove some of the baked on brake dust, along with a quick polish. The rear's now fill the rims very nicely. Will get on the fronts this week.
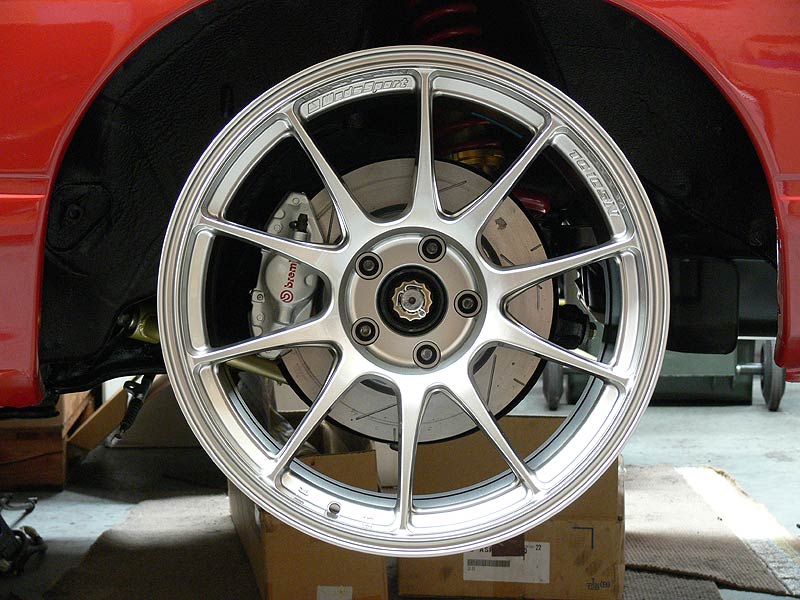
- Rear (R33 GT-R) Brembo Caliper
- Rear (R33 GT-R) Brembo Caliper - Top View
- Rear (R33 GT-R) Brembo Caliper - Fitted
It's been an exciting time getting the rims because it really shows we're getting close now. Just finishing off a couple of private jobs at the moment so I can purchase a few things for the interior (Dynamat, headunit and retrim) so that I have a nice comfy and relatively quiet and cool driving environment.
Until next time.
Cheers
Brendan
Monday, 8 January 2007 | | Categories: Exterior, Suspension
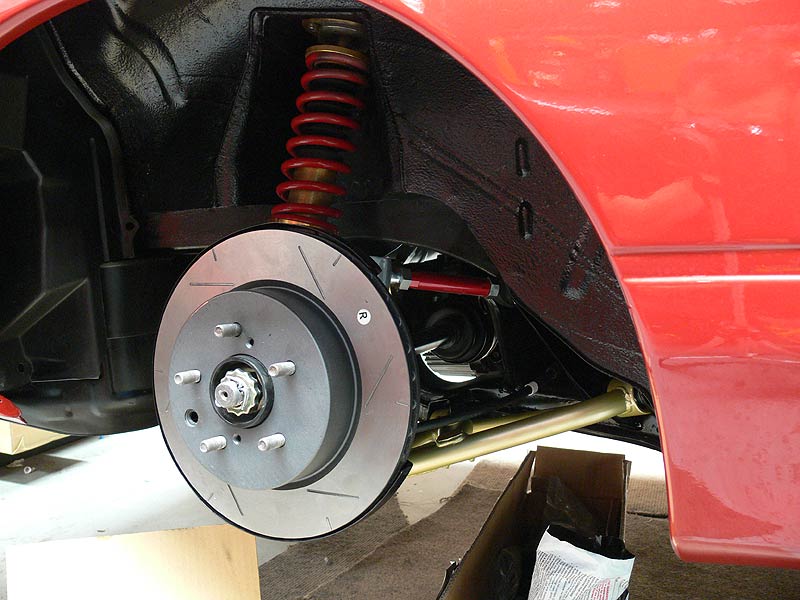
Well well well. Been a while since last post hasn't it. December was a rather busy month getting ready for Xmas. The wife had a deadline of Xmas day to get our front gardens done, so weekends were spent digging, prepping, etc. Glad to say I did make the deadline and we now have a little tropical grotto out the front. So there's the reason for little work being done on Sillbeer.
So after Xmas, I spent a week off to spend time with the family which was thoroughly enjoyable - plus the workshop was closed so I couldn't do anything anyway. Last Tuesday I was in there, and planned to be there for three full days.
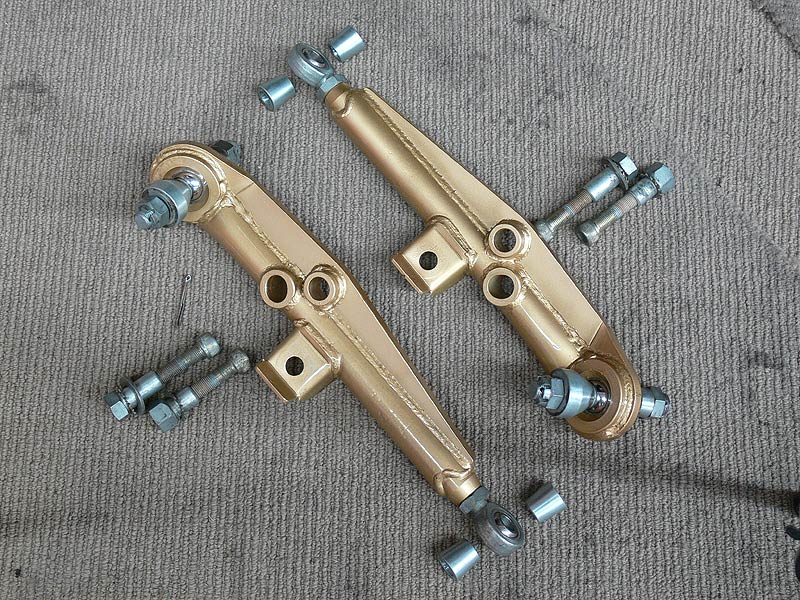
First on the agenda was to get the Ikeya Formula Front Adjustable Lower Control Arms finished off. They are pre-loved items so weren't in top shape, so I sanded them back a little and gave them a fresh coat of gold (not quite Ikeya Formula gold, but close enough for this) along with a coat of clear. The nuts and bolts etc were in pretty used condition, and I didn't have the inclination to sandblast them and electroplate them (funny considering I bought the electroplater for just that reason), so instead I got out the prepsol and a wire brush and gave them a quick once over. They didn't come up too bad either.
- Ikeya Formula Front LCA's prepped for paint
Next on the agenda was getting the windows and window surrounds all ready to have the glass refitted. The rear screen had something on it similar to the dimpled surface of a basketball which took about 2hrs all up to remove it. Ugh!! Then the old sealer was removed and given a good clean. Following on the rear quarter windows were cleaned up and the old tint removed (which was completely clear due to age and sun). The tint glue was especially a pain to get off, using a razor blade certainly helped.
- S13 Silvia Rear Windscreen Glass
- S13 Silvia Rear Quarter Window Glass
Then came the real challenge...chasing down all the bits of surround for the rear, quarter and doors. This probably took a good day and a half to find all the bits, fasteners from about 4 different wrecks that C-Red has for just such a situation. Some bits were even found in puddles of water sitting in the wrecks. In the end, I managed to get all the bits needed, although I will be needing to get new door seals, new front screen along with new front and rear window retainers.
- S13 Silvia Rear Windscreen Lower Surround
- S13 Silvia Door Surrounds and Rubbers
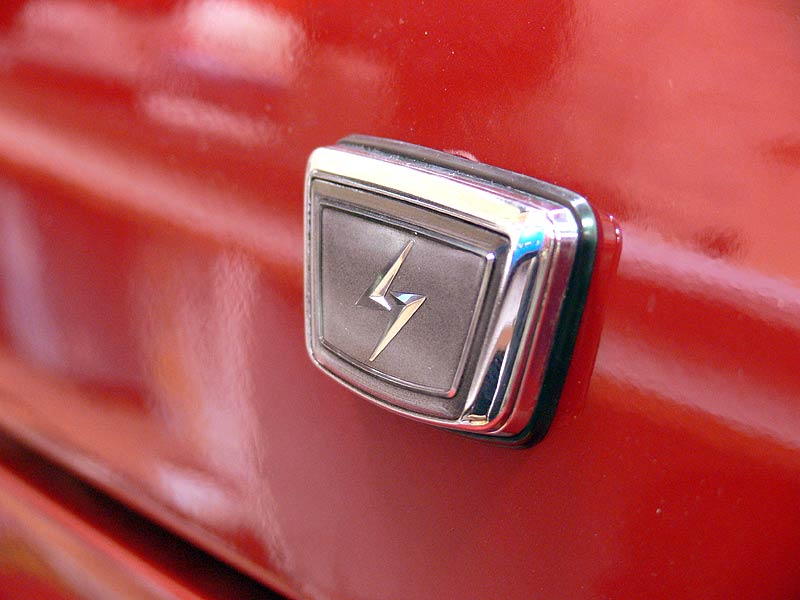
Oh, and I also added a nice boot lock in the form of an old CA version lock, just because I like it better than the SR version.
After the exterior bits, I focussed on find the scuff panels and lower kick panels. These were a little harder to track down, but finally got a full set along with the correct fasteners and gave it all a good clean in the shower, a wipe down with prepsol and finally a good lashing with the tyre shine...now look great (pics don't do them justice).
- S13 Silvia Door Scuff Panel
Following on from the windows and stuff, I decided it was time for a bit of a clean up. Needing access into the boot, all the bits and parts I've been storing in there needed a new home so the side skirts and other body panels waiting to be mounted were stored in a safe place and the parts were moved into the place where the rear seat will go. Giving me access to the boot which was a freakin' mess after spending plenty of time at the panel beaters. I started off with a vacuum, then some all purpose cleaner and finally a wipe down with the prepsol. This should give a nice clean surface for the Dynamat to stick to.
- Clean Boot (left)
- Clean Boot (right)
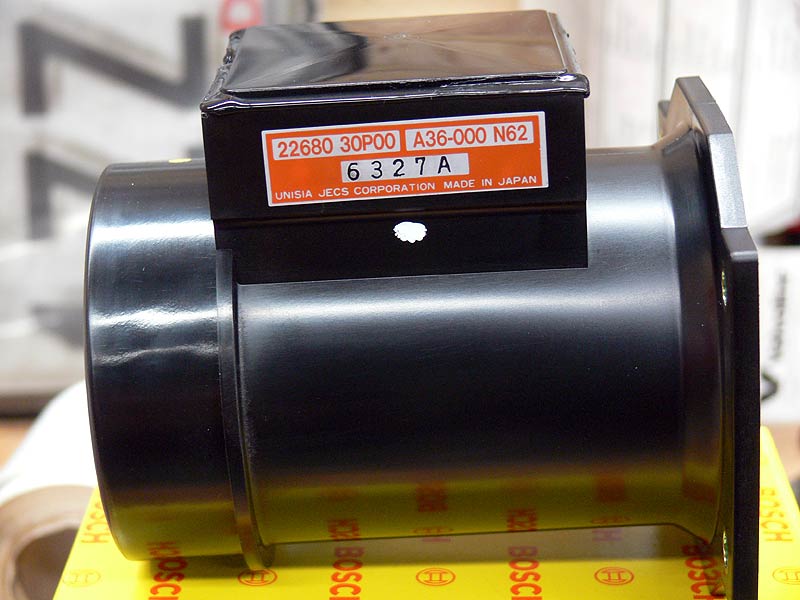
Now I have been tossing up what sort of engine management I'm going to use for sometime, and wanting to keep it to a good street car with the occasional track squirt, I wanted good cold start functionality and economical freeway/highway driving. So I've decided to give the latest BikiROM a go using an S15 ECU. This will require the need of a Z32 Air Flow Meter, so Jeff ordered in a Bosch one for me - nice and new, and give me good driveability (sp?).
- Bosch Z32 AFM Box
- Bosch Z32 AFM Label/Side
- Bosch Z32 AFM Inside
Something that I've been wanting for get sorted for sometime it of course the suspension, and with all the parts needed now at hand to finish it off, I got stuck into it with only the front and rear lower control arms being the final major bits to go (sway bars will get fitted later - but at least I have them). First up the stock rear LCA's were removed which was relatively easy - remove split pin, nut and them give the hub carrier a few good hits with the hammer and she fell out. Next up I fitted the inner mounts first on the Ikeya Formula Adjustable Lower Control Arms followed by the outer ball joint. Damn it looks good.
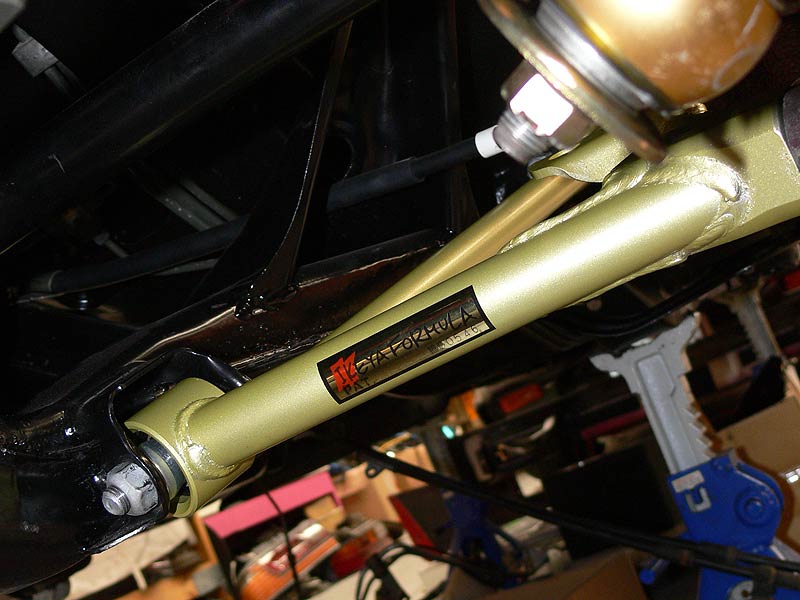
- Ikeya Formula Rear LCA's Installed
- Ikeya Formula Rear LCA's Ball Joint 1
- Ikeya Formula Rear LCA's Ball Joint 2
And then it was onto the fitting the fronts which were prepped prior. Once I got the correct installation order for the spacers etc on the ball joints, everything went pretty smoothly. And they look hot too.
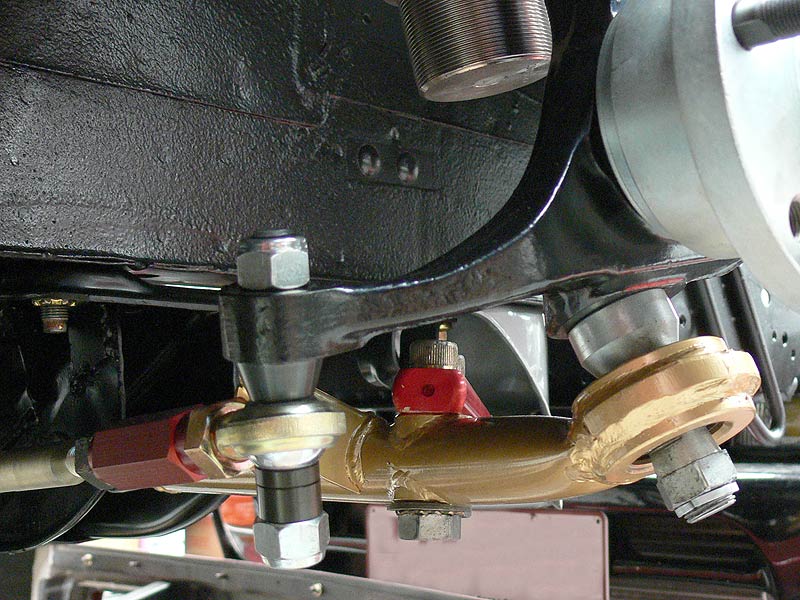
- Ikeya Formula Front LCA's Installed 2
- Ikeya Formula Front LCA's Inner Mount
Second last step was to go around and tighten up all the suspension ready to hit the ground followed by the tightening of all the wheel bearing nuts (which I had to go out and buy a 36mm 3/4" socket and 1/2"-3/4" adaptor :( cost = $50). It's now at a stage where the discs and be mounted up, calipers bolted on and wheels fitted. I think I will do this next week so that it can be rolled around the workshop. Josh at C-Red will be completing my engine and gearbox over the next couple of weeks (hopefully) and we can then drop the front suspension, mount the engine and gearbox, and put it all back again with then need to scratch the engine bay.
Phew, that was a big update, 'til next time.
Cheers
Brendan
Monday, 11 December 2006 | | Categories: Suspension
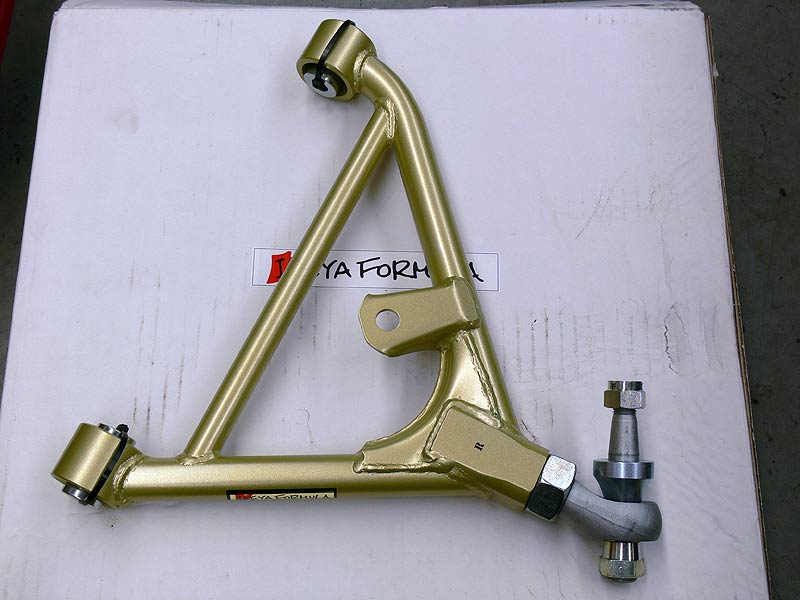
I have managed to get my hands on a set of the Ikeya Formula Rear Lower Control Arms (Adjuster Rear Lower Arms) earlier than expected. These were actually Roy's, but he's kindly let me have them and then he will get mine when they come in from JShop. They're a rather nice bit of kit that's for sure, and I can't wait to get them fitted (and I only just put the damn rear subframe up last week).
- Box
- Label
- Top
- Side
- Documentation
The main function of these front and rear adjustable lower control arms is for roll centre adjustment. Here's a piece of information from the Ikeya Formula web site explaining it further:
Drivers tend to consider that center of gravity would be lowered and have more stability if car height is lowered. However, if you are using the normal arm, the arms would be raised and opened up outwards and the center of gravity of car and roll center would be apart . And the roll amount unnecessarily increases while the suspension stroke decreases, and causes the condition of " Grip limitation between tire and ground surface will be lowered".
By using Ikeya formula's "Front lower arm", "Rear lower arm" and "Tie-rod end" which possess the roll center adjuster function will correct the roll center and set back to the position where has the shorter distance between center of gravity and roll center and then decreases the roll amount.
Additionally, we would like to recommend to install both Front and Rear at the same time. Because the roll center of Front and Rear would be "shifted", if mounting only on Front side, and the roll axis will be shifted on Front and the roll amount changes on Rear, and causes loss of the stability in the car behavior.
From these points, we would like to recommend to wear both on Front and Rear.
Wasn't much work done on Saturday. I had intended to get the engine bay all ready for ancilliaries to be installed by giving it a cut & polish to remove some overspray, but it wasn't budging. I will now give it a rub back and have it resprayed properly. Wouldn't want to do all this work to have a crap looking engine bay.
Cheers
Brendan
Monday, 4 December 2006 | | Categories: Engine, Driveline, Suspension, Wheels/Tyres
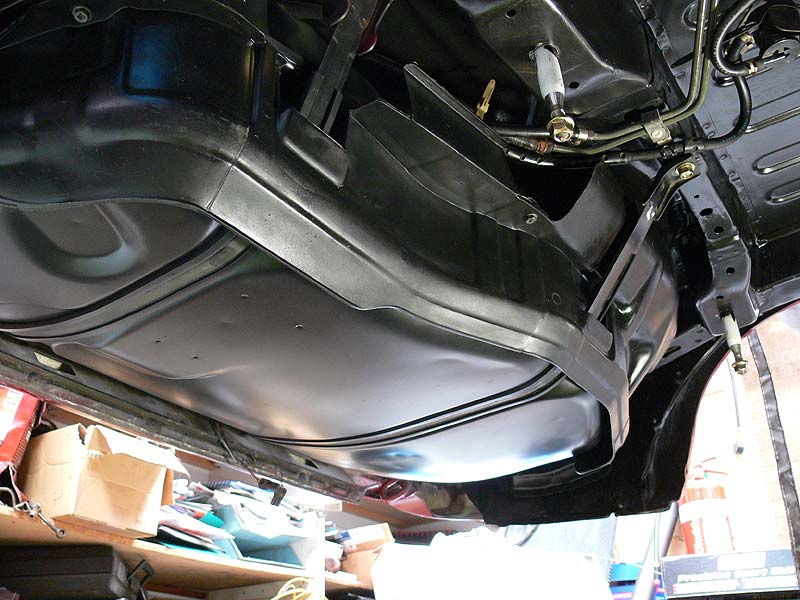
OK, so here's how it goes. The week before last I went ahead and painted the fuel tank using some of K&H;'s Chassis Black paint. Was touted as being chip resistant yada yada. So after prepping the tank with a quick wet sand using 400 grit paper, I sprayed it on...outside...in the sun. This turned out to be bad move. Number one problem was the dusted, number two was the tank getting hot making the paint finish a little strange and three the slight breeze present was blowing the spray away before it hit the tank. Needless to say I wasn't happy with the finish...plus it was way too shiny.
- Wetsanding the tank
- Finish using K&H; Chassis Black
So I let it dry for a week hoping the shine would subside a little but on Saturday, it still didn't look any good. So out it came for another coat of paint (which in the process of moving it, I scrapped it back to bare metal...so much for chip resistant). I think next time I'd use the VHT Epoxy Paint in Satin Black, but this time I used the VHT Caliper Paint in Satin Black, along with painting it inside for minimal dust flying around. All in all I gave it about 3 coats of this early in the day and the finish was much better and I'm glad I did it. While it was drying, I cleaned up the metal straps that hold the tank in place along with getting a hand from Clint (cceg) to clean the rubber strap covers (so the tank doesn't rub metal-to-metal on the straps). Along with the rubber straps, we cleaned the plastic tank surrounds as well which took a little bit of elbow grease to clean with some prepsol, but was worth it, giving it a final coat of tyre shine to bring it up to spec.
- S13 Fuel Tank Fitted (from front of car)
- S13 Fuel Tank Fitted (from rear of car)
- Fitting rubber nozzle surround
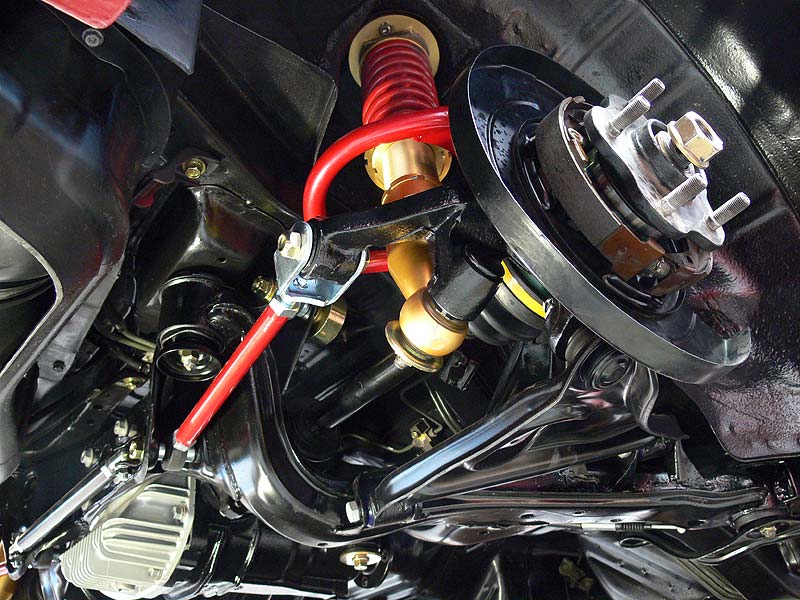
We were on quite a roll on Saturday, and Roy was staying back later than the usual close time so with Clint helping out, we bolted the subframe up and fitted the rear RG V-Stage coilovers as well. As you can see from the photos, it's looking mint with all the Kazama parts in place!
- S13 Rear Underbody 2
- S13 Rear Underbody 3
- S13 Rear Underbody 4
- S13 Rear Underbody 5
Now due to a bit of peer group pressure from Dally and Roy, I've gone ahead and purchased a full set of the Ikeya Formula Lower Control Arms (front and rear, otherwise known as roll-centre adjusters). The reasoning behind this is that I've done pretty much everything else, why not do this as well. The fronts I managed to pick up second hand for a good price (pictured), but the rears will be new and have ordered them through Aston at JShop. I've received the fronts already as they were already in Australia, but the rears will be coming from Japan, so your guess is as good as mine when they'll be arriving...hopefully prior to Christmas.
- Ikeya Formula Front Lower Control Arms for S13 Silvia/180SX
- Ikeya Formula Front LCA Bolts etc
And news just to hand, my rims are on their way downunder...but coming by ship it will be slow going. Should be here later this month or January. And for those who didn't read the previous post back in late May, here they are again:
WedsSport TC 105N

Front: 18x9.5+10 (8.0kg)
Rear: 18x10.5+12 (8.35kg)
I've also ordered in a new steering wheel. The one I had pegged will be fine for track duties, a Sparco #215 Competition Steering Wheel suede job, but I need a durable leather one for daily driving. The winner was a Nardi Rally 35 Deep Corn with about a 90mm dish, black leather and red stitching...perfect!
Cheers
Brendan
Tuesday, 14 November 2006 | | Categories: Engine
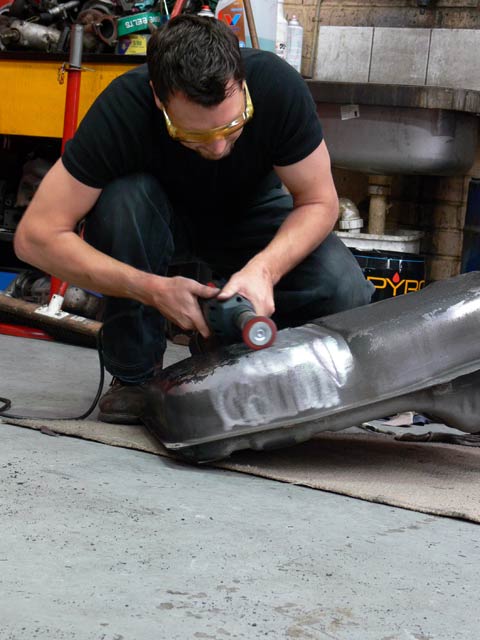
Didn't have a lot of time on Saturday to get stuck into anything time consuming like painting, so I decided (with the help of Clint) to prep the fuel tank for painting. First up we gave it a quick wipe down with some prepsol to get rid of the grime that had built up on it. Then out came the drill and a nylon grit brush and off came the old paint from the bottom because it was very chipped and nasty. To do the whole bottom of the tank took about 1.5hrs - but this was the only attachment I had for stripping paint. Next week I'll give it a sand down for a nice smooth finish and then spray on some VHT Epoxy Paint in Satin Black (SP671). That should provide a nice solid finish.
- Starting to strip the paint
- Paint Stripping Complete 1
- Paint Stripping Complete 2
- Paint Stripping Complete 3
- Paint Stripping Complete 4
Cheers
Brendan
Monday, 6 November 2006 | | Categories: Engine
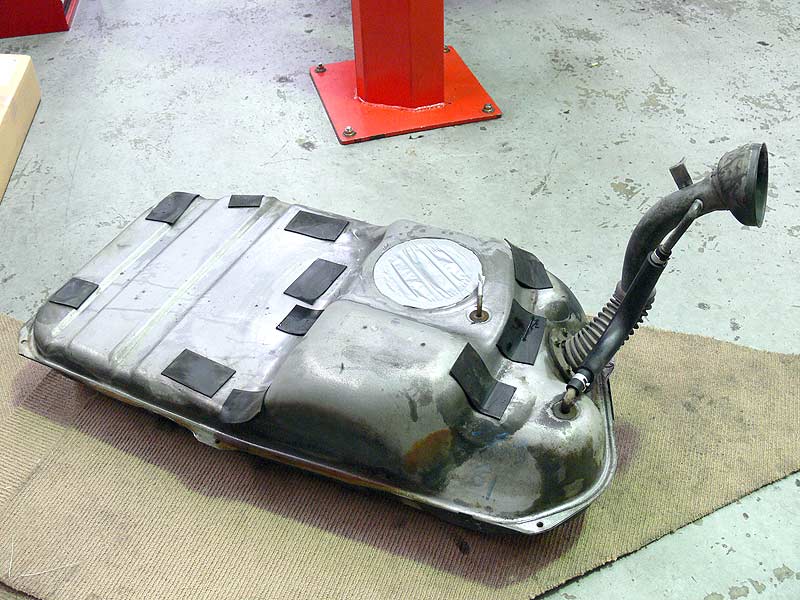
Well before we put the rear subframe back in, we thought it best to remount the fuel tank and as the original was battered and bruised, as well as a little rusted, a donor car was found with a tank in reasonable condition. With the car jacked up and stand in place for safety, I first removed the plastic surrounds from around the tank and the fuel filler neck. Next, and this is after a few goes with the spanners, sockets and rechargeable rattle gun, I connected a bunch of air hoses together and got at the bolts with the trusty Bluepoint rattle gun. After removing the bolt from the front drivers side strap, and the other bolt from the rear passenger (middle) side strap, we slowly lower the tank out.
We poured the old fuel out and gave the exterior a quick clean with some degreaser and high-pressure hose, but it's going to need a good rub down and sand before giving it a coat of paint next week.
What you see in the image above is the top of the tank which is usually hard up against the bottom of the boot and viewing it from the rear. The hole covered in tape is the access hole, the lid of which, holds the internal fuel pump in place.
- Bottom of fuel tank
- Plastic fuel tank surrounds
The plastic surrounds will also be given a quick clean with the prepsol and doused with tyre shine to get them back to original condition again.
Cheers
Brendan


