Thursday, 2 November 2006 | | Categories: Suspension
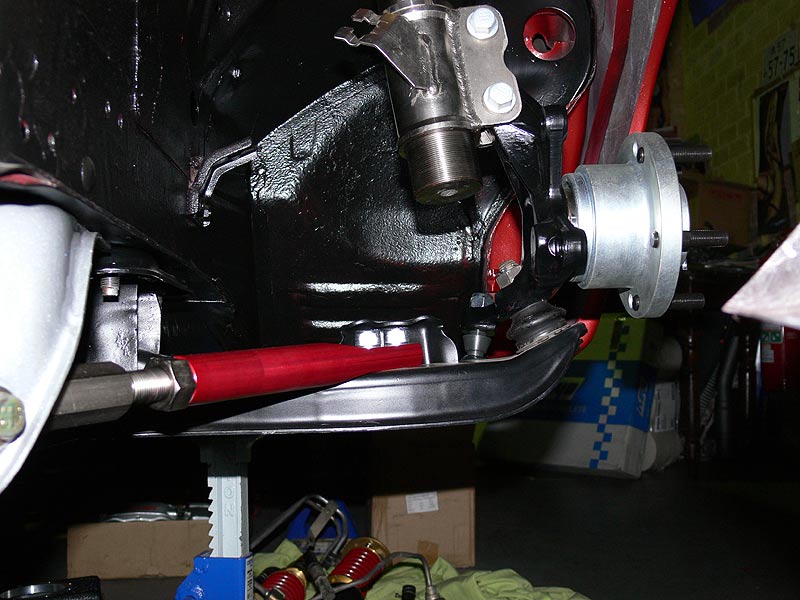
On Tuesday night, Roy was nice enough to keep the workshop open for a couple of extra hours for me to do some more work on Sillbeer...this time at the pointy end of the car. With the bolts plating on Saturday, it was really just a matter of bolting it all up and like Saturday it felt like Christmas opening up the Kazama boxes with their shiny new arms. So to start with we bolted up the Nismo lower control arms and the RG coilovers. Then came the Kazama Pillow-ball Tension Rod (also known as the castor rod) which really is a thick piece of kit in comparison to the originals. And don't get me started on the colour! After that, it was time to get the steering sorted - I decided to get the Super Strength Tie Rods after being advised that even the smallest hits can bend the standard ones. After fitting this up and putting the boot on, the Tie Rod ends was done and fitted up to the hub carrier. Finally we mounted the new 5-stud hubs.
Most things are loosely fitted for the time being until we have the engine in. The reason being that we'll be dropping the whole front sub-frame out of the car to fit the engine and gearbox so as to not scratch the engine bay if swinging in the engine from the top. Once that's in we'll tighten it all up and fit the lovely DBA4000 330mm rotors and Brembo 4-spot calipers.
- Before the assembly
- Kazama Castor Rod
- Kazama Castor Rod connect to the Nismo Powerbrace
- End of the power steering rack - no tie rods
- End of the power steering rack - no tie rods
- Comparison of Kazama Super Strength Tie Rod to a standard Tie Rod (R33 GT-R I think)
- Tie Rods and Kazama Tie Rod Ends
- GReddy Oil Catch Tank I got last week
I'll be back in on Saturday if anything doesn't come up but not 100% sure what I'll be doing next, probably find a fuel tank, clean it, paint it and fit it up before bolting up the rear subframe.
Cheers
Brendan
Sunday, 29 October 2006 | | Categories: Engine, Driveline, Suspension
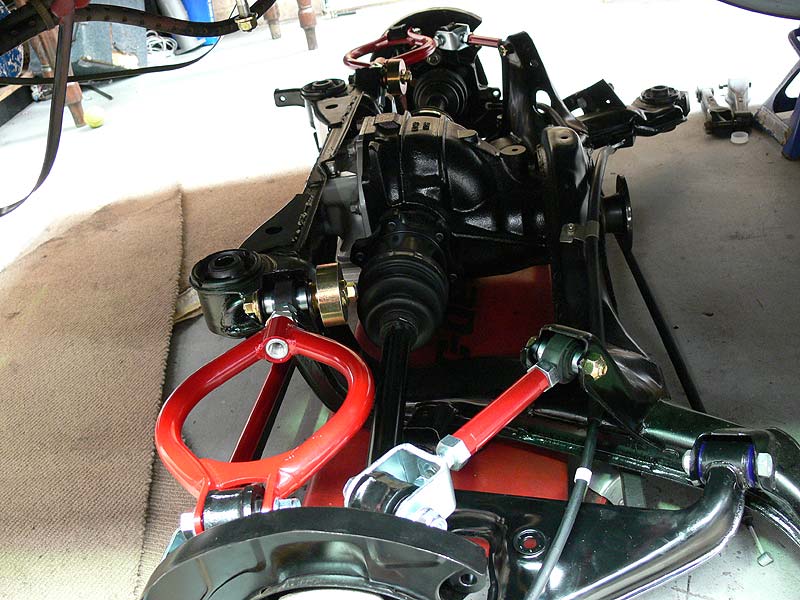
Finally got back into the workshop yesterday and got the rear end together after receiving the Kazama parts back a couple of weeks ago. Also made the aim of the day to get the electroplating kit together. Unfortunately the results weren't quite as expected (ie. not quite shiny enough), but the next batch I'll polish before doing the plating process. So first up I had to remove the old bushes from the rear lower control arms, so out came the oxy torch and with a bit of help from Shibb we had the old stuff out (very smoky). Now some of you may have noticed I got a set of the red Nolathane bushes a few weeks ago - after doing a quick test fit these didn't fit (will be writing an email to them about it), so luckily we had some others in the store to use. Oh, and I had to sand and repaint the rear LCA's in the process.
Once the nuts and bolts were plated, we moved onto the assembly of the rear subframe with the new Kazama bits, and with assistance from Roy and Jimmah, we had it back together in about 40 minutes.
- Just waking up
- Caswell Plating Kit
- Disassembled Rear Subframe
- Rear Lower Control Arm Painted (Top)
- Rear Lower Control Arm Painted (Bottom)
- Roy and Jimmah lending a hand
- Jimmah on the final run
- DONE! Well almost...
So the rear end was wheeled under the car as we ran out of time thus the crap picture, but all that's required now is the tightening of all the parts then we'll raise it up and go the front.
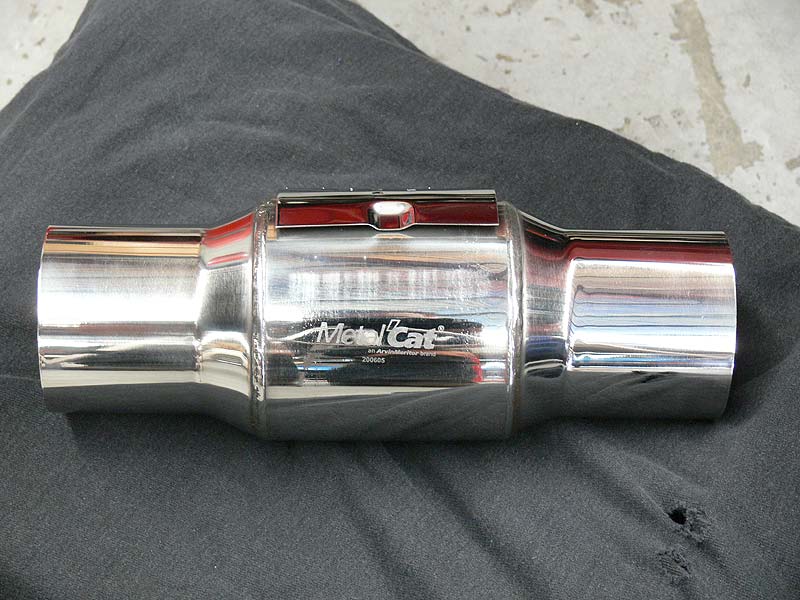
Also ordered through a GReddy Catch Can with 15mm connections (the squarish one) last week from a member on NissanSilvia.com (see next post for pics) and a new 3" MetalCat Catalytic Converter from shy180 (JustSR). Flanges need to be welded up, but we'll wait until the exhaust is up and attached before we do that to make sure we get the exhaust as high as possible.
- Box
- Logo
- Stange Numbers that mean something 1
- Stange Numbers that mean something 2
Hoping to get into the workshop mid week and complete the fitting up of the rear end and possibly move onto the front which I now have all the parts for woohoo! Time to hit the accelerator on the project methinks.
Cheers
Brendan
Thursday, 5 October 2006 | | Categories: Suspension
Make sure you read the box!!
So after some delays due to out of stock parts that needed to be manufactured, the full set of Kazama suspension arms (except front tension rod brace) arrived with many thanks to C-Red. The intention of the car is to set it up for grip work on either motorkhana, track or possibly hill climb, and with the adjustability of the suspension setup, I hope to find a great handling car. So here we go:
Front
- Kazama Pillow Ball Tension Rod (Castor Rod)
- Kazama Super Strength Tie Rod
- Kazama Super Tie Rod End (TRE)
Rear
- Kazama Adjustable Rear Upper Arm
- Kazama Adjustable Rear Toe Arm (Tension Rod)
- Kazama Traction Rod
All these parts are top quality and mostly adjustable with ball joint connections (as opposed to rubber bushes). As a plus, they're also red to match with the rest of the car 
Also sometime ago I ordered in a set of flanges for the GReddy/Trust Type-R Blow-off Valve. Basically a flange to weld onto the intercooler piping, and an adapter that screws into the outlet:
- GReddy Type-R BOV Mounting Flange
- GReddy Type-R BOV Outlet Adapter
I'm still trying to get my plating kit up and running, but I have all the electrical bits all soldered up, the solutions are made up from the concentrates, I've gone out and bought this lovely plastic kitchen apron to protect the jewels from chemical splashes and I have the gloves and goggles to protect the other bits. All thats left now is to get an aquarium air pump to keep the water agitated so bubbles don't settle on the parts being plated. Hopefully I get one of those before I go in on Saturday and I'll do my first run of bolts that will allow me to bolt up all the suspension nice and tight and get the car rolling again.
Cheers and thanks for listening.
Brendan
Wednesday, 4 October 2006 | | Categories: Brakes, Suspension, Wheels/Tyres
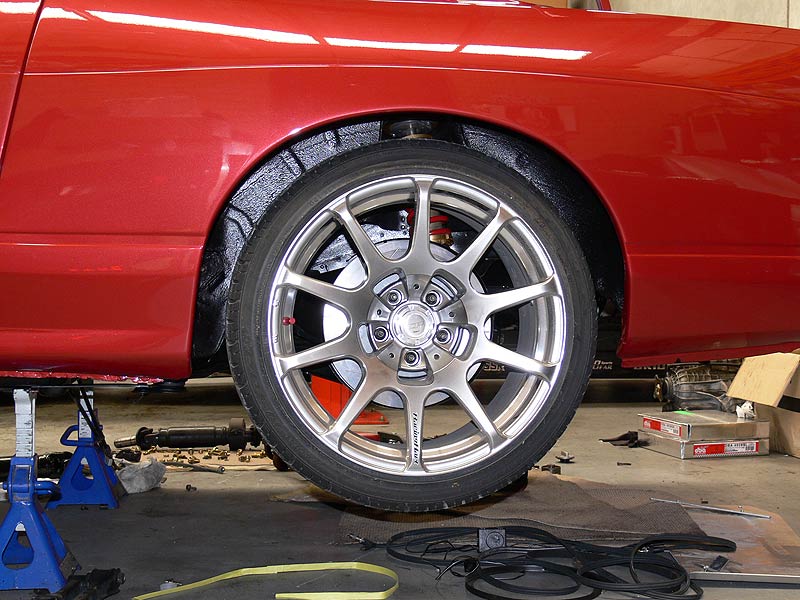
Many apologies for the delay in action over the last couple of weeks, I needed a break and sometime with the kids.
Anyway, a couple of weeks back I was prepping some stuff around the new plating kit I'm working on (to make old bolts and brackets shiny and new again), and Trent from TKO Tinting rocks up at C-Red for some cooler pipe clamps. After a bit of ooohing and aaahing at his nice red R32 he's been building he offers me the chance to trial fit his new shiny rims. They're a newish model from Racing Hart called the CP-S10 and from memory they're 18x10+19's which are fairly close to what I'm after. Now you can see from the pics here that even with these specs, they're well within the 50mm wide M-Sports guards. The wheels I have on order at the moment are the Wedsport TC-105N's with rear specs of 18x10.5+12 (see previous blog post for decent pictures), so looking at these in front of me we're thinking a 20mm spacer could be required to fill the guards nicely.
- Side on View of CP-S10 fitted
- Rear View of CP-S10 fitted
- Front on View of CP-S10 fitted
- Coilover clearance 1
- Coilover clearance 2
From those angles you also get a really good feel for how wide it is too. Mmmmm, yummy. Hope I can fit it into the carport at home.
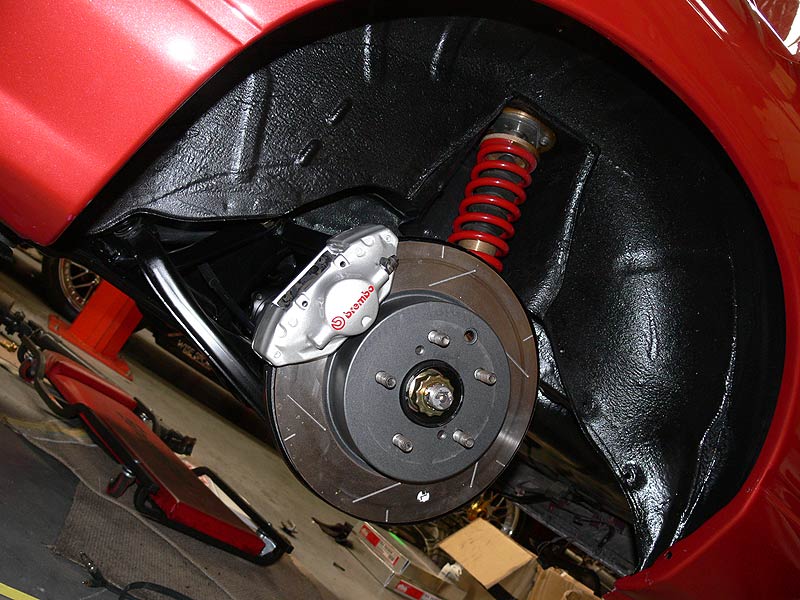
While I had the brake rotor and coilover fitted, I thought I'd just trial fit one of the rear Brembo calipers I'd re-finished. Doesn't it looks tops! There were no pads in these and I had a hard time finding the original bolts as they use a much more coarse thread than standard Nissan bolts. I think I have lost the fronts :( While I was there I took a shot of the 5-stud hubs I'd cracked open too.
- Nice shot of the rear caliper fitted up
- Close up of caliper and rotor
- With an R34 GT-R 18" wheel fitted
- Front aftermarket S13 5-stud hub
Cheers
Brendan
Monday, 4 September 2006 | | Categories: Engine, General, Suspension
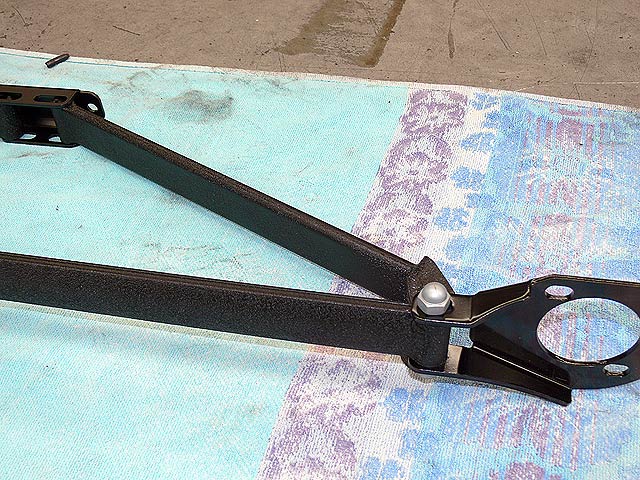
I went in on Saturday with a view to get the electroplating kit setup but after reading through the manual, I still need a few bits and pieces, so it'll have to wait a bit. In the meantime, I had some bits that I needed to paint anyway. These being the Cusco OST brace (to match the rest) and the Sard 'Fuel Collector' (fuel surge tank). So after a little pit of prep work, the bars were painted in VHT Black Wrinkle paint and the bracket in Semi-gloss black.
- One brace sanded ready for paint
- Dummy Placement of the OST brace under the rear brace
- Close up of bottom plate (originally cusco blue)
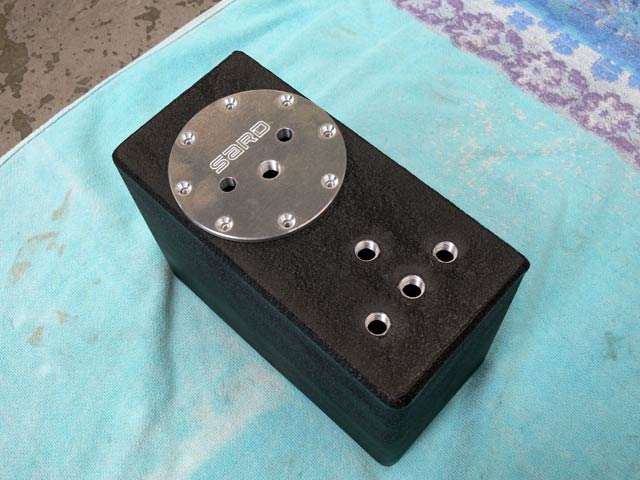
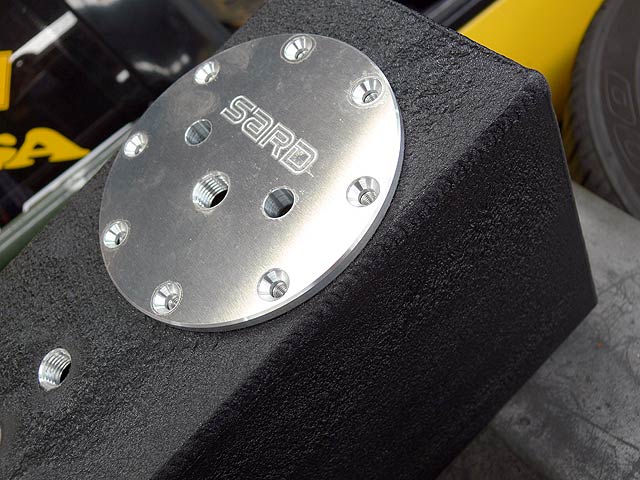
It was then time to paint the surge tank in Black Wrinkle too. With the main hole masked up so the o-ring can still make a good seal and the input/output points stuffed with material, it was given its coating. It's not perfect, but with the 'Sard' engraved lid on, it looks tops. This will have some tabs welded on (which I really should have done before I painted it) and then bolted to the floor of the boot.
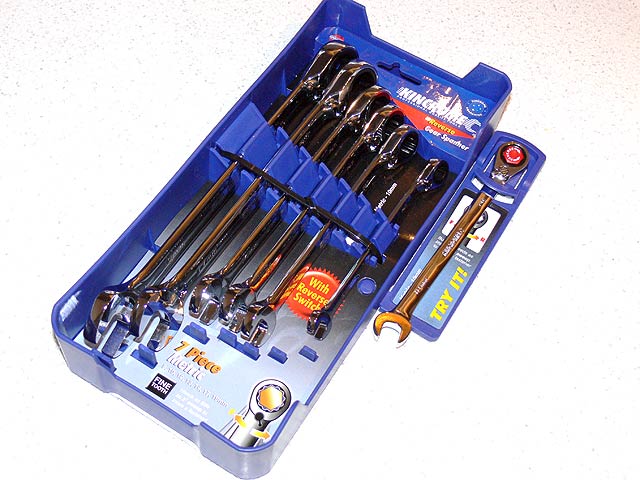
And finally I bought myself a present on Sunday. Using a gift voucher I got for my birthday back in March, I went down to Bunnings and grabbed a set of spanners, namely Kincrome 7pce (Metric) Gear Spanners (8mm, 10mm, 12mm, 14mm, 15mm, 17mm, 19mm). These should replace my cheapo ones quite nicely and reduce time in doing things up considerably.
Cheers
Brendan
Friday, 1 September 2006 | | Categories: Suspension
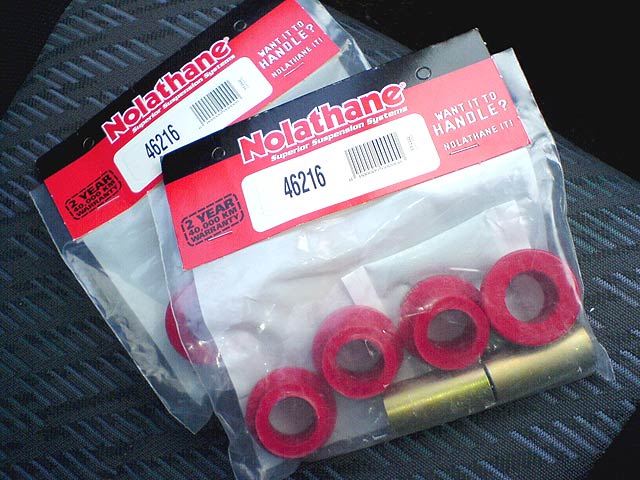
A couple of posts back I mentioned my little stuff up with the rear lower control arms...ie. I prepped a set from an R32 GT-R, not an S13. After that little set back, I grabbed a set of S13 rear LCA's and quickly prepped and painted them for temporary fitting to the rear end. I was initially going to look at getting a set of adjustable rear LCA's, but after seeing the prices, I decided to stick with just updating the bushes in the stock ones. Now, I know this is a little anal, but I'm trying to keep a colour scheme going here, and yellow (Whiteline) or blue (OEM Replacements) bushes wouldn't cut it, so I went for the red Nolathane bushes. Still very good quality and red to boot. A quick look up on the web site (Redranger Nolathane), I identified the part number required, 46216, and promptly called around, settling on Repco who had them airbagged across for $107.00 inc GST. See the following picture identifying where these bushes will be installed:
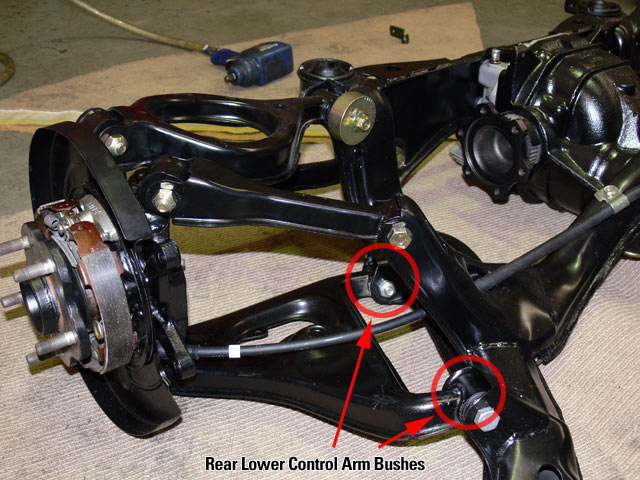
Next step in installing these will be to melt out the old ones with an oxy torch, then sand and spray with paint and finally fit the new bushes. Woohoo. Oh, and if you do order a set of these, get two sets as a single set only does one side (lucky I ordered two sets just in case).
Cheers
Brendan
Tuesday, 29 August 2006 | | Categories: Suspension
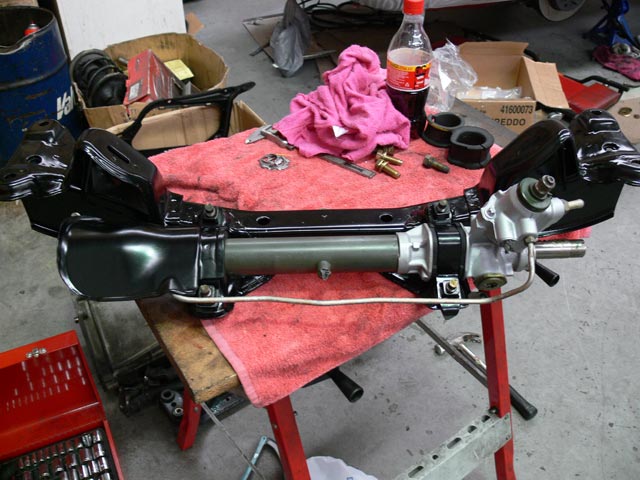
After working on the rear end last week, it was time to move up to the front. I was really nice having all the parts all cleaned and painted ready to be bolted back up to the car...was a matter of picking them up and bolting them in. Started on Saturday morning by removing the Tie Rods from the S15 Power Steering Rack. These are known to be quite weak (ie. bend easily) when hitting curbs/ripple strips at speed, so they'll be replaced with Kazama Super Strength Tie Rods (plus Super Tie Rod Ends). Once removed, it was bolted up to the S13 engine crossmember. There is very little difference between the S13 and S15 crossmembers, so it bolted straight up using the S13 mounts and brackets. After a quick wipe down, I located the nuts needed, applied a bit of anti-seize to the threads and bolted it up. Woohoo *dances a jig*.
- S13 Engine Crossmember and S15 Power Steering Rack
- Tie Rods removed
- Crossmember Bolted Up under car
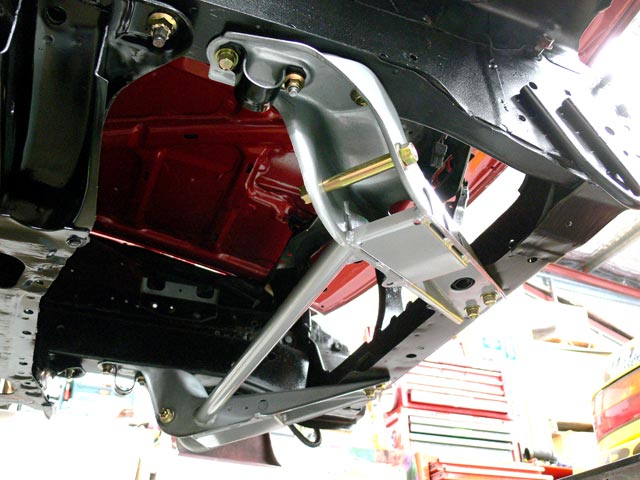
Next came the Nismo Power Brace, again a matter of selecting the correct nuts and bolts (that had been re-plated) and bolting it into place. As you can see I've also put the castor rod bolts in place so I don't lose them and have also attached the sway bar bracket mounts as well. This way I won't have to go searching for them when it comes time to bolt that bit in.
- Crossmember and Nismo Power Brace viewed from top
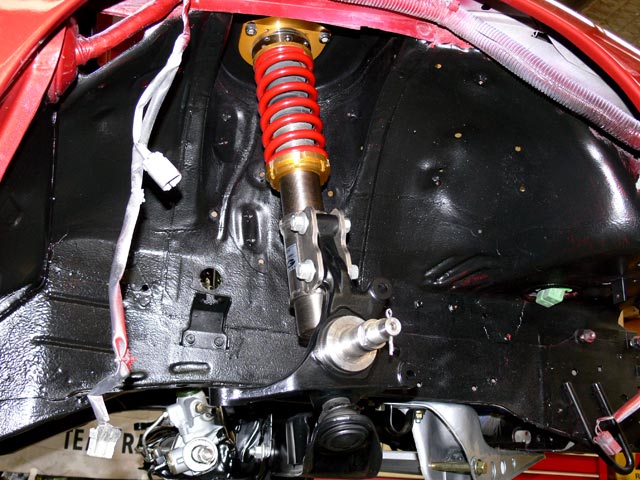
Last part of the day was tracking down some crucial nuts and bolts for the strut assembly. Luckily there was a full S13 front assembly down the back of the workshop I could use, so I raped that for the inner mounting bolts for the Nismo Lower Control Arms and the two bolts to mount the top of the hub assembly/spindle to the RG coilover. These will need to be replated, so for the time being I've sand blasted them and will plate when I get my new DIY electroplating kit up and running. I did have to make a quick trip down the parts store however for some new mounting nuts for the top of the coilover (I'll replace these later with better self-locking ones). It then took about 5 minutes each side to bolt what I had into place.
So next step is get my plating kit running, the manual is pretty huge as it covers the basics of electroplating as well as the specific kind you have the kit for. The kit has come from a US company called Caswell (http://www.caswellplating.com/) who have an Australian distributor in Melbourne. This will allow me to do the plating when I need it and have an exterior grade plating done in 60 minutes.
Until next time...
Cheers
Brendan
Saturday, 19 August 2006 | | Categories: Brakes, Driveline, Suspension
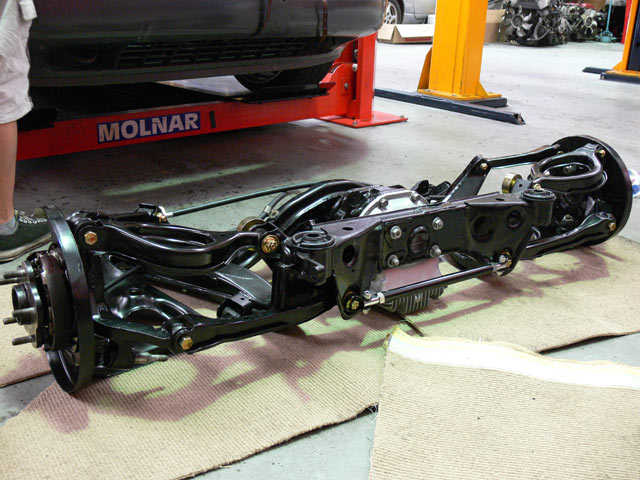
So it's been a while since my last post, but with more renovations going on and Autosalon now out of the road, I got back into the workshop for a full day to complete the rear end assembly. It all went together fairly smoothly, with Roy helping me out with one side of the hand brake assemblies (from an R33 GT-R) before I did the other under his watchful eye. Of course this was after we figured out that I had both the hubs and the hand brake pivot on the wrong sides (left on right and right on left)...der! Then came another minor hiccup...the rear lower control arms. Now after burning out the old crusty bushes with an oxy acetylene torch and repainting up nicely, I put some new bushes in one side only to find out they weren't going to fit! They were from an R32 GT-R and for some reason I had got them mixed up ages ago (about 12mths ago). I went and grabbed the originals, quickly gave it a clean up and coat of paint, and I'll redo the bushes when I replace all the arms with the Kazama ones I have on back-order. Here are some pics mid and after assembly, minus the half shafts which I missed out until someone mentioned I had better put them in then rather than after it was bolted up.
- Partly assembled
- Rear control arms
- Rear control arms
- Diff in place...sexy hey!
- R33 GT-R Handbrake Assembly
- R33 GT-R Handbrake Assembly
- Lower Tension Rod Brace
- Fully assembled (minus shafts)
The handbrake cables used were new Nissan R33 Skyline GTSt, please check new prices from Nissan before forking out for second hand ones as I've heard of some used ones going for same price as new. So once it was all together, we lifted it onto a trolley jack, wheeled it under the car, lined it up and bolted it in. Finally, I felt as though I had achieved something. Although now that it's bolted in, I know I'm going to have to take apart the outside arm assemblies anyway to replace all the arms - but at least it looks like I've done something. Pics of it bolted in:
- Rear Bolted Up 1
- Rear Bolted Up 1
- Rear Bolted Up 1
- DBA 4000 Rear Brake Rotor
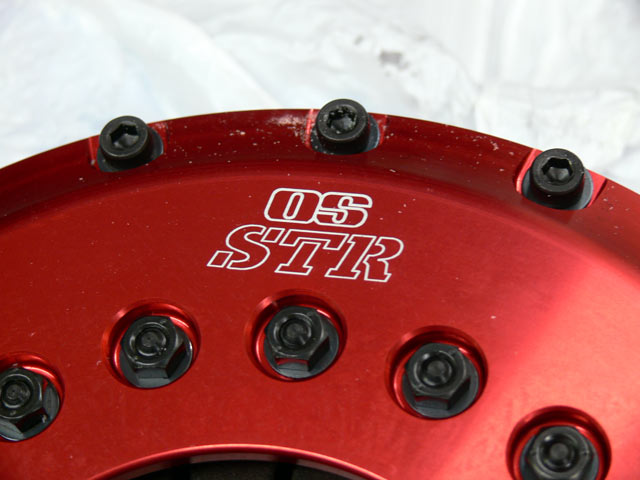
After a short wait, my new OS Giken STR (STR2C) Twin-plate Clutch arrived, and damn it's beautiful (as much as a clutch can be). Just a recap about the clutch for those that missed it previously:
The New OS Giken STR series can handle up to 600hp, yet retains drivability very close to standard with 30% lighter pedal effort than most multi-plate clutches. By using special new plate and diaphragm designs, OS Giken has achieved ample power handling with just 715kg clamping pressure. This makes the STR series perfect for everyday driving applications, along with most race and drift applications.
The clutches come complete with lightweight chrome-moly flywheel, ruby red-anodised billet aluminium clutch cover and the required bearing/carrier set or pull-push converter kit where required.
- STR2C Top
- STR2C Side
- STR2C Logo
- STR2C Thrust Bearing
A few other bits and pieces have come in too. The DBA4000 discs for the front brakes are now in, will take pics when I test fit them up. I purchased a Cusco OST Brace - for those who haven't heard of these, it mates up with a Cusco OS Rear Strut Tower Brace and adds two additional arms to tie the struts to the floor of the boot in a triangle configuration. These will need to be refinished as per my other braces (black wrinkle finish on the bar and semi-gloss on the plate). I've also purchased a kit that allows me to do my own Zinc electroplating of metal parts, saving me time in dropping them down to the platers (takes about 60mins to do parts in a bucket on site).
Not sure what's next, I know I have a lot of painting still to do (Sard fuel surge tank, intercooler, IC pipes), but also want to get the front engine support in and start on bolting the front suspension together.
Until next time.
Cheers
Brendan
Wednesday, 2 August 2006 | | Categories: Engine
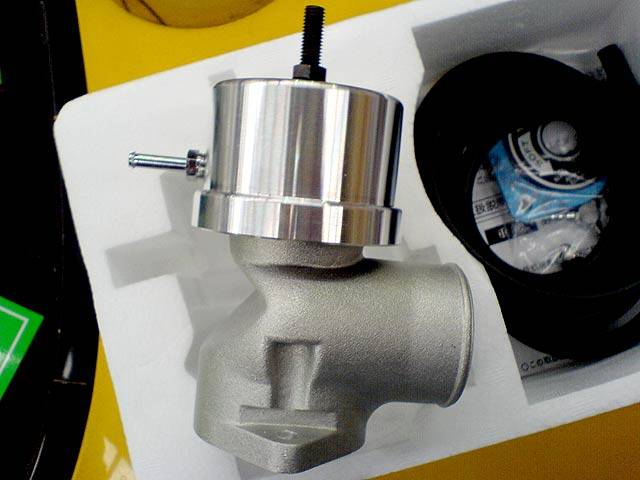
Went and grabbed my new GReddy Type-R Blow-off Valve (Standard Spring) from Jeff's office yesterday and took a few pics. This is one of the largest blow-off valves on the market and comes in two configurations, the first with what they call a standard spring and the other with a 'race' spring. Here's an excerpt from a site I found with info on the two:
GReddy's Type R Blow Off Valve (BOV) is a simple, yet powerful design. The GReddy Type R Blow Off Valve is made from Billet and Cast Aluminum. The GReddy Type R Blow Off Valve uses an oversized 47mm Housing that is Intended for Engines that produce more than 400 horsepower and over 12lbs (0.82bar) of Boost. You can adjust the Pressure Relief by simply turning the knob on the Top. The Stock Spring Type R Blow Off Valve (BOV) Holds up to 18lbs (1.24bar) of Boost. If your Turbo Runs Boost levels from 16lbs (1.1bar) up, you can purchase the GReddy Stiff Spring Type R Blow Off Valve. You will need to purchase a Steel or Aluminum BOV Mounting Flange to Properly Install The GReddy Type R Universal Kit. (Thanks to RacingWorks.com)
As I said I took a few pics so here they are:
- GReddy Type-R BOV (Side)
- GReddy Type-R BOV (Piston)
- GReddy Type-R BOV (Parts)
- GReddy Type-R BOV (Box)
From the size of it, a lot of people (as did I) mistake it for an external turbo wastegate - but I assure you this is a blow-off valve. We'll be mounting it on the passenger side of the intercooler where it will be plumbed back into the inlet just after the airflow meter (AFM - if I do end up with one) and the intake on the compressor housing. This will hopefully reduce the amount of noise from it as I'm not a fan of the psssshhht. Should generate more of a low wooosh sound similar to that of stock GT-R blow-off valves when you change from airbox to pod filters.
Apologise for the slow movement, but with only 3hrs per week to work on it, there's not a great deal I can get done - especially when there's parts that need prep before refit.
Cheers
Brendan
Tuesday, 25 July 2006 | | Categories: Brakes, Driveline, Suspension
After recovering most of Saturday from a big night out with the boys on Friday, Roy said he'd be in at the workshop so I trundled in around lunch time to do some work on the car.
The intention was to put some of the rear end together and get the brake and fuel lines bolted back up. So, once I got there my first job was to find a fuel tank - after checking a few cuts out the back, I found one on a car up the back of the workshop in top condition - no hits. Next I dragged the brake and fuel lines out and gave them a quick wipe down with some prepsol. Once clean, slid them back under and after a bit of cursing, had them bolted into position with the newly coated bolts. Looked great.
Next was the rear end. I had brought some old bits of carpet from home a few weeks before so I layed out a few bits so I didn't scratch any of the new paint on the concrete floors. I man handled the sub-frame out from under the car, and layed it over the differential which I then...damn I didn't get the nuts coated for the diff. After a quick sandblast I bolted the diff up. This was followed by the arms. It was only now I noticed I didn't get all the bits I needed for the diff to bolt up - missing were some rubber gromets and spacers. So I moved onto the hubs and hub assemblies, where I sandblasted the bolts, layed on some anti-sieze paste and bolted hub, brake disc shield, handbrake bracket and hub assembly together.
Sorry about no pics, but that's about when Roy was closing up shop and I didn't get a chance to snap a few off.
Oh, and I received my Cusco OST Brace in the mail from JDM Concept. Cost $190 for this brace which extends my Cusco OS Rear Strut Brace down to a bracket on the floor, essentially triangulating the brace for better stiffness. Will post some pics once it's been painted the same as the other braces.
Bye for now.
Brendan


