Category: Engine
Thursday, 8 February 2007 | | Categories: Audio, Engine, Interior, Driveline
Alright, so a couple of weeks ago, I was lucky enough to start getting some help on moving Sillbeer closer to completion. Enter one Mr Greg Dally. He'll be doing a few days a week working on my car to get things moving along. I have so much work on now just to pay to get it over the line, that I have minimal time to actually work on the car so I'm glad to have his expert hand on the job...and to those who don't know how he works, he's about as anal (if not more) as I am.
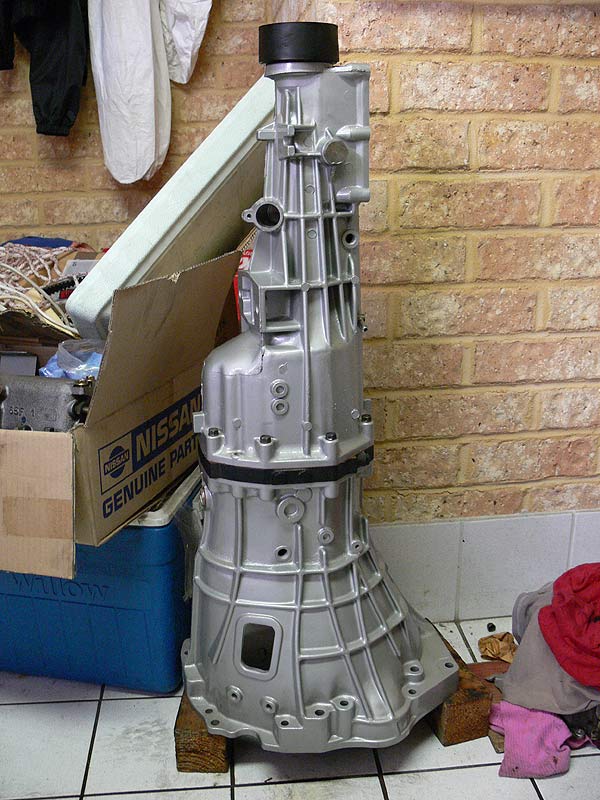
So first on his agenda was to complete the gearbox. Now it's really just been a shell for quite sometime now, so with the internals of an S14 5-speed gearbox identified, Greg made up mine to as you see it here. Apparently there was a bit of polishing that took place on some components that will never get seen so that just goes to show his enthusiasm. It just looks mint and with the clear coat, should be relatively easy to keep clean too.
- S13 Gearbox Top View
- S13 Gearbox Closeup Middle
- S13 Gearbox Closeup Rear
- S13 Gearbox Closeup Selector
A little bit that I've done in between other things is to paint the taillight cluster units with a chrome paint. As I'm going to use the 'crystal' clear/red taillight lens, there needs to be a little more reflection from behind so a coating of chrome helps that out. Also to assist in a nice neat seal around the taillight, I cleaned all to old sealer from the taillight surround...using a bit of Rostoff and/or Prepsol and elbow grease, it came off easily enough.
- Taillight Cluster Unpainted
- Taillight Cluster Painted
- Taillight Surround Before and After
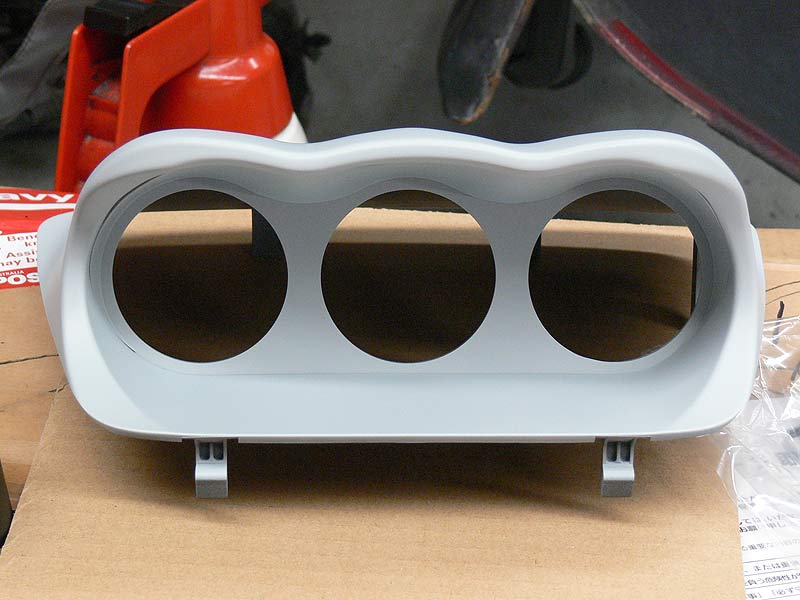
As the exterior and mechanicals are coming along now, it was time to start looking at what's happening with the interior. Now I have had a set of 4 Defi-Link gauges for some time, and have been tossing up on how to mount these. I had bought a set of Defi-Link Single Meter Visor's, but I didn't really like the thought of these things sticking out like dog's bollocks on the dashboard. So the only other option was a 3-gauge hood of some sort. Most of the stuff available for the S13 dash looks mighty naff, but those made for the WRX and EVO by Defi are so so nice...cue purchase to ET Performance and they had a Defi Triple Meter Hood in my lap inside a week. Now as this was made originally for a WRX (MY2000+) I will have to modify the dash and the hood appropriately to fit. This could take some time, but after an initial fitting - it'll look mint. Note that it comes in a primed plastic ready to be painted in your own chosen colour. Once fitted, the dash will get reskinned as close as possible to factory so it looks like the cluster was a factory option.
- Defi Triple Meter Hood Profile
- Hood Test Fit Front 1
- Hood Test Fit Front 2
- Hood Test Fit Top
- Hole in Dash
Please note that the dash used is stuffed anyway having had a set of gauges mounted on the passenger side. Once we have the basics sorted, we'll used a fresh dash to work with.
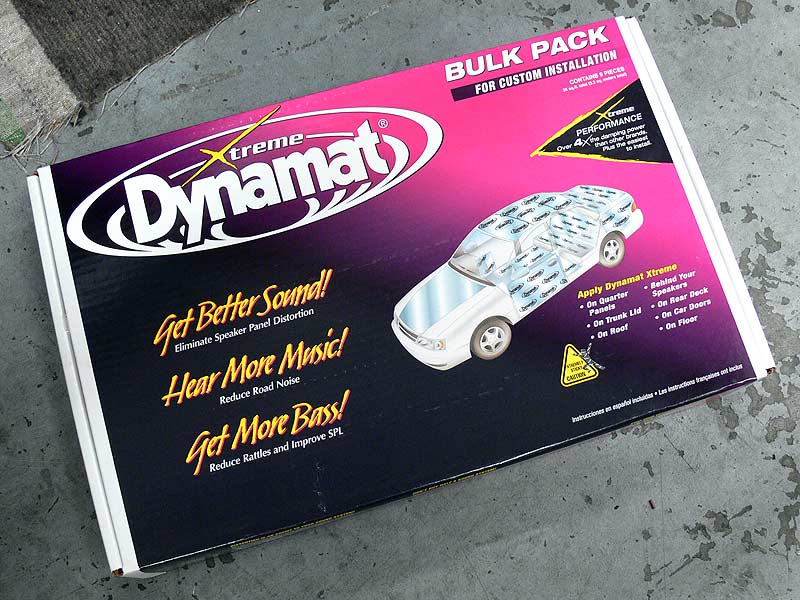
Now there's one thing that may or may not sit well with some people when building a car like this, and that's adding weight in the form of sound deadening. But as this really needs to be a comfortable (as well as quick) car to drive, it will be required...especially when taking into account the sound system planned (will be revealed in a future post). So as is done to all of Chip Foose's cars on Overhaulin', the interior will be fully decked out with Dynamat...improving on both sound and temperature in the cabin. This will be applied to all areas of the boot, the floor, roof and doors. Yes, it'll add weight, but at the same time make the car feel more solid (think thud rather than clink when closing the doors) and liveable especially when driving down south.
Next up for me is to find some components in the engine such as Power Steering pump, A/C compressor, alternator and starter motor and get them ready for fitting. The front and rear window seals should arrive from Nissan any day now and we've also ordered in a new brake master cylinder from a Z32 300ZX in the larger 1 1/16" size. An article on SportCompactCar's web site notes the particular's around using this master cylinder with Brembo's.
Also on the subject of interior, I need to start gathering the pieces that will get refinished (ie. plastic trim) and the bits that will be retrimmed to match the Honda Integra DC2 Type-R Recaro's that will be fitted. So much to do, so little time, but with Dally on the job things are looking great.
Cheers
Brendan
Monday, 4 December 2006 | | Categories: Engine, Driveline, Suspension, Wheels/Tyres
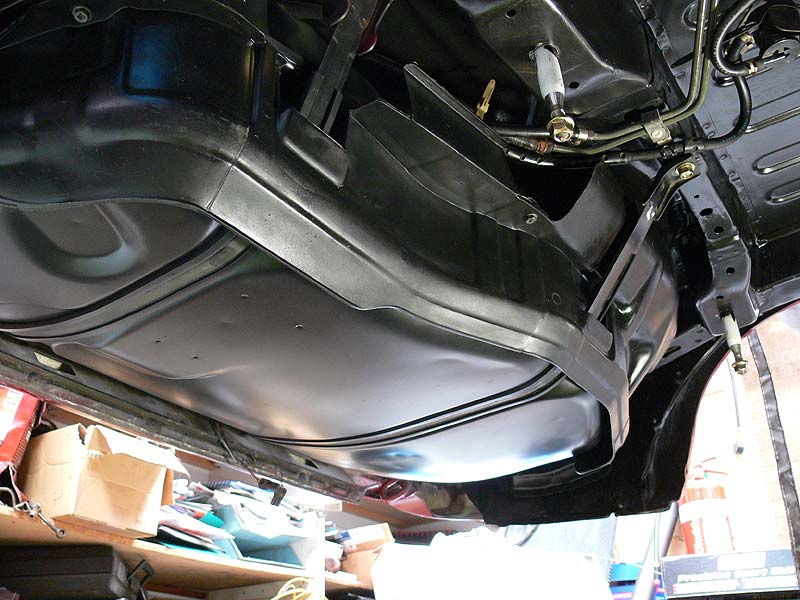
OK, so here's how it goes. The week before last I went ahead and painted the fuel tank using some of K&H;'s Chassis Black paint. Was touted as being chip resistant yada yada. So after prepping the tank with a quick wet sand using 400 grit paper, I sprayed it on...outside...in the sun. This turned out to be bad move. Number one problem was the dusted, number two was the tank getting hot making the paint finish a little strange and three the slight breeze present was blowing the spray away before it hit the tank. Needless to say I wasn't happy with the finish...plus it was way too shiny.
- Wetsanding the tank
- Finish using K&H; Chassis Black
So I let it dry for a week hoping the shine would subside a little but on Saturday, it still didn't look any good. So out it came for another coat of paint (which in the process of moving it, I scrapped it back to bare metal...so much for chip resistant). I think next time I'd use the VHT Epoxy Paint in Satin Black, but this time I used the VHT Caliper Paint in Satin Black, along with painting it inside for minimal dust flying around. All in all I gave it about 3 coats of this early in the day and the finish was much better and I'm glad I did it. While it was drying, I cleaned up the metal straps that hold the tank in place along with getting a hand from Clint (cceg) to clean the rubber strap covers (so the tank doesn't rub metal-to-metal on the straps). Along with the rubber straps, we cleaned the plastic tank surrounds as well which took a little bit of elbow grease to clean with some prepsol, but was worth it, giving it a final coat of tyre shine to bring it up to spec.
- S13 Fuel Tank Fitted (from front of car)
- S13 Fuel Tank Fitted (from rear of car)
- Fitting rubber nozzle surround
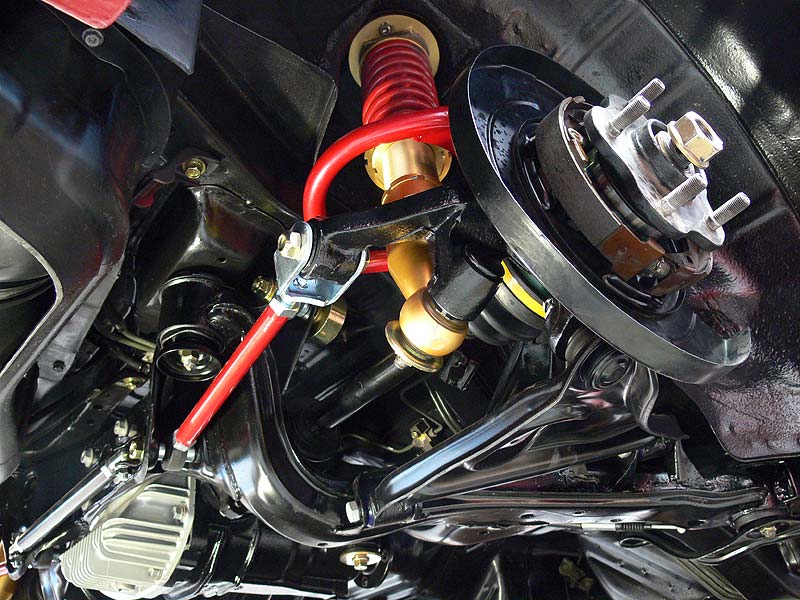
We were on quite a roll on Saturday, and Roy was staying back later than the usual close time so with Clint helping out, we bolted the subframe up and fitted the rear RG V-Stage coilovers as well. As you can see from the photos, it's looking mint with all the Kazama parts in place!
- S13 Rear Underbody 2
- S13 Rear Underbody 3
- S13 Rear Underbody 4
- S13 Rear Underbody 5
Now due to a bit of peer group pressure from Dally and Roy, I've gone ahead and purchased a full set of the Ikeya Formula Lower Control Arms (front and rear, otherwise known as roll-centre adjusters). The reasoning behind this is that I've done pretty much everything else, why not do this as well. The fronts I managed to pick up second hand for a good price (pictured), but the rears will be new and have ordered them through Aston at JShop. I've received the fronts already as they were already in Australia, but the rears will be coming from Japan, so your guess is as good as mine when they'll be arriving...hopefully prior to Christmas.
- Ikeya Formula Front Lower Control Arms for S13 Silvia/180SX
- Ikeya Formula Front LCA Bolts etc
And news just to hand, my rims are on their way downunder...but coming by ship it will be slow going. Should be here later this month or January. And for those who didn't read the previous post back in late May, here they are again:
WedsSport TC 105N

Front: 18x9.5+10 (8.0kg)
Rear: 18x10.5+12 (8.35kg)
I've also ordered in a new steering wheel. The one I had pegged will be fine for track duties, a Sparco #215 Competition Steering Wheel suede job, but I need a durable leather one for daily driving. The winner was a Nardi Rally 35 Deep Corn with about a 90mm dish, black leather and red stitching...perfect!
Cheers
Brendan
Tuesday, 14 November 2006 | | Categories: Engine
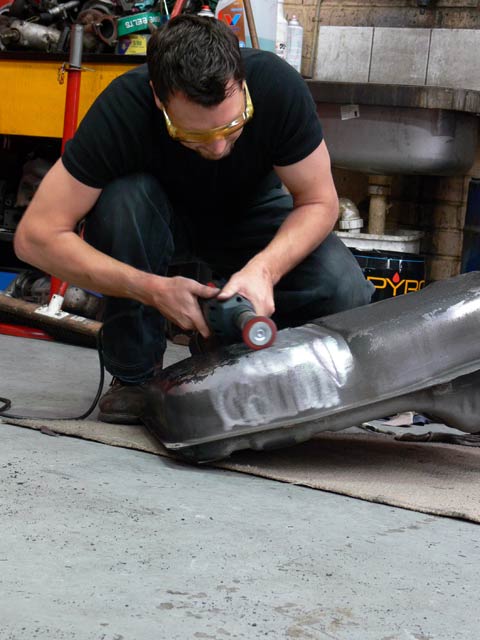
Didn't have a lot of time on Saturday to get stuck into anything time consuming like painting, so I decided (with the help of Clint) to prep the fuel tank for painting. First up we gave it a quick wipe down with some prepsol to get rid of the grime that had built up on it. Then out came the drill and a nylon grit brush and off came the old paint from the bottom because it was very chipped and nasty. To do the whole bottom of the tank took about 1.5hrs - but this was the only attachment I had for stripping paint. Next week I'll give it a sand down for a nice smooth finish and then spray on some VHT Epoxy Paint in Satin Black (SP671). That should provide a nice solid finish.
- Starting to strip the paint
- Paint Stripping Complete 1
- Paint Stripping Complete 2
- Paint Stripping Complete 3
- Paint Stripping Complete 4
Cheers
Brendan
Monday, 6 November 2006 | | Categories: Engine
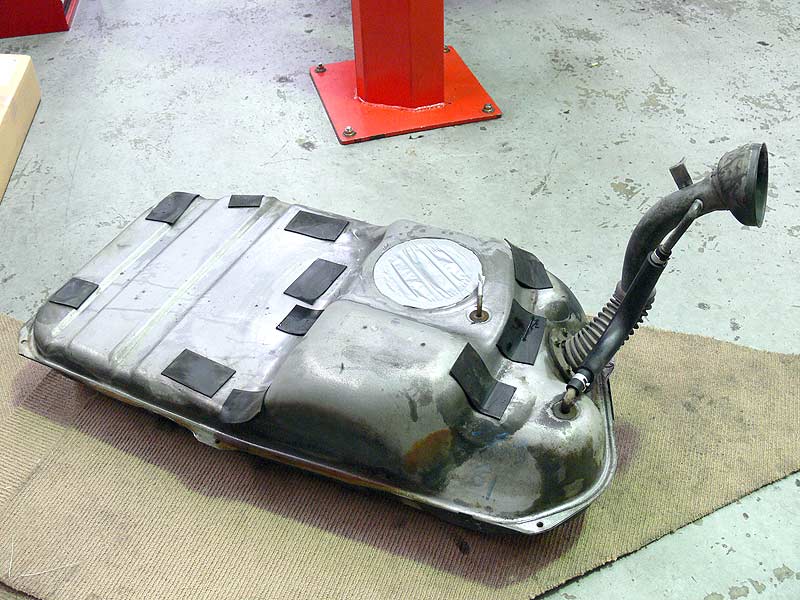
Well before we put the rear subframe back in, we thought it best to remount the fuel tank and as the original was battered and bruised, as well as a little rusted, a donor car was found with a tank in reasonable condition. With the car jacked up and stand in place for safety, I first removed the plastic surrounds from around the tank and the fuel filler neck. Next, and this is after a few goes with the spanners, sockets and rechargeable rattle gun, I connected a bunch of air hoses together and got at the bolts with the trusty Bluepoint rattle gun. After removing the bolt from the front drivers side strap, and the other bolt from the rear passenger (middle) side strap, we slowly lower the tank out.
We poured the old fuel out and gave the exterior a quick clean with some degreaser and high-pressure hose, but it's going to need a good rub down and sand before giving it a coat of paint next week.
What you see in the image above is the top of the tank which is usually hard up against the bottom of the boot and viewing it from the rear. The hole covered in tape is the access hole, the lid of which, holds the internal fuel pump in place.
- Bottom of fuel tank
- Plastic fuel tank surrounds
The plastic surrounds will also be given a quick clean with the prepsol and doused with tyre shine to get them back to original condition again.
Cheers
Brendan
Sunday, 29 October 2006 | | Categories: Engine, Driveline, Suspension
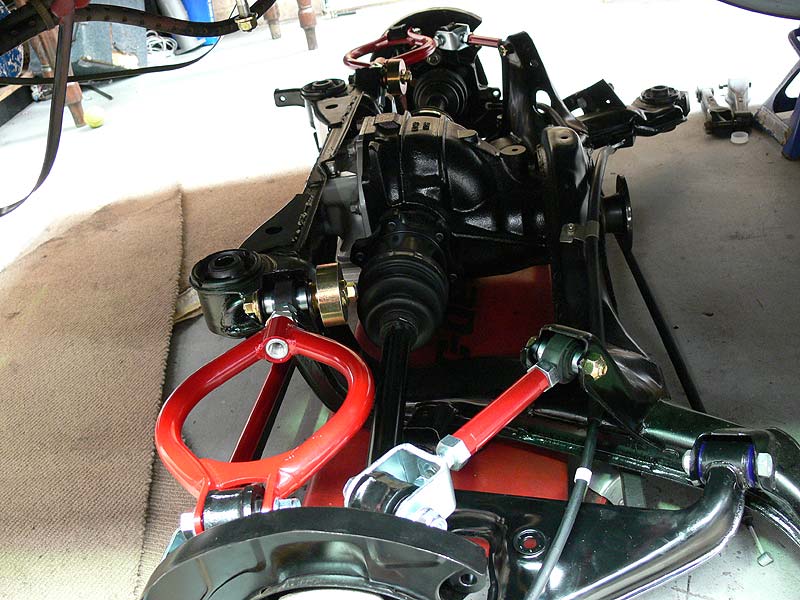
Finally got back into the workshop yesterday and got the rear end together after receiving the Kazama parts back a couple of weeks ago. Also made the aim of the day to get the electroplating kit together. Unfortunately the results weren't quite as expected (ie. not quite shiny enough), but the next batch I'll polish before doing the plating process. So first up I had to remove the old bushes from the rear lower control arms, so out came the oxy torch and with a bit of help from Shibb we had the old stuff out (very smoky). Now some of you may have noticed I got a set of the red Nolathane bushes a few weeks ago - after doing a quick test fit these didn't fit (will be writing an email to them about it), so luckily we had some others in the store to use. Oh, and I had to sand and repaint the rear LCA's in the process.
Once the nuts and bolts were plated, we moved onto the assembly of the rear subframe with the new Kazama bits, and with assistance from Roy and Jimmah, we had it back together in about 40 minutes.
- Just waking up
- Caswell Plating Kit
- Disassembled Rear Subframe
- Rear Lower Control Arm Painted (Top)
- Rear Lower Control Arm Painted (Bottom)
- Roy and Jimmah lending a hand
- Jimmah on the final run
- DONE! Well almost...
So the rear end was wheeled under the car as we ran out of time thus the crap picture, but all that's required now is the tightening of all the parts then we'll raise it up and go the front.
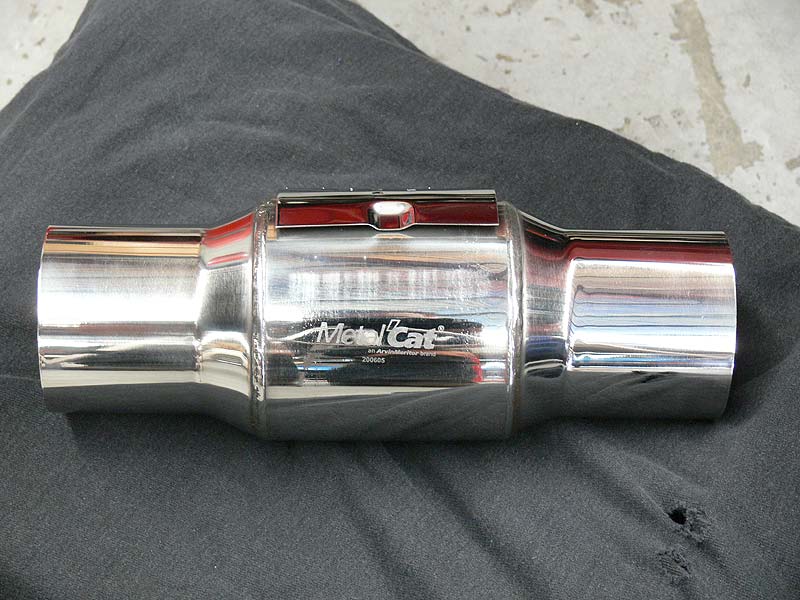
Also ordered through a GReddy Catch Can with 15mm connections (the squarish one) last week from a member on NissanSilvia.com (see next post for pics) and a new 3" MetalCat Catalytic Converter from shy180 (JustSR). Flanges need to be welded up, but we'll wait until the exhaust is up and attached before we do that to make sure we get the exhaust as high as possible.
- Box
- Logo
- Stange Numbers that mean something 1
- Stange Numbers that mean something 2
Hoping to get into the workshop mid week and complete the fitting up of the rear end and possibly move onto the front which I now have all the parts for woohoo! Time to hit the accelerator on the project methinks.
Cheers
Brendan
Monday, 4 September 2006 | | Categories: Engine, General, Suspension
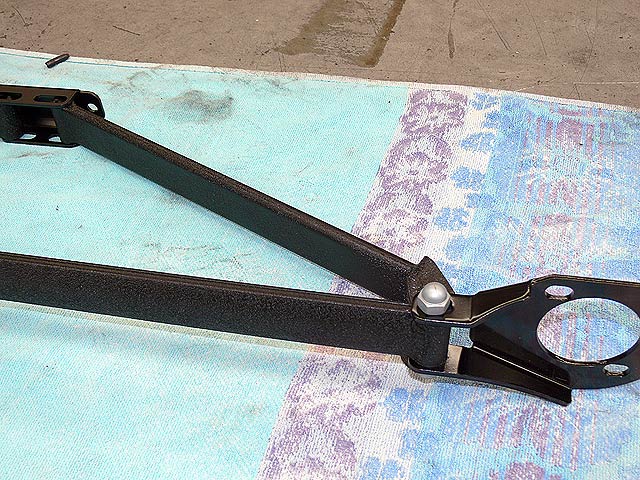
I went in on Saturday with a view to get the electroplating kit setup but after reading through the manual, I still need a few bits and pieces, so it'll have to wait a bit. In the meantime, I had some bits that I needed to paint anyway. These being the Cusco OST brace (to match the rest) and the Sard 'Fuel Collector' (fuel surge tank). So after a little pit of prep work, the bars were painted in VHT Black Wrinkle paint and the bracket in Semi-gloss black.
- One brace sanded ready for paint
- Dummy Placement of the OST brace under the rear brace
- Close up of bottom plate (originally cusco blue)
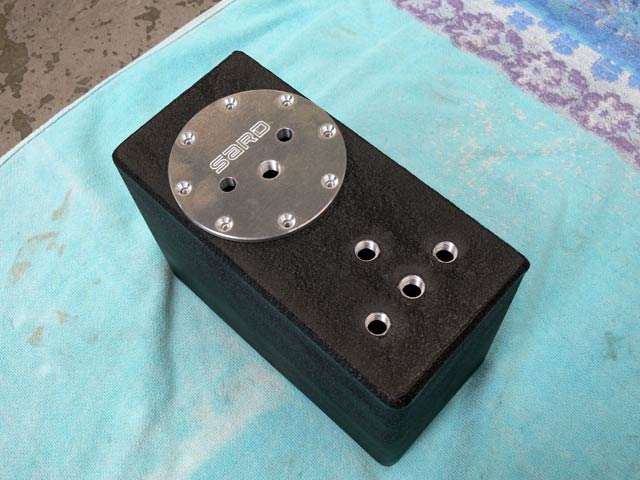
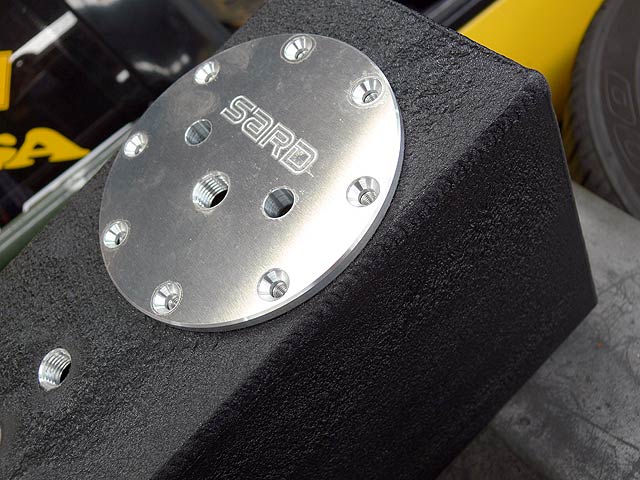
It was then time to paint the surge tank in Black Wrinkle too. With the main hole masked up so the o-ring can still make a good seal and the input/output points stuffed with material, it was given its coating. It's not perfect, but with the 'Sard' engraved lid on, it looks tops. This will have some tabs welded on (which I really should have done before I painted it) and then bolted to the floor of the boot.
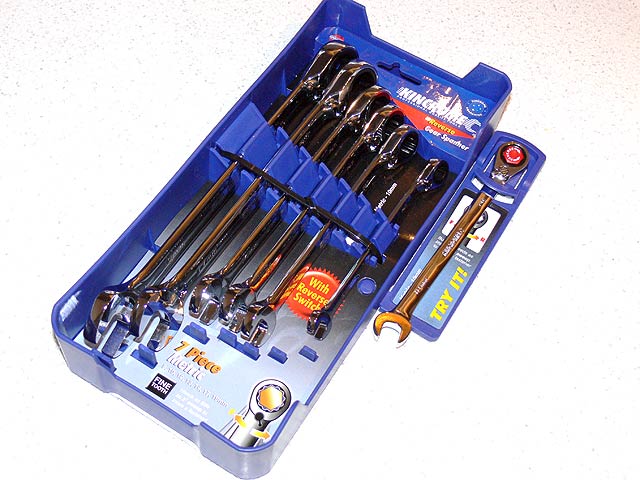
And finally I bought myself a present on Sunday. Using a gift voucher I got for my birthday back in March, I went down to Bunnings and grabbed a set of spanners, namely Kincrome 7pce (Metric) Gear Spanners (8mm, 10mm, 12mm, 14mm, 15mm, 17mm, 19mm). These should replace my cheapo ones quite nicely and reduce time in doing things up considerably.
Cheers
Brendan
Wednesday, 2 August 2006 | | Categories: Engine
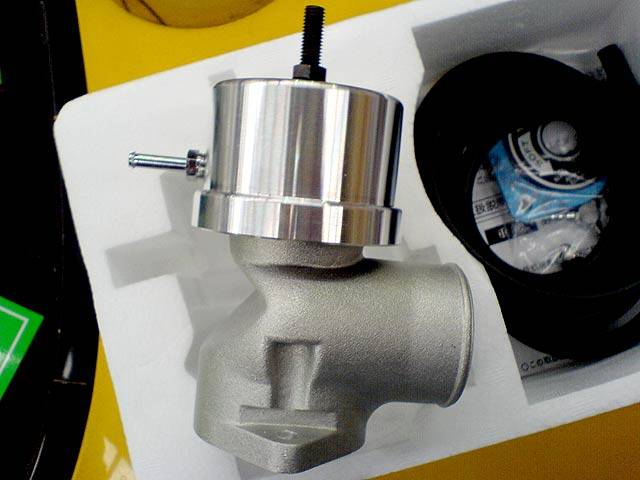
Went and grabbed my new GReddy Type-R Blow-off Valve (Standard Spring) from Jeff's office yesterday and took a few pics. This is one of the largest blow-off valves on the market and comes in two configurations, the first with what they call a standard spring and the other with a 'race' spring. Here's an excerpt from a site I found with info on the two:
GReddy's Type R Blow Off Valve (BOV) is a simple, yet powerful design. The GReddy Type R Blow Off Valve is made from Billet and Cast Aluminum. The GReddy Type R Blow Off Valve uses an oversized 47mm Housing that is Intended for Engines that produce more than 400 horsepower and over 12lbs (0.82bar) of Boost. You can adjust the Pressure Relief by simply turning the knob on the Top. The Stock Spring Type R Blow Off Valve (BOV) Holds up to 18lbs (1.24bar) of Boost. If your Turbo Runs Boost levels from 16lbs (1.1bar) up, you can purchase the GReddy Stiff Spring Type R Blow Off Valve. You will need to purchase a Steel or Aluminum BOV Mounting Flange to Properly Install The GReddy Type R Universal Kit. (Thanks to RacingWorks.com)
As I said I took a few pics so here they are:
- GReddy Type-R BOV (Side)
- GReddy Type-R BOV (Piston)
- GReddy Type-R BOV (Parts)
- GReddy Type-R BOV (Box)
From the size of it, a lot of people (as did I) mistake it for an external turbo wastegate - but I assure you this is a blow-off valve. We'll be mounting it on the passenger side of the intercooler where it will be plumbed back into the inlet just after the airflow meter (AFM - if I do end up with one) and the intake on the compressor housing. This will hopefully reduce the amount of noise from it as I'm not a fan of the psssshhht. Should generate more of a low wooosh sound similar to that of stock GT-R blow-off valves when you change from airbox to pod filters.
Apologise for the slow movement, but with only 3hrs per week to work on it, there's not a great deal I can get done - especially when there's parts that need prep before refit.
Cheers
Brendan
Thursday, 22 June 2006 | | Categories: Brakes, Engine, Driveline, Paint
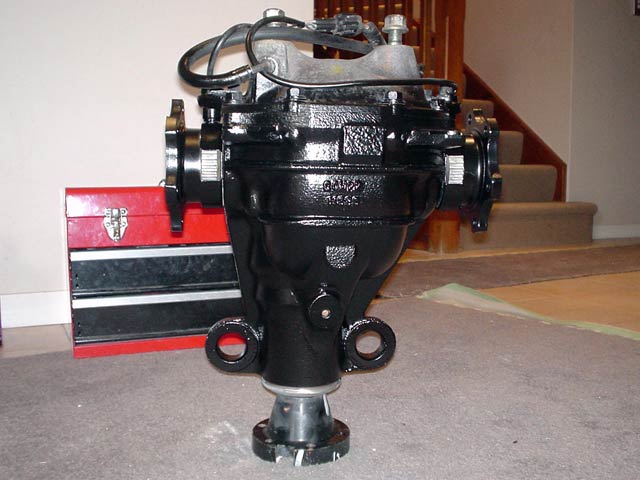
A couple of weeks ago I had to remove a diff for the project from a subframe. This item was from an R33 Skyline GT-R and is a Viscous LSD. Unfortunately it was at the back of the workshop under another two fully loaded subframes. It took a good 30 minutes just to move the one I wanted into a clear area and another hour to remove the differential and half-shafts from the subframe...ugh! I hurt myself in a number of ways while doing this. The reason for going the GT-R diff route rather than a mechanical is that this will be daily and 'grip' driving fun car, not an all out 'drifter', and secondly, I'm running short of funds to purchase a $1500 diff - there's other more important stuff to still get yet.
Once I got the diff and half-shafts home, it was time for a quick de-rust of the diff housing before a rust inhibitor primer and a few coats of the satin black. Looks good too. The rear cover will be replaced with a prepped and painted S13 Silvia one, and the front yoke will be changed to suit the driveshaft. As for the half-shafts, there wasn't so much rust as there was baked-on grease covering the boots. I had a quick go with the prepsol and discovered that with a bit of elbow grease, removal of the nasty grease coating resulted in a new looking boot. Took about 45mins for each half-shaft but the result was worth it, a quick mask and paint and the half shafts were done. At the same time as doing these, I also cleaned and painted up the drive shaft. It's looking pretty schmick, but for the life of my I can't find any photos.
- GT-R Differential Top
- GT-R Differential Bottom
- GT-R Half Shafts
- GT-R Half Shafts Boot closeup
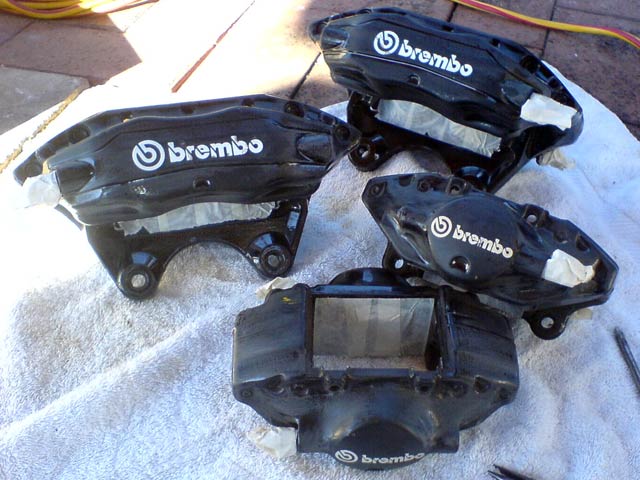
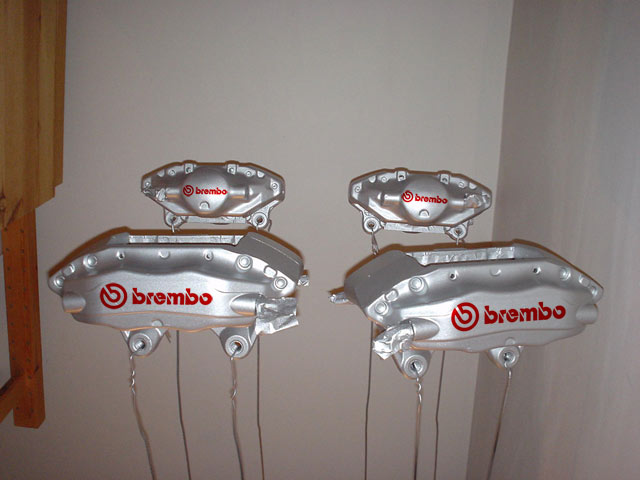
Now another list on the prep list were the Brembos. These are items I kept from the R32 Skyline GT-R that I wrote off a couple of years ago now. They were in top condition and once I decided on colour scheme, it was time for a quick clean and mask followed by 3 coats of the Silver base coat (using VHT Caliper - Cast Aluminium paint). I've now masked up for the new logos to be painted in Red and finally I'll run another 3 coats of the new VHT Clear Gloss Caliper Paint to make it nice and easy to clean the brakes after the hard yards.
- Brembos Prepped and Ready for Paint
- Front Brembo - VHT Cast Aluminium base coat
- Rear Brembo - VHT Cast Aluminium base coat
- All Brembo - hanging in the cupboard
- Front Brembo - Logo Mask
- Rear Brembo - Logo Mask
I couldn't help myself and wait another day to paint the red logo, so have done up a quick and dirty mockup in Photoshop.
Onto another item now. I originally had a China Trust 'Copy' Sump installed on my engine, but after just sitting there for quite a few months, there's evidence of oil leaking. As such, I decided to purchase a genuine Trust/GReddy Oil Pan/Sump. Paid $510 for this from Tanghy on SilviaWA new (thanks Andrew).
- Trust Sump (Top)
- Trust Sump (Bottom)
- Trust Sump (Parts)
Will post up a shot of the Brembo's once finished (like you knew I would anyway).
Cheers
Brendan
Thursday, 1 June 2006 | | Categories: Engine
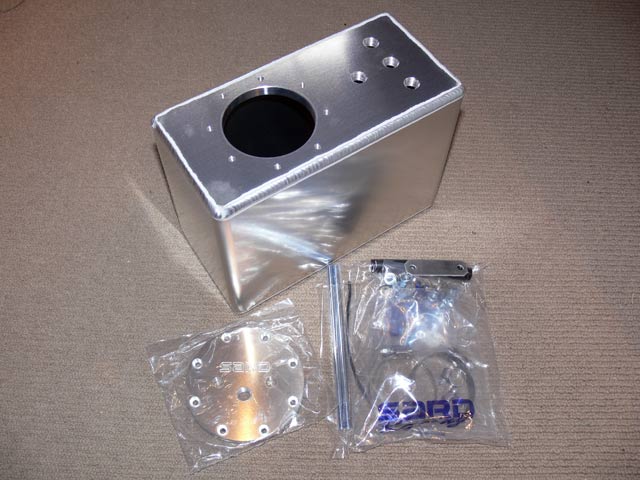
I was having a nice little sleep in this morning (which is past 7am for parents), with my baby boy curled up next to me when the kids come racing up the stairs saying there's a package being delivered. Damn I wish they wouldn't come so early. But, low and behold, the Austpost man had a lovely little box direct from Japan for me. The Sard Fuel Collector (Single Pump version) had arrived. I ordered this about a week ago through Takakaira.com and expected a delay on shipping when they mentioned a June 6 dispatch date. And I'd also been told by a local supplier that it'd be two months before they could get one in for me. So I was pleasantly surprised when I logged onto takakaira and it had shipped out on Saturday. Checked it last night and it was in the Perth dispatch centre. I love tracking stuff across the world, it's so cool.
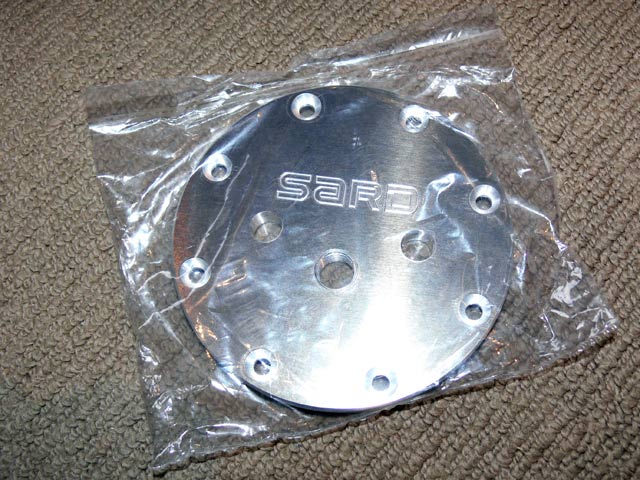
Anyway, for those not sure about what this does here's a quick run down. Sometimes under hard cornering, your stock fuel pump may end up sucking air as the fuel in the tank moves to the opposite side to the pickup, this can be detrimental to the health of a good engine, especially if caning it. So, what the Fuel Collector or Surge Tank does, is provides a small insurance policy against the main pump running out of fuel. In this case, a lift pump will sit in the fuel tank and provide fuel to the collector - keeping it as full as it can for as long as it can (it has a return line to the tank). Then, a high-flow pump is mounted in the Fuel Collector where it will have a constant supply of fuel to send to the engine. Most surge tank setups mount the hi-flow pump external to the surge tank itself - but this generates quite a bit of noise, and licensing don't like it a lot, thus the reason for going for this setup. Shipped to my door, this cost $330 and as you can see it's a nice bit of kit. Just need to try and get black fittings now to replace the blue ones 
Cheers
Brendan
Tuesday, 9 May 2006 | | Categories: Engine, Exterior, Driveline, Paint
Yeah, I know, lame title, but it's hard to keep coming up with new witty titles all the time 
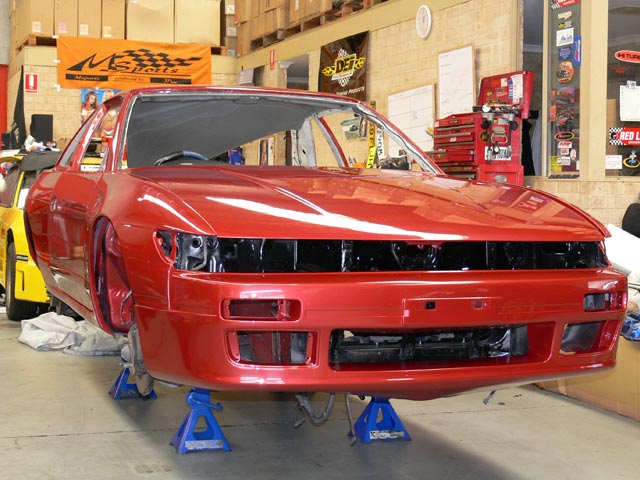
Well after the unfortunate failure of the SD (memory) card in my camera on Saturday, I got another on Monday and scooted out to C-Red to get some replacement pics. It really feels like I'm getting somewhere now, with attention turning to the underside/chassis. Enjoy these pics:
- Front View
- Front View (driver side)
- Front Quarter 1 (driver side)
- Front Quarter 2 (driver side)
- Side View 1 (driver side)
- Side View 2 (driver side)
- Rear View
- Rear View (passenger side)
- Rear Quarter (passenger side)
- Rear Quarter (driver side)
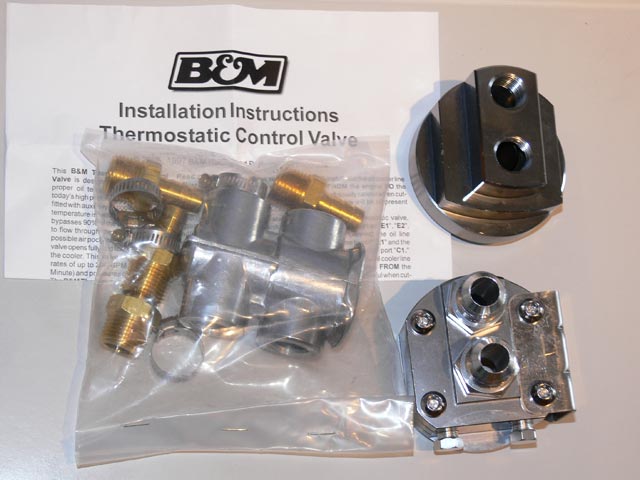
Next up is the arrival of my B&M; Inline Oil Thermostat (in the plastic bag), which I purchased from 'spandex' (who now has a website of his own as well - www.midnightmods.com.au) on the NissanSilvia.com forums (highly recommend the great service you'll get). This will make up along with the oil filter sandwich plates and the remote oil filter mount, the main part of my oil cooler setup. Still to get will be the oil cooler core which will probably be a top quality Serco unit from Go Gear in Mt Hawthorn. Once it's all mounted, I'll get the Earls lines made up to suit again with the Black connectors rather than the standard blue and red ones.
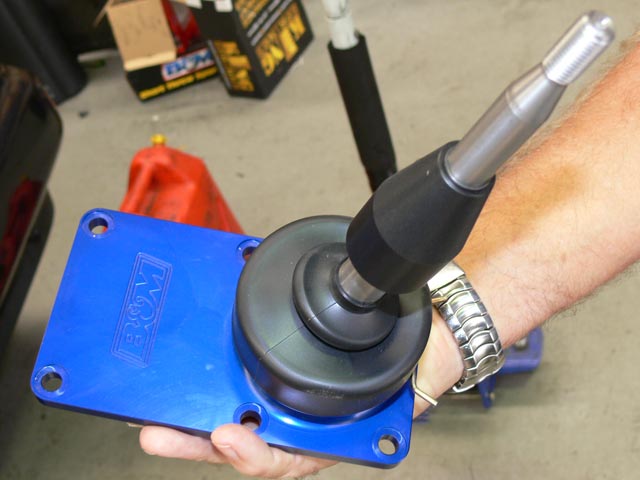
Another item to arrive recently through C-Red was this B&M; Short Shifter for the S13 gearbox. This will reduce the throw required on gear changes, making way for quicker times on the track when needed. This will mount up on the gearbox which has been resprayed, but may be powder coated instead now.
- B&M; Short Shifter for S13 (top)
- B&M; Short Shifter for S13 (bottom)
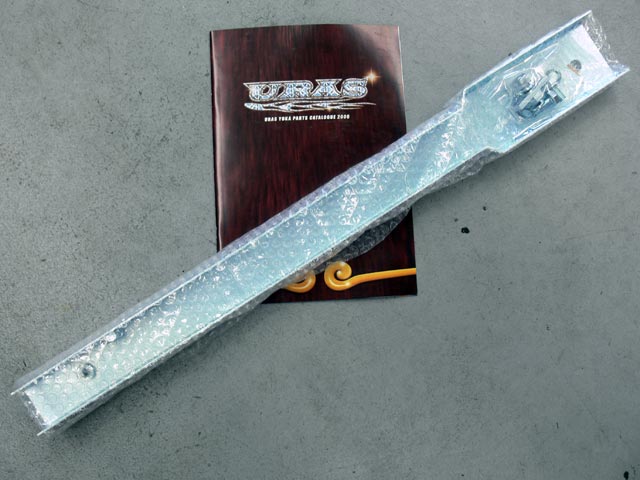
And finally, I received my new URAS S13 Chassis Rail from Japan. I ordered this through 'BT-Revolution' on the NissanSilvia.com forums and again I recommend this trader as I was taken care of very well. Now, why do I need a chassis rail, well if you've ever peeked under the S13, you notice that the passenger side chassis rail doesn't run all the way to the rear before supporting the rear sub-frame. Well this item bolts up and completes the missing rail, increasing chassis rigidity. For the rest of the chassis, I already have the Cusco strut tower bars, Zenith A-Pillar braces and the Zenith rear boot brace, I'm still looking into tying parts of the gearbox tunnel together along with a front castor rod chassis brace of some sort (either small brace or Nismo Power Brace).
Well hope you enjoyed this Mega May update, should be accelerating the amount being done to the car now that it's back in my possession (so to speak).
Cheers
Brendan
(aka. Grandpa [SWA], Sillbeer [NS] or VSPEC32 [SAU])


