Category: Engine
Thursday, 26 May 2005 | | Categories: Engine

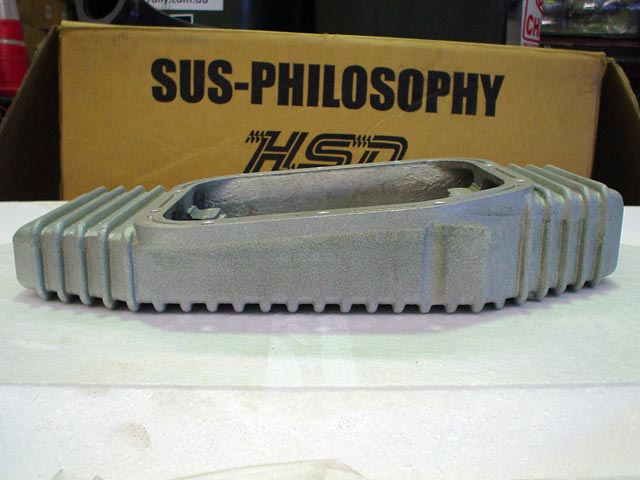
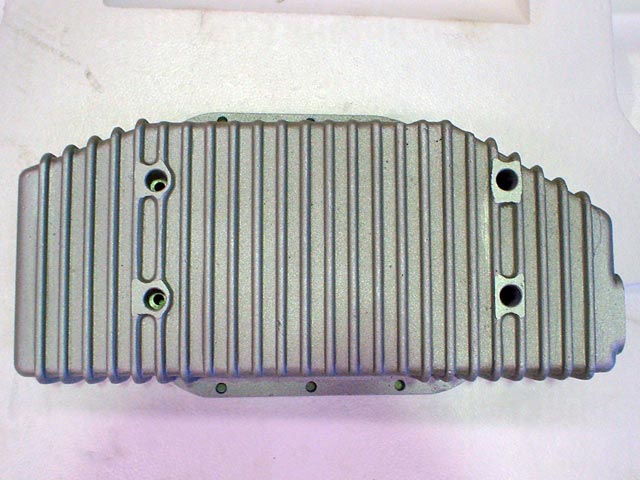
Another batch of bits and pieces have come along in the last month or so. These include a Lightweight Pulley Kit, Cusco Brake Stopper (used) and Trust 'Style' Oil Sump. The Lightweight Pulley Kit is supposedly there to reduce moving mass on the engine, but the GFB Lightweight Crank Pulley should do more than all these three pulleys combined. The Cusco Brake Stopper I found and picked up for $50 in used condition, just needs a respray and all good. It's purpose is to reduce the amount of flex in the firewall and braking ancillaries under hard braking conditions (which can only be a good thing). And finally the Trust 'Style' oil sump. It's not too bad, but the castings could have been done better. It's been given a good scrub and baffles fitted. This sump gives greater oil capacity to the lacking SR20 engine and also has baffles that are used to keep the oil where it should under lateral movement - ie. under the oil pickup (you don't want oil starvation in any engine).
Here's some pics for your edification:
- Lightweight Pulley Kit
- Cusco Brake Stopper
- Trust 'Style' Sump (Front)
- Trust 'Style' Sump (Back)
- Trust 'Style' Sump (Top)
- Trust 'Style' Sump (Bottom)
The pulley kit and sump was supplied through C-Red and the Cusco Brake Stopper through John at ImportBitz.com.au (quick and pain free service).
Cheers
Brendan
Thursday, 26 May 2005 | | Categories: Engine

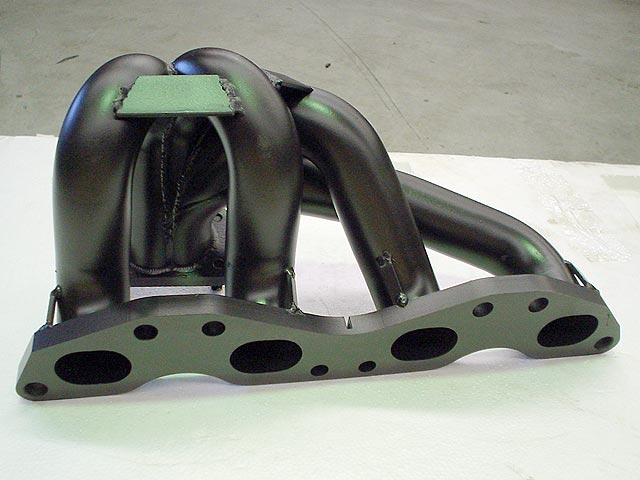
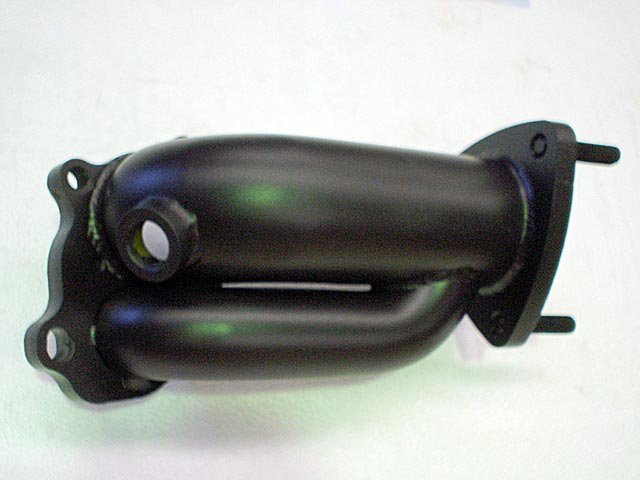
To help with heat management under the bonnet and assist with exhaust gas scavenging from the cylinders, I've had all the exhaust components heat coated. This includes the HKS 'Style' Manifold, HKS GT-RS Exhaust Turbine Housing, HKS Dump Pipe and HKS Front Pipe. As well as the normal advantages, it also looks clean and simple which is the theme I'm aiming for under the bonnet. When I had these parts done on my GT-R, the heat difference on that side was quite significant from an un-scientific hand test point of view.
As usual, here's some pics of the components:
- HKS 'Style' Manifold
- HKS 'Style' Manifold (other side)
- HKS GT-RS Exhaust Turbine Housing
- HKS Dump Pipe
- HKS Front Pipe
All these items were coated through Lyndon at Techline Coatings WA (0500 899 988). They're a Competition Coatings applier and have done a great job. Thanks Lyndon.
Cheers
Brendan
Friday, 29 April 2005 | | Categories: Engine

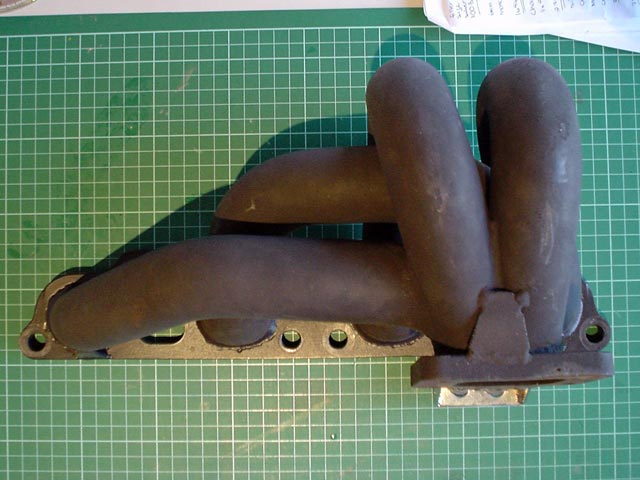
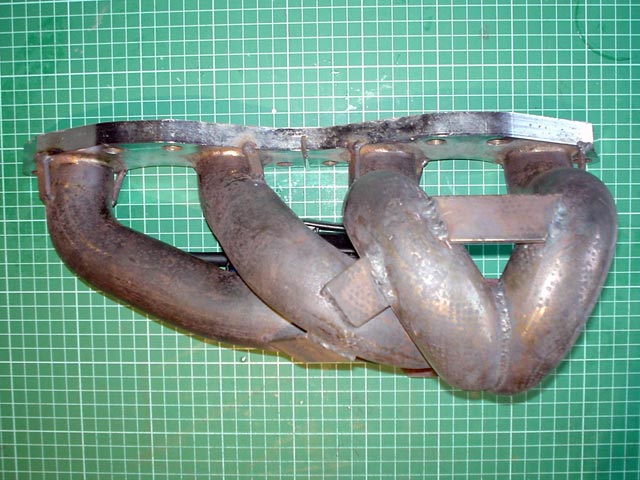
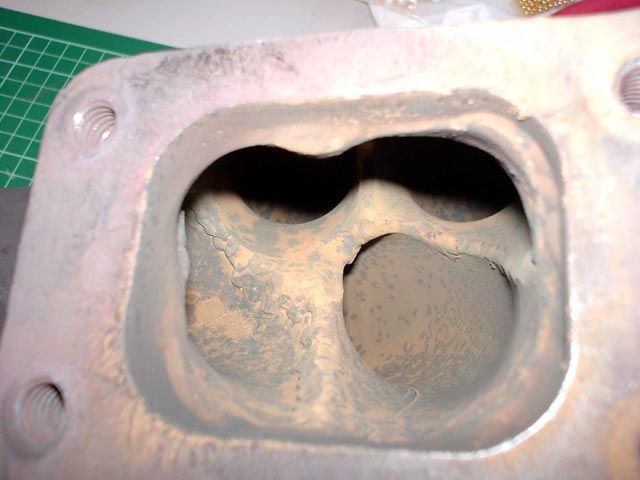
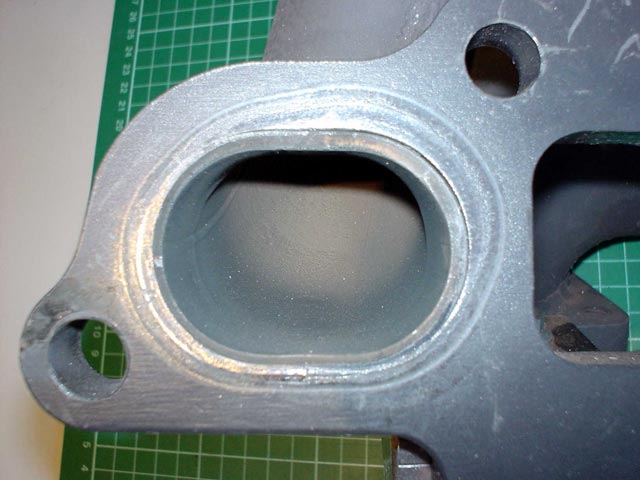
Recently saw the chance to grab a different exhaust manifold from the china copy that I already had. Bought it as an unknown japanese brand as unlike all the china copies, it hasn't been mirror polished (not that that really means anything). I've felt the the joining of the first runner to the collector in the china copy I have is a little on the severe side, coming in at almost 90deg. When I saw this japanese one, it immediately looked better, and also different too as the runners are lined up to the collector as opposed to being in a quadrant (square) type collector.
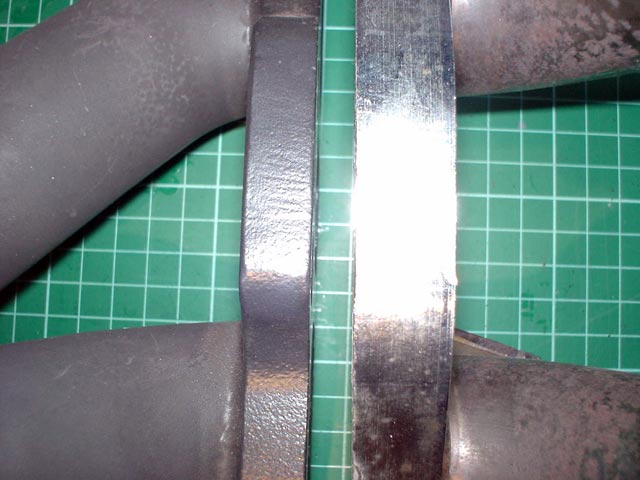
Anyway, here are a few pics of the differences between the two. I have noticed that a few of the china copies come out now are getting better - but the price of this 2nd hand was only $230 so I can't complain. I'll take to C-Red and see what they say about its likely strength as it has minimal bracing. Note that the china copy looks cleaner at this point because it's been ceramically coated. This will be done also to the Jap one, and may also consider cryogenically treating it to give it some extra strength.
Pics of the SR20DET manifolds:
- Side View Jap | China Copy
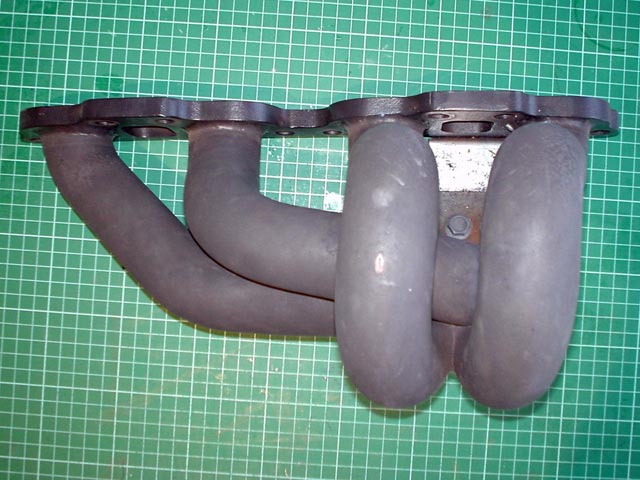
- Top View Jap | China Copy
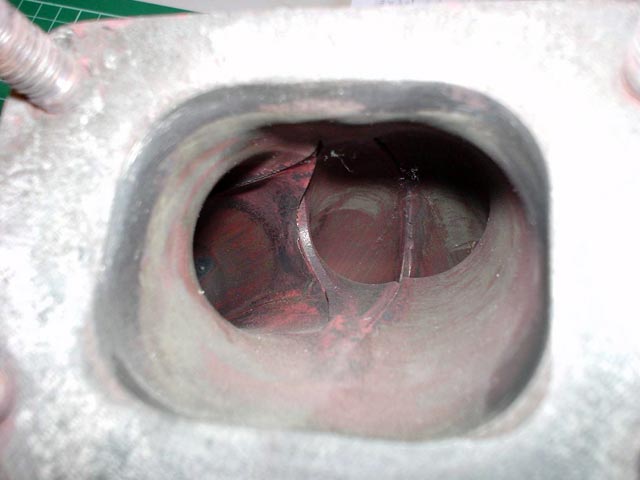
- Inside Collector Jap | China Copy
- Mounting Plate Jap | China Copy
- Inside Runner Jap | China Copy
- Thickness Difference
If anyone has any comment, or recognises the manifold and it who it was possibly made by, please let me know.
Cheers
Brendan
Tuesday, 19 April 2005 | | Categories: Engine

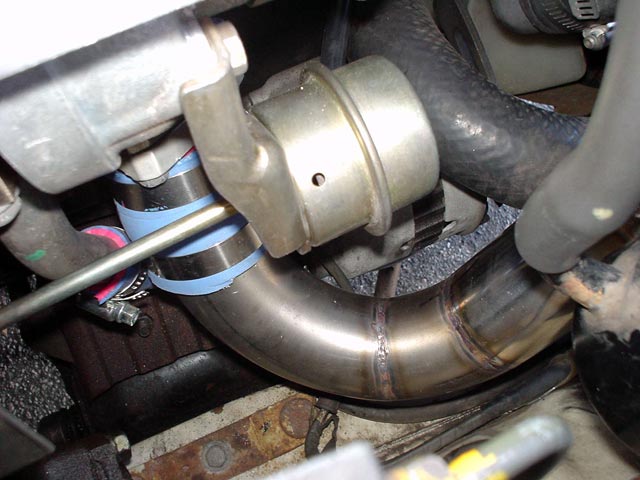
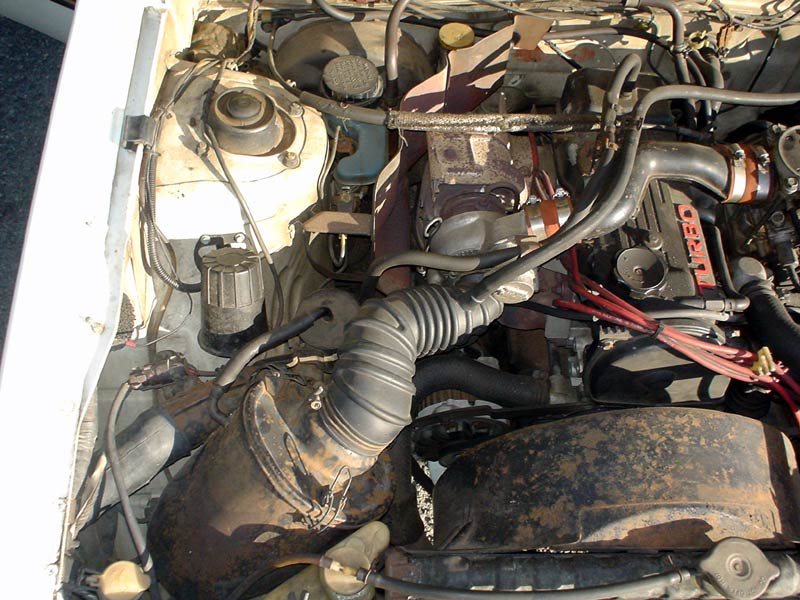
Well, after a couple of days on the T25G I'm very happy with the results of changing the turbo over from the Mitsubishi TC05-12A to the Garrett (Nissan) T25G off my old Silvia on the 4G63B you see here. There were a couple of problems with correct vacuum lines and having the standard SR20DET BOV venting to atmosphere, but once the BOV was 'plumbbacked' and Roy from C-Red sorted out the vacuum lines, all was running much better. Unfortunately I can't screw too much boost in due to a detonation problem, and the boost cut that the standard ECU has (50% injector duty cycle).
Next I'll be getting the vacuum advance sorted out and then look into how I can change the fuel and stop the boost cut. We were going to be intercooling it but couldn't find an easy route to the front, but we'll be looking at moving the washer bottle and overflow bottle soon which may give us access through to the front area. Unfortunately, unlike the Starion, there's no room to go around the sides of the radiator.
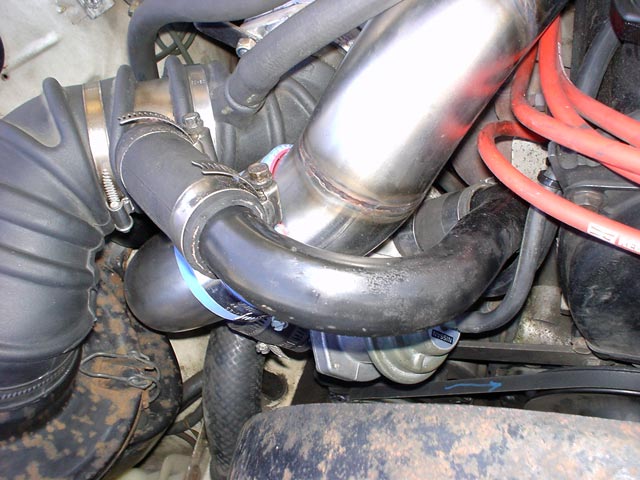
Pics of the completed conversion:
-
Overview (from top)-
Garrett T25G-
Garrett T25G-
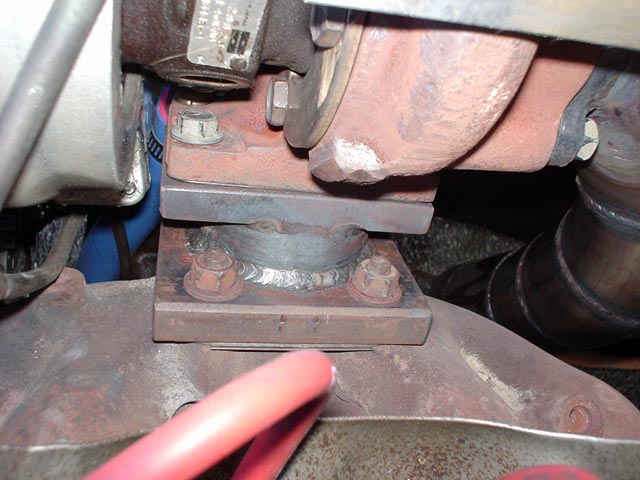
T25/T28 Adaptor Plate-
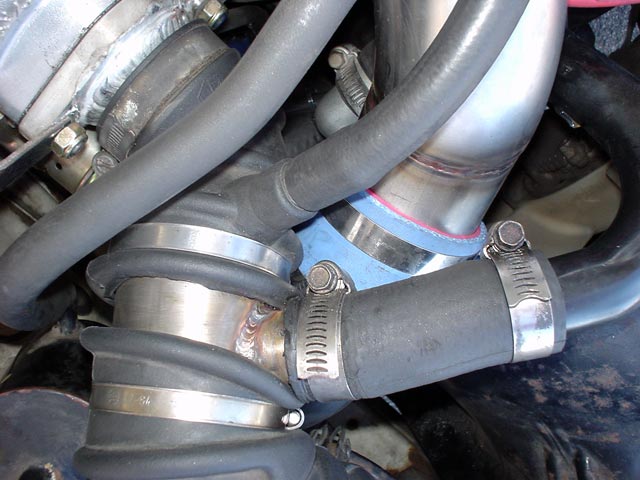
Standard Internal Wastegate Actuator-
Standard S13 SR20DET Blow-off Valve-
BOV Return Pipe (uses part of an R33 Skyline return pipe)
-
BOV Feed adapted into Intake Hose (I cringed when he cut this - they're hard to get hold of these days in good condition)
Of course it will never be 100% complete, but she goes a little better and sounds better now with the soft woosh of the BOV between gears. I have a small feeling that once the vacuum advance has been sorted out, I might be able to get a bit more out of her before hitting boost cut.
I also suspect some of you are asking yourselves why? Well, at first I thought the old TC05 was on its way out because I thought he compressor was banging against the housing - I now know the sound was the engine pinging its tits off! But the T25G turbo from my old
Silvia I once owned and cost me all of $200. It's bigger than the TC05 too and in relatively better condition to boot. The cost of the conversion was more my time as I had a contra deal already setup with Wayne & Irene at Embleton Engineering in Myaree. As you can see, a top rate job was done. It will also allow me to use cheap T28 flanged turbos in the future - which reminds me I have that HKS GT-RS I should give a go for Drag Combat this weekend ; )
Cheers
Brendan
Monday, 11 April 2005 | | Categories: Engine
Yeah, I know, not another post on the damn Sigma - but shit happens.
Well I dropped it off this morning to Embleton Engineering for the turbo swap. Read down a couple of posts to see what's happening. Should be there for 2-3 days getting the work done, and left a little standard Silvia/180SX intercooler in the boot hinting that if they have time, to try and fit that up too : )
While I was surfing the
Austarion Forums over the weekend, I came across some instructions for modifying the gearstick for a shorter shift, so I've emailed the instructions to Wayne hoping that he might be able to accommodate that modification at the same time.
Will report back later in the week to tell you all about it.
Cheers
Brendan
Friday, 1 April 2005 | | Categories: Engine
I have added a permanent link to the right side white box that will give access to the main 'plan' for the car. Enjoy.
Friday, 25 March 2005 | | Categories: Engine

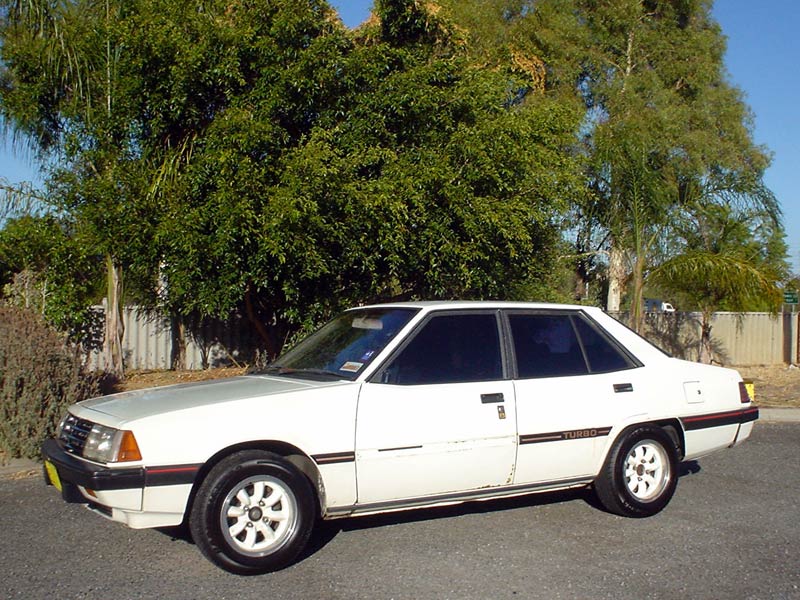
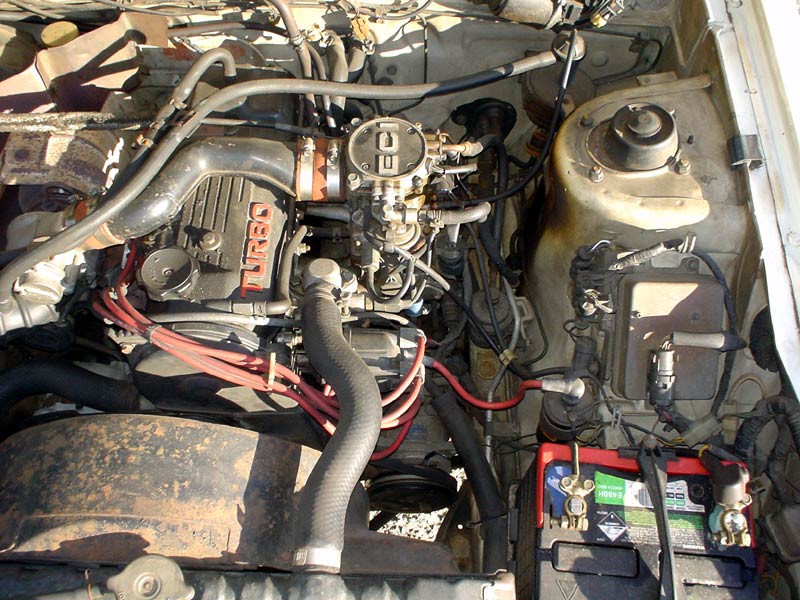
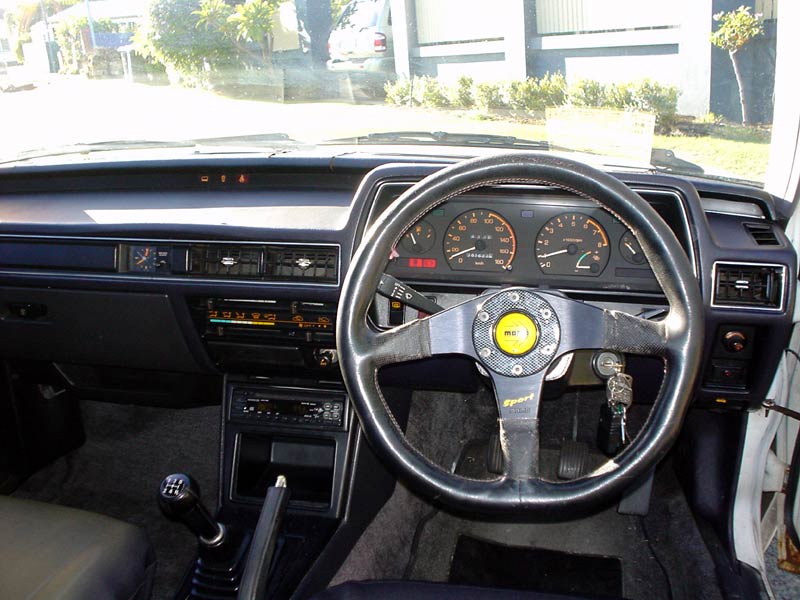
As the Sillbeer project progresses, my daily transport is known to many as the Sigma Turbo. In actual fact it's 1984 Mitsubishi Galant Turbo. It runs basically the same engine and driveline package as the Starion, so quite a bit of information I learn of the Austarion forums is handy.
Pics of the Battle Sigma:
-
Front-
Side-
Rear-
Engine 1 (note tiny turbo)
-
Engine 2-
InteriorAnyway, the turbo that is currently on it - a Mitsubishi TC05-12A is very very small. In fact I think it probably came off a 1.8L Cordia Turbo. Boost response is strong between 2000-4000rpm, thereafter you may as well change gear. So I got to thinking about changing over to something a little more common. As it happened, the guy who bought my old black Silvia was upgrading his turbo and was selling the original - which I knew was still in pretty good condition. So I bought it for a good price and it is still in good condition. The turbo is a T25G - usually found on the Nissan S13 SR20DET Silvia's and 180SX. Compressor - 50 trim T3 wheel with 0.8A/R T25 diffuser Turbine - 1.77" wheel (I think the trim is 62), 0.64 A/R T25 housing. These usually support about 220hp. So it should make a nice upgrade.
Another plus about this conversion is that happened to have done some work recently for Embleton Engineering - being a new logo design and more recently a bunch of stickers. So with this in mind, I went and spoke with them, delivered the stickers and have managed to work out a contra deal to cover the cost of converting to the new turbo...woohoo!
Lets just hope nothing bad happens once I fit up the turbo - mwuahahahahaha.
Cheers
Brendan
Wednesday, 23 March 2005 | | Categories: Engine

Was my birthday recently, so as a present to myself (and using cash I got as presents), I bought myself a new steering wheel so I could play Gran Turismo 4 with a little more realism. The unit I got was designed to work with GT4 and is the Logitech Driving Force Pro force feedback wheel. It's a pretty nice wheel too, giving you much more realism and feel than a Dual Shock controller. While I got the wheel, I walked past this racing seat that had in store at Harvey Normans, so I bought that too to make it more real. When I got it home, I played for a few hours and soon realised the standard seat sucked ass big time, I needed about 4 cushions strategically place to get a decent position. Then I remembered that I had a couple of nice Recaro's that aren't likely to be used for quite a few weeks just yet. So I went down to C-Red with the seat frame and Recaro in hand and bribed Roy to fit the seat to the frame. With the use of 4 small ally tags and some nuts and bolts, I now have what some would believe as a very nice setup.
I tried it out on the weekend just gone, and yes it's bloody great. The seat holds you in nice and tight, and you don't get the feeling you've been sitting on a concrete slab for 6hrs.
Cheers
Brendan
Wednesday, 16 March 2005 | | Categories: Engine
Have just had word from Roy at C-Red that the head is now back from the machinest. While there the new exhaust valve guides were fitted along with some stiffer valve springs (Tomei Type A 7500RPM limit). The camshafts being used have a 260deg duration with 11.8mm left on both intake and exhaust side. A Tomei Rocker Arm Stopper (RAS) Kit will be fitted and the head screwed on with a Tomei 1.5mm Metal Head Gasket being used as the meat filler. Will get some pics of the setup the next time I'm in at the workshop.
It's envisaged that this setup, along with the previously mentioned ported intake and exhaust ports should make use of the rest of the setup being bolted in place.
Yay, finally some movement, although it'll have to slow for a bit while I get some cash together to get the GReddy Plenum and then have the plenum and rocker cover done up in red crackle paint (as per FJ20ET style).
Cheers
Brendan
Monday, 14 March 2005 | | Categories: Engine

Apologies for the delay between updates. There has been movement in the right direction, with the completion of the short block now taken place. All is nice and shiny (technical term used to describe a well built engine) with the bores looking very smoove. You'll notice the block as been sleeved, more because of the piston size than any performance enhancement. If anyone happens to know what type of forged piston these are, let me know. They're connected to Arias forged rods, all hanging onto the prepped and knife-edged crank.
Short block pics:
-
Just like new-
Top-
Beautiful sleeved bores-
GTi-R Oil Pump-
Bottom-
Big-ends-
Crank cradle/girdle-
SerialThe head is also almost ready to go - these pics taken just before it went off to have the guides replaced for good measure. The intake ports have been ported and now have a nice sharp edge too. Just need to get in there and give it a nice smooth finish by hand:
-
Serviced Head-
Intake PortsOver the last few months, I have been collecting various parts ready for the assembly phase. Here are a few of them:
-
HKS Stainless Steel Turbo Dump Pipe-
HKS Stainless Steel Turbo Dump Pipe-
Stainless tubular manifold (heat coated)-
Stainless tubular manifold (heat coated)-
Nismo 740cc Fuel Injectors (straight-fit)-
Sparco 90mm Deep Dish suede steering wheel-
Nissan Aero Sport ('Nismo') rear podsUnfortunately the body hasn't gone too much further since the last update, there being a delay while we wait for a parts shipment to come in from Japan. All I have repeat is that the rear
Wise wide-body guards are on.
Thanks must go to Roy, Josh, Jeff and Marc over at
C-Red for their help thus far on the project. Can't wait to get the body back to see if the QF's are going to fit ; )
Cheers
Brendan


