Category: Interior
Friday, 8 August 2008 | | Categories: Interior
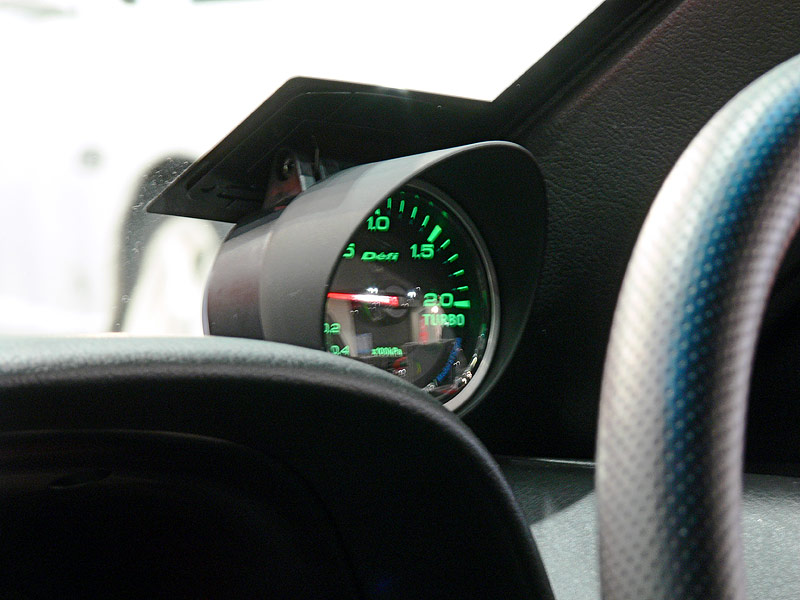
With the impending Perth Autosalon around the corner at the time, I thought it was a prime opportunity to finally get off my bum (again) and install the Defi-Link Turbo Boost Gauge.
I've had the link cable for some time that would connect from the Defi-Link Controller to the gauge, but to install it you need to remove the main gauge cluster...thus the procrastinating. Anyway, I unscrewed the various bits of trim from under the dash, steering column and cluster, and removed the main gauge cluster from it's position. Using a small cable snake I taped the Defi-Link extension to the end of it and poked it through to the glove box where the Controller is stashed. Then I removed the trim from the A-pillar and poked the other end of the extension cable up the corner of the windscreen/dashboard as I knew I would mount it somewhere there, just wasn't sure where.
Now while the gauge cluster was out, it was a good opportunity to fix the fuel gauge which has been on the piss ever since I frigged with it a few months ago. Basically I fiddled with it and it ended up going way off the dial on a full tank meaning empty was somewhere around 1/3 tank. Before I started in the morning, I stopped by the petrol station and filled right up. Then I plugged the cluster back in and turned the ignition. The needle is really just a slip fit over the spindle so with a bit a tweaking and waiting for it to normalise I had it spot on.
Back to the boost gauge. I wanted the location of it to be reasonably out of the way while being easy to read. I hand held it in a few locations such as the A-pillar and the top of the dash and none of the spots seems right. I got some feedback from Marc at C-Red and the suggestion was made to stick it to the windscreen in an upside-down position so to speak. As I was going to be sticking it to the screen using the supplied double-sided tape I thought it would be best to cut some black vinyl so the gauge cup foot wouldn't be visible from the outside. And it worked. After lining up the vinyl, marking positions to stick to I fitted the gauge holder/cup, the Single Visor (gauge hood), fed extension through to the gauge and finally pushed it all into place. I think this setup is just ideal.
From the outside, you would hardly know there's an additional gauge there. The fitting of it upside down there does not interrupt airflow coming from the side firing window demister vents, and when you look at it from the driving position you're looking straight down the barrel of the gauge...WINNER!
- View from the driver's side
- View from the passenger's side
As you can see it's really tucked away nicely which is perfect.
Cheers
Brendan
Tuesday, 2 October 2007 | | Categories: Engine, Interior, Suspension, Wheels/Tyres
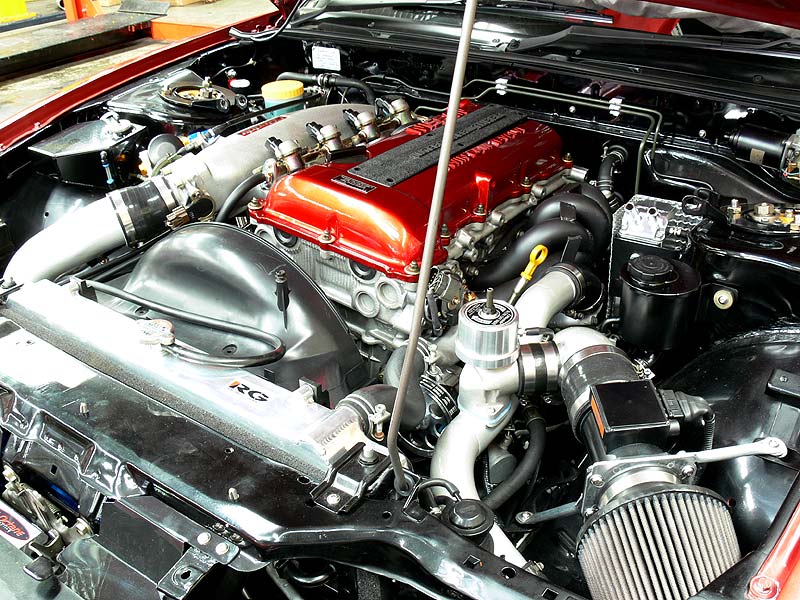
Wow, time flies...full stop. But yes, I have still been working on the car. We're currently going through some changes under the bonnet that are taking longer than expected which is causing a knock-on affect in having the car on the road. While this has been happening though, I have been continuing to do things on the car in preparation for its eventual trip over the pits. But first up, I never took photos of the engine bay while at the show which was a complete oversight on my part, so here are a few photos now:
- Engine Bay from front
- Engine Bay from driver's side
- Engine Bay from Passenger side
- Exhaust manifold detail
- GReddy Remote Oil Filter
- GReddy Oil Cooler
You may have noticed in those pics a nice shiny GReddy oil catch can (breather) sitting on the passenger side strut tower. Well this was fitted by me, using a custom mounting bracket and heat shielding that I fabricated (which I was very happy with). Final result looks reasonable clean.
- GReddy Oil Catch Can from front
- GReddy Oil Catch Can from rear
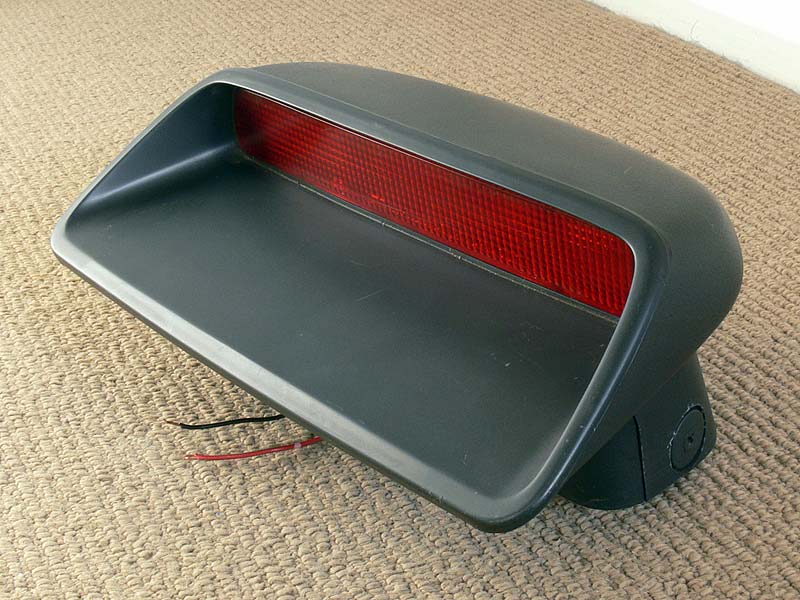
As part of the registration process, there are a number of items that needed to be addressed. The first is the rear high-mount brake light. Now I was originally going to get a Hella light from the local light store (Alanco), but remember that the S13 Silvia came out with one of the factory. As fate would have it, when I had a look on eBay, someone in the east was selling one...and after a frantic last 10sec bidding war, I came away the new owner of a genuine Nissan S13 Silvia High-mount Brake Light.
- S13 Silvia Brake Light (Front)
- S13 Silvia Brake Light (Back)
- S13 Silvia Brake Light (Side)
- S13 Silvia Brake Light (Bottom)
- S13 Silvia Brake Light (Lamp)
Now the sorta trick bit was figuring out how to mount the little bastard (note: it's not that little). After removing the rear parcel shelf (and the sub woofer), I found mounting holes on the metal shelf. Unfortunately the same couldn't be said for the wooden parcel shelf, which I went ahead and guestimated where the holes should be cut after doing a bit of measuring. Next up was figuring out how to get power to it, this is where I could kiss the Nissan engineers as they left the plug sitting on the loom that runs across the rear window. I cut the retaining tape and hey presto, all it plugged straight in. After bolting on the mounting bracket and a few backwards and forwards with the wooden parcel shelf, it was installed.
- S13 Silvia Brake Light Mounting Bracket
- S13 Silvia Brake Light Plug (Wire/Loom)
- S13 Silvia Brake Light Parcel shelf modifications
- S13 Silvia Brake Light Fitted (from inside)
- S13 Silvia Brake Light Working
While on the parcel shelf, I installed the child restraint belt brackets. Now I installed the bolt holes a few months ago, so this was a very simple job. Using the Klippan Child Restraints from Repco (I think), it was just a matter of removing the pre-cut piece in the wooden parcel shelf, a hole made in the material and bolt them in. All done in about 5 minutes, but crucial for registration and taking my 1yr boy for a spin.
- Klippan Child Restraint
- Child Restraint (fitted)
- Child Restraint (fitted)
As the car is getting registered, it will no doubt be subjected to their height test which usually equates to the car needing to be 100mm off the deck at any point under the car. After fitting up the exhaust a few weeks ago, a quick check under the car revealed it had a lot of height required to clear. At only 55mm off the deck, I needed at least another 55mm to get me in the safe zone. The procedure to do so was reasonably easy though with just a matter of taking off the bottom coilover mount and winding both sides out until it all cleared. This was done for the front too, but this consequently cancelled out some of the clearance done on the rear. I'm in two minds yet as to whether I will just put stock shocks/springs on to get the registration process over and done with. Here's a before and after shot anyway:
- Wheel height before
- Wheel height after
- Exhaust clearance after
Another reason for all these delay's is the fact that I'm also spending more time with the family, which means less time on the car...and without doubt, family comes first. I promise not to leave it so long next time (like you've never heard that before from a blogger).
Cheers
Brendan
Monday, 9 July 2007 | | Categories: Interior, Driveline, Suspension
Jeez, the pressure is really on now to get the car done. And now I'm taking a holiday! Last week was a little hectic with a lot of little things to do. Of the main things, the interior is all in (just need to bolt in the glove box once the loom's been tied away), the fuel system is finished, the mirrors are being painted and the carpets are done. The main battery line has been secured in its final resting place, the stereo installer is all set to do his magic (Daniel Jurkovic - 0408 792 466), and Tomas is scheduled to come in later in the week to refit the body kit.
So, how does the trim work look...in two words - bloody fantastical. Pete, Chris and the guys at Trimcare have done a great job, in minimal time and fuss...if you need any trim work done, please don't hesitate to go see them (Trimcare - Unit 3, 233 Bank Street, Welshpool - 9470 3381).
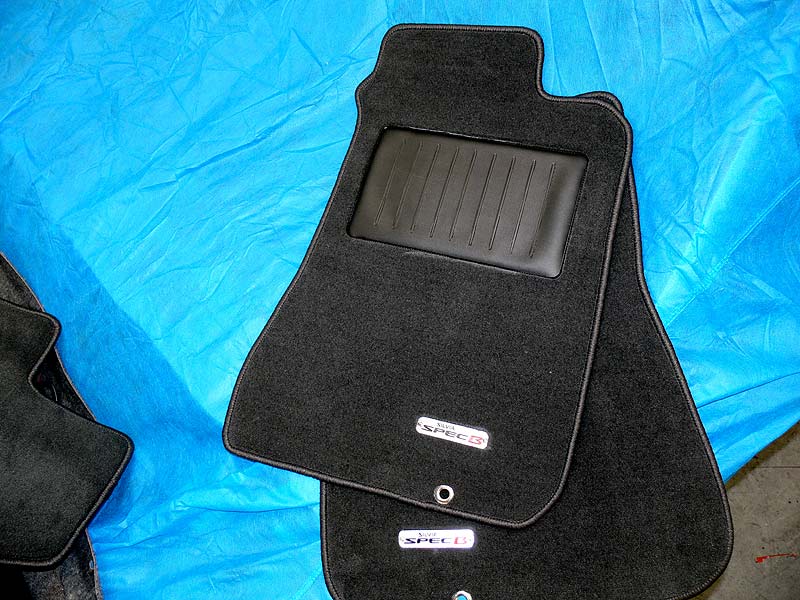
With the floor mats, they used originals as a template for the main shape and had the edges bound. For the specB badge, we mounted in the factory position, but as it wasn't as solid as the original, and the carpet is rather plush, they had to melt the fibres under the badge so it didn't bow in the middle once riveted into place.
- S13 specB Floormats
- S13 specB Floormats (closeup)
- Boot Carpet (centre)
- Boot Carpet (drivers side)
- Boot Carpet (passenger side)
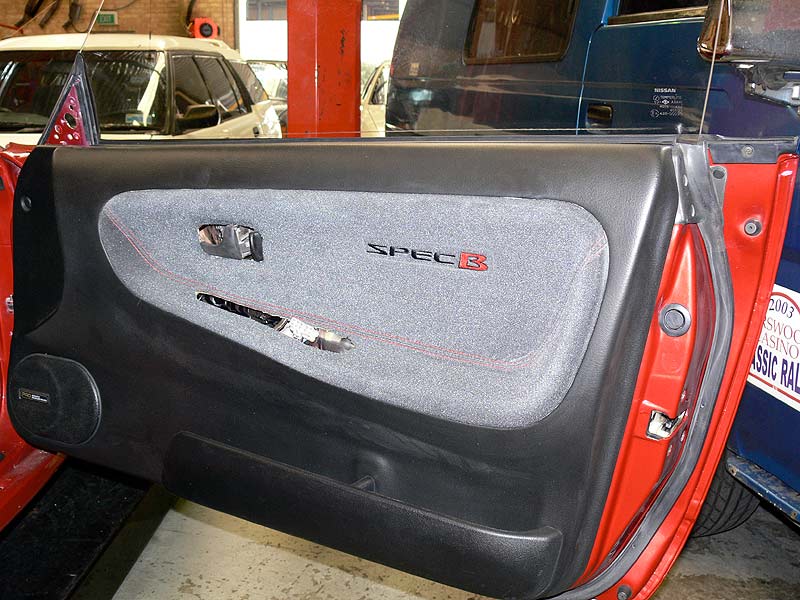
The door trims came up a treat - ignore the whitish tinge, it's chalk marks that I'm yet to clean off. The plastic trims and centre console were all sprayed back to the original black colour, and the gearboot and handbrake cover are now in place. You can also see that the centre console box lid is trimmed in the same material as the back seat, door trims and glovebox.
- Centre Console
- Dash all fitted
- Air-conditioning Controls
I tell you I had a rabbit of a time with the air-con control. Firstly the head unit I had hadn't been cleaned once in its lifetime and it took me 30mins of rubbing hard with the prepsol to get down to the shiny plastic again. Once it was all clean, it was time to fight the octopus which was the wiring. I had to go track down a fuse, and missing solenoid for the airbox - along with a bunch of running around to different cars trying to figure out what went where. I also found one of the Nissan console DIN-sized storage boxes too (woohoo).
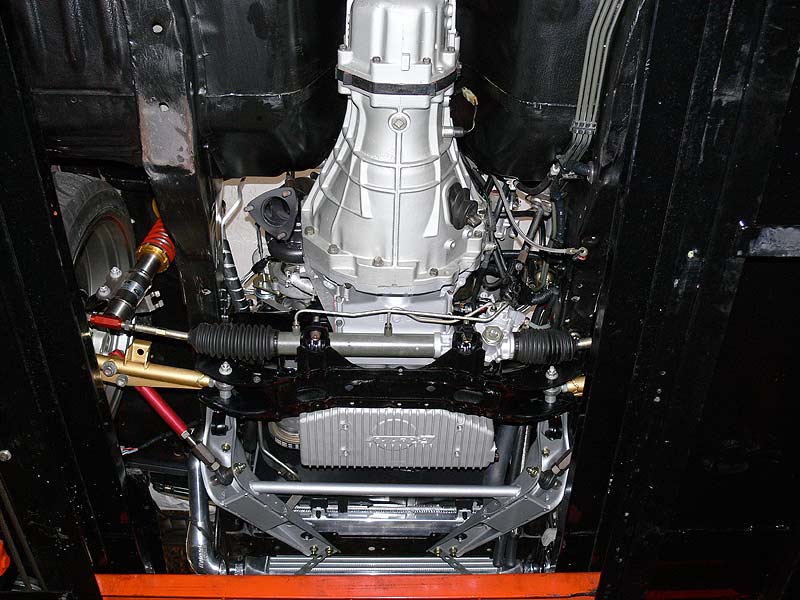
Doing all this work took place on the hoist, so while it was in the elevated position, I took a few pics of the underside for all those that haven't see it yet. Note you may see some flaking red paint in bits which is actually the hoist, not the car.
- Back of gearbox/tunnel
- Diff from the front (R33 GT-R Diff and Half-shafts)
- Diff from the back
- Rear Wheel suspension etc from the back
- Rear Wheel suspension etc from the front
- Front Wheel suspension etc from the back
Taking the weekend off as we've had a place booked down south for quite a number of months now, then next week I'm focussing only on the car to have it ready for Autosalon. Hopefully I can get one more post in before the show.
Cheers
Brendan
Wednesday, 4 July 2007 | | Categories: Interior
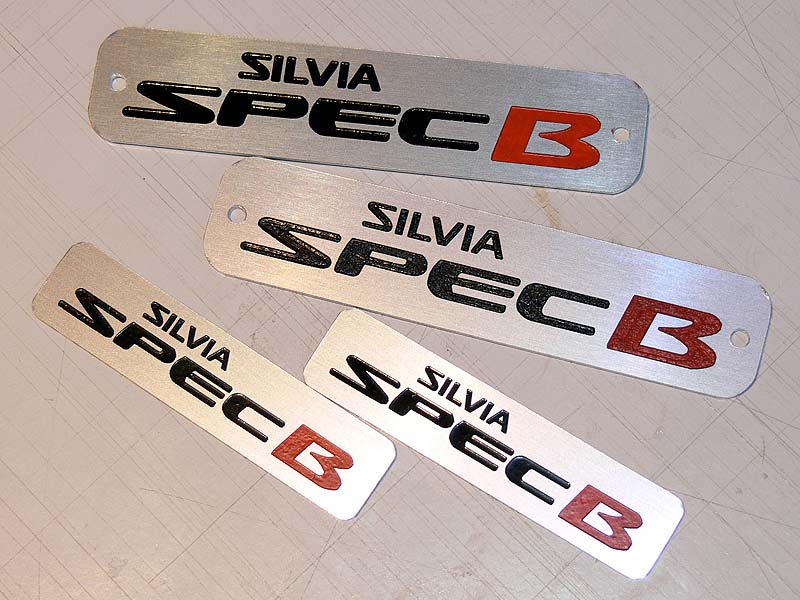
A few weeks ago I decided to take the logo application to the next level and commissioned a company call Badge-a-Minit to turn it into a plaque/emblem/badge thingy. The price was reasonable too for a custom one off piece of work. The process goes like this, the take the artwork I created (a vector file format called EPS), digitise it into a bitmap that their engraving machine can read which turns it back into vector artwork. The engraving then happens on the aluminium material - in this case branded Gravoxal. Once the engraving is done, the areas are paint filled and finally the top surface is linished back for a clean final product.
I had two different sizes made up, the larger ones will go on the new floor mats being made (fixed using rivets), and the smaller ones are yet to find a home, I think one will go on the dash somewhere, the other possibly in the engine bay. I still need to apply a final coat of clear for their protection and then they'll be ready for fitting.
I'm pretty happy really.
Cheers
Brendan
Tuesday, 3 July 2007 | | Categories: Exterior, Interior
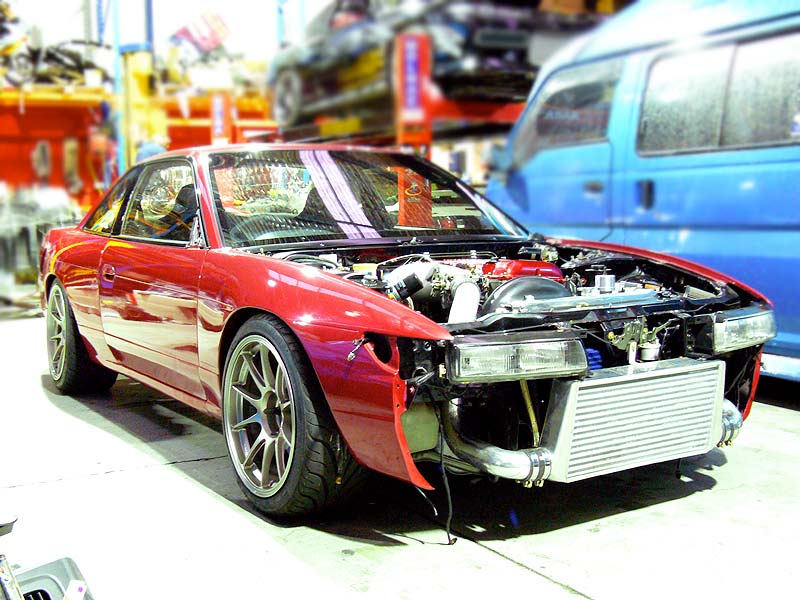
Last Friday was a big day for me. It was the day the windows were being installed...finally changing sillbeer from a shell, to a car. But before they were done, I had to do some final prep. The interior needed to be removed for one, and the last bit of Dynamat was applied to the rear parcel shelf. While the rear glass was still out, I also drilled some holes for a future harness bar that we'll mount across the parcel shelf because once the glass is fitted, the area will be too tight for a drill.
- Dynamat on rear parcel shelf
Now once the windows were fitted by the kind fellows from Wayne's Windscreens, I took some pictures to remember the moment...you can tell now it's completely changed the outlook of the car.
- Windows installed from rear
- Windows installed from above
- Windows installed from above rear
While that was all going on the last of the interior pieces were gathered together and taken down to Trimcare to be refinished. You can see from the pics that some of the pieces were painted in a marble effect paint...this just isn't my bag, so it'll be brought back to stock.
- Centre console with marble effect paint
- Interior pieces for refinishing
Now as much as I wanted to on Saturday, I had to wait the obligatory 24hrs for the window sealant to cure so I've split my weekday in the workshop this week and spent the Monday PM refitting the interior (well what I had of it anyway). This included the newly trimmed rear seats and front door panels.
- Rear Seats now in place
I even sat in the back and belted myself in to see how comfy it is. I must say the logo really works well. I also went down to Clark Rubber and picked up some nice trim for the holes over the rear strut towers where the brace comes through. The final product looks great, noting also the plastic trim now looks new.
- Rear Strut Tower trimmed and ready to go
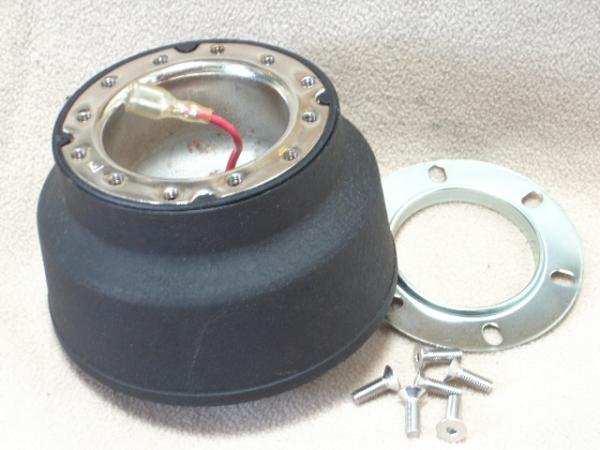
Now one thing that I've been trying to solve is the problem with the Nardi boss kit just not covering up the hole in the steering column surround. I did a bit of research and the only ones that seemed to be what I needed were from Nismo. After chasing that up and finding out they're discontinued, I turned to the Yahoo Auctions...and found quite a few of the correct design. Now whether they're genuine Nismo or not is yet to be determined, but I bid on two of them and won both so hopefully they'll be sent over asap. Oh, and I used Slidewise Imports to do all the dirty work, thanks Zac. Here's some pics of the boss kits I won:
- Nismo 'Style' Boss Kit for S13 - 1B
- Nismo 'Style' Boss Kit for S13 - 1C
- Nismo 'Style' Boss Kit for S13 - 2
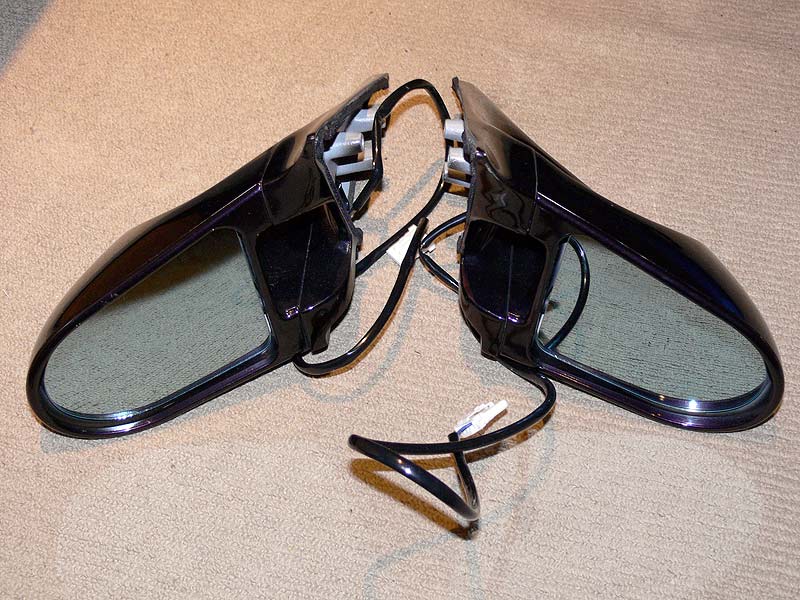
And finally on Monday I got my Ganador mirrors. Bought from someone on NS.com, they're in great condition and have been dropped off to Phil at AFM Enterprises Osborne Park to be resprayed in the correct colour:
- Ganador Mirros from Front
- Ganador Mirrors from Top
- Ganador Mirrors sail
- Ganador Mirrors plug
Only three weeks or so now until Autosalon so the race is really on to get the car completed. Yet to do are bodykit fit, fuel system completion, catch can, stereo and battery along with a myriad of small bits and pieces.
Wish me luck, going to need all of it.
Cheers
Brendan
Tuesday, 3 July 2007 | | Categories: Interior
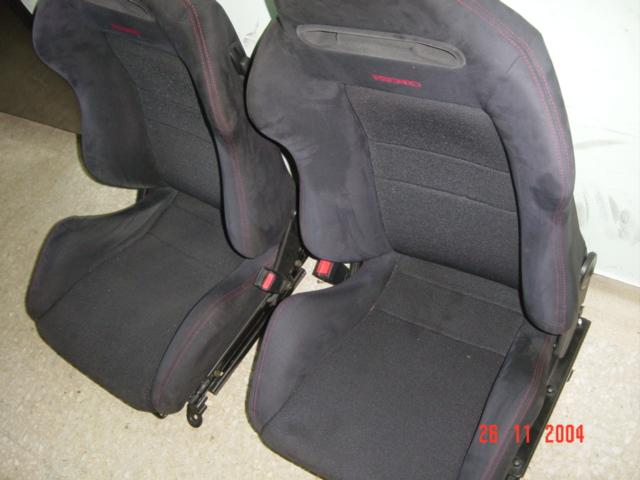
Well as I'm now using the R34 GT-R seats now, I sort of sold the Recaro's to a close friend. Unfortunately he's needing to sell them now for his own reasons. If anyone is interested (probably more people from West Coast and than east due to possible shipping costs involved), please email Clint on clinton 'at' cceg.com.au to find out more.
Cheers
BrendanI
UPDATE: They're sold.
Thursday, 28 June 2007 | | Categories: Audio, Interior, Suspension
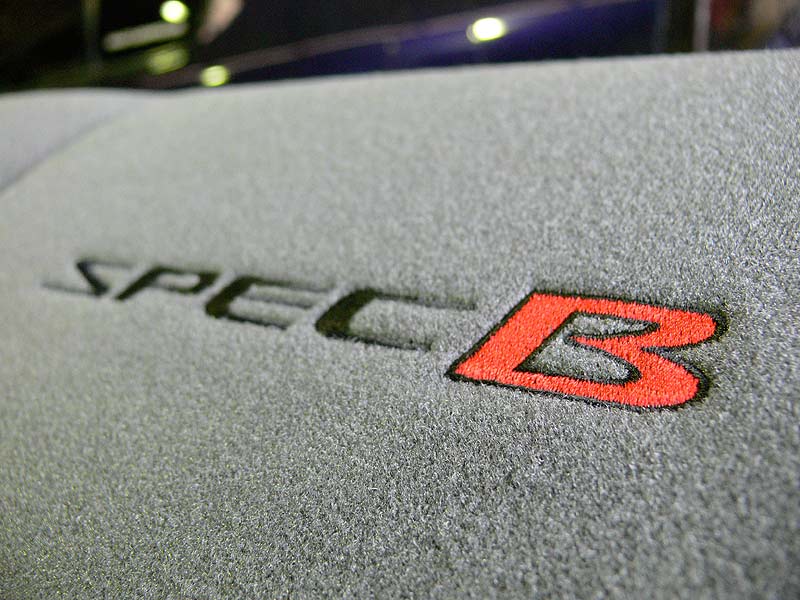
Didn't the logo come up tops! I'm extremely happy with the way the logo has come out...not to mention the trim so far. The trim is currently in the very capable hands of Chris, Peter and the team over at Trimcare in Welshpool. The rear seats have been trimmed, the vinyl on the door trim has been repaired, and the time the photos were taken, they were still to be resprayed back to factory original colour.
- Door trim insert logo
- Door trim inserts ready for fitting
- S13 Rear Seatback trimmed ready to go
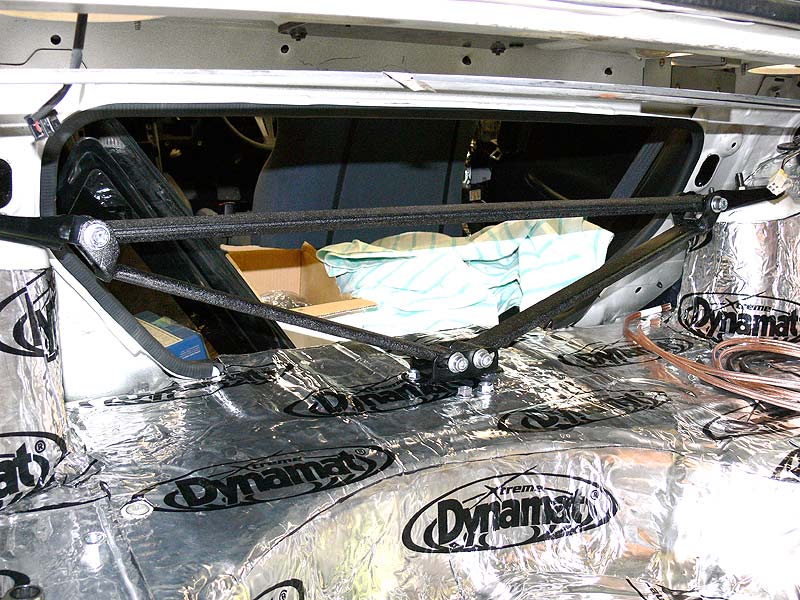
While Trimcare have been working on the cloth trim pieces, I worked on the boot - specifically the rear Cusco Strut Brace and the additional OST brace. Essentially you fit the main brace and centre the bits, then fit the triangulating braces that reach to a plate on the floor. You mark the holes on the floor, drill a nice clean guide hole using a small drill bit, then proceed to drill the main hole. Then get on your back, riggle under the back of the car (mmm, looks so clean under there), and pit the backing plate into position which is just above the differential. I also fitted up the Zenith Boot Brace which ties the ends of the chassis rails together in a similar way to the standard S15 rear boot brace does.
- Holes drilled in boot floor for bottom plate
- Zenith Rear Boot Brace
Of course all these bits will need to come out again, but finding all the bits and making sure it all fits is all part of the process.
Now the plastic trim in the boot usually covers up the top of the suspension towers, so once you fit a rear strut tower brace, it no longer fits. So the solution is to cut holes in the plastic trim so the brace and come through as well as giving enough room to adjust the coilovers damping. With this in mind, and the use of an engraving/dremel tool I set about cutting holes on an already busted set of trims. Using a tape measure and pencil I roughed out a guide to cut. I fitted a 20mm cutting wheel to the dremel and made my first cutouts, cleaning up the corners with a small 8mm diameter grinding stone. Test fitting revealed that the holes could be made smaller, so with that I measured out on the good trims and an hour or so later it was done. These boot trims were also dropped over to Trimcare so that can be refinished in the factory colour. The edges of the holes will get a clean rubber trim put around the edge.
- Suspension tower trim hole (passenger side)
- Suspension tower trim hole (driver's side)
You can see though that the original colour of the car (ie. white) is showing through the holes, so I masked up the area and used some Wurth's Matt Black paint to darken the area. Once the trims go back on, it should look need and tidy.
- Suspension tower painted (passenger side)
- Suspension tower painted (driver's side)
As the paint can was out, I quickly masked up the rear tow loop that sticks out under the rear bar and painted that too. It was looking rather scummy, but I sanded it back and found a cleaner black plastic trim and now it's up to spec. Oh, and considering I was tinkering at the back, I refitted the number plate lights that I had cleaned up. This also involved taking the old tape off the wiring which runs inside the boot and re-wrapping in new tape. With new bulbs in place and a bit of grunting trying to plug them back in (as the plugs are up on top of the steel bumper), all went in without a problem.
- Tow Loop (top)
- Tow Loop (bottom)
- Number plate lights re-fitted
Meanwhile Marc has been completing the wiring loom, the Splitfire coils are in place, the injectors are wired up and there's hardly a wire to be seen thanks to the Marc Palmer Special Service (you really need to look for them). Oh, and all that stereo gear was picked up thanks to Alex at Westside Car Audio in Osborne Park. I got a great deal on the gear, including the DDLinear Flagships. The amps are tiny and much lighter than an older 1000w monoblock is, so it evens out the use of all the dynamat  Now I might have to upgrade my iPod because I need a later version...but that's a tax deduction anyway.
Seeya round
Brendan
PS> Apologies for the later than normal posting date.
Monday, 18 June 2007 | | Categories: Audio, Engine, Interior
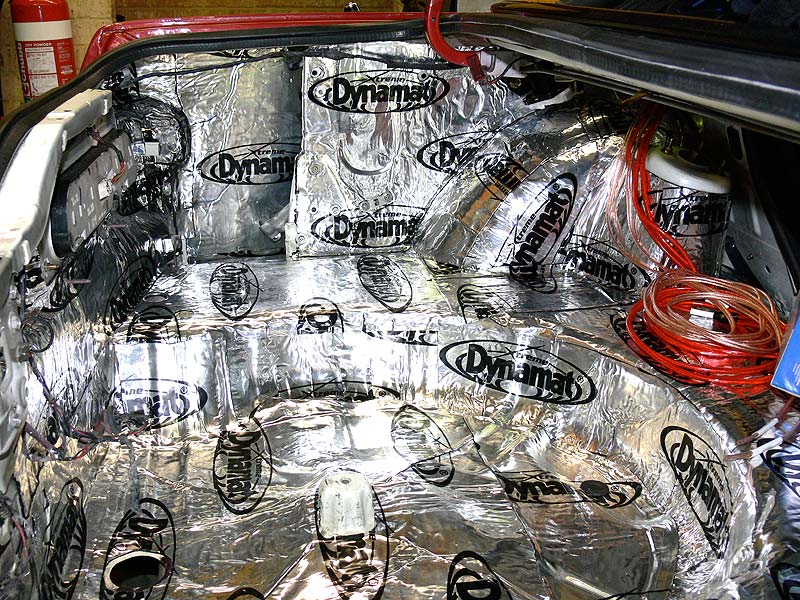
Hooray...the last of the dynamat (except rear parcel shelf..dammit) is in the boot (trunk). After I ran out a couple of weeks, it took a few days to order, then more to deliver etc. But Friday I focussed on completing it...meaning the drivers side boot floor, suspension tower, outside guards and rear panel around the lights.
- Dynamat on the boot driver's side
- Dynamat on the boot rear panel
Once that was done, I went and tracked down some rear boot carpet and floor mats. After a good vacuum and clean, the floor mats just didn't seem to be coming up any good. The floor carpet was a little better. I'm going to get the floor mats remade now with a nice plush carpet. There's also a possibility of getting some badges made up for the mats based on the logo I designed, but still waiting back on quotes for them.
Next was to sort out the fuel pump. Now my original plan was to use a Sard single pump surge tank, but due to time restraints, we're just going with an in-tank pump that we'll use in the surge tank later. The pump chosen is the Bosch 044, but in an in-tank installation. The modification and fitting to the standard fuel cage was reasonably straightforward thanks to some instructions from NissanSilvia.com and help from the C-Red team.
- Fuel pump access prior to the dynamat
- Original S13 fuel pump setup
- Bosch 0 580 254 044 (The 044) Fuel Pump
- The 040 vs 044 fuel pumps - swapped over fittings
- Bottom of the bracket removed
- Fuel feed pipe shortened
- Fuel feed pipe attached to 044
- Completed 044 fuel pump assembly
- Completed Pump Install now with dynamat
In addition to these main things, I installed the electric aerial and went and got new (ie. used) license plate holders as mine seemed to have caught the attention of the spray painter's gun.
- License Plate light covered in overspray
- License Plate light in great condition
I'm due to get the seats back from the trimmers sometime later this week so I'll be throwing those in on Friday. Greg was helping out on Saturday too, working on getting the fuel system complete involving the Sard fuel pressure regulator (FPR), fuel filter and fuel lines to the rail and back. Oh, and I got some new pedals too from Natetune on NissanSilvia.com, aren't the purdy.
- Nardi Foot Pedals
Until next week.
Cheers
Brendan
PS> Sorry for the title, was still thinking of all those 'THIS IS SPARTA!' funnies that are running around at the moment (see the movie '300').
Tuesday, 12 June 2007 | | Categories: Engine, Interior
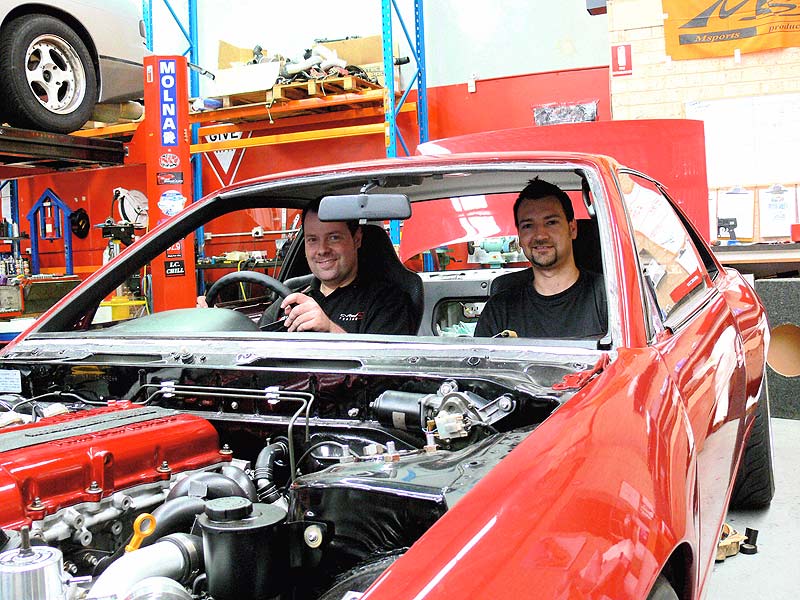
Greg and I (me in passenger seat) checking out the seating positions
So the focus on the interior was kept up last week...this time in the form of the front seats, carpet and dashboard. To start off with, I remind some of you that I did purchase a new set of carpets sometime ago for Sillbeer. They were really nice and moulded to a point for the S13 floorpan. Unfortunately, it required a fair amount of time in marking with chalk the holes and cuts required to make it all fit correctly. Now when I purchased a used interior a little while back, a carpet also came with it. The colour was a darker grey than the original, but had a few stains and a lot of glass fragments spread throughout. I decided that after I had vacuumed and cleaned this one, I'd make a final decision on whether to use the new or old. The old one won. It came up a treat, and took all of 5 minutes to install.
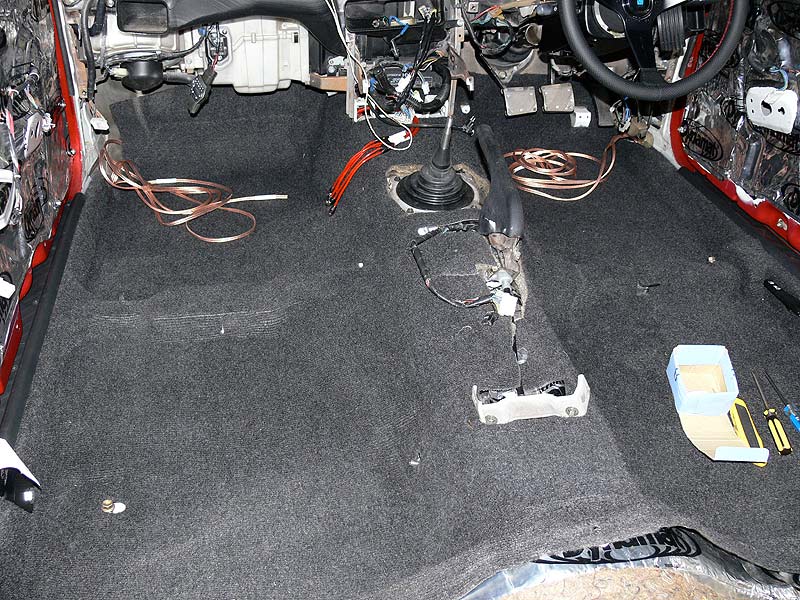
As you can see from the photo, it came up very nicely and all the holes are exactly where they're meant to be. Next job was the seats - which are from an R34 Skyline GT-R. Reasons for these are comfort, height and OEM function. The only requirement (as with all GT-R to S13 seat fitment) was a modification to the rear outside seat mount. I had previously fabricated up a tab in mild steel to sit in the groove of the original seat mount, and after tracking down the 'Welding Gnome', had him TIG weld the tabs in place. A quick coat of black satin paint and an overnight dry, a search for the appropriate class of bolt and we chucked them in. Needless to say that due to my perfect marking, they bolted in without a hitch. See pics of the tabs:
- Fabricated tab sized and marked
- Tab TIG'd into place by the 'Welding Gnome'
- Fabricated tab painted and bolted in
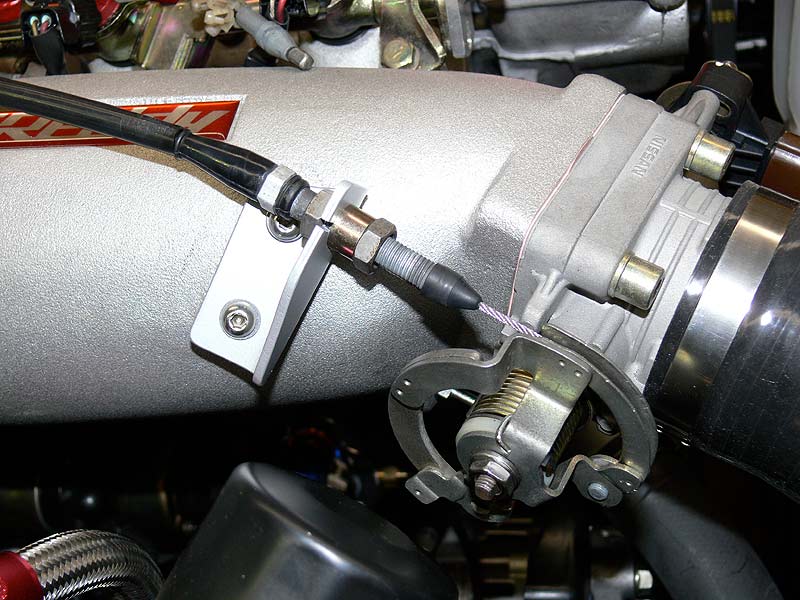
I mentioned previously that Greg had fabricated a new bracket up for the throttle cable so it fitted correctly on the GReddy Plenum. This was painted up and fitted, it should clear the bonnet easily while looking fantastic while it does it.
- Throttle Bracket from back/top
- Throttle Bracket from back
- Throttle Bracket from front
- Throttle Bracket with cable fitted

Another fitment in addition to the dashboard was the new Nardi Deep Corn steering wheel. This is a very stylish black leather jobby with the red stitching. I've used a genuine Nardi boss kit - but as I suspected (see pics), it's rear diameter doesn't cover the hole on the S13's steering column cover so I'll have to fabricate something to fit in there.
- Nardi horn button
- Nardi Deep Corn red stitching
- Dash and Steering wheel installed
- Nardi Boss Kit for S13 Box
- Nardi Boss Kit for S13 Front
- Nardi Boss Kit for S13 Back
The leather wheel I purchased from Yahoo Auctions in Japan, but I recently purchased a suede version of the Nardi Deep Corn for motorsport applications through a supplier on nissansilvia.com named 'natetune' at a very good price along with some pedals and the boss kit.
Other things done are the seat belts are now in - brand new from Klippan. I fitted the horns up to replace the tinny 'beep beep' ones that Silvia's usually come with. These have been tested, and they're more BMW spec than Barina now. And I ordered and received a nice black plastic air diversion plate for the radiator/intercooler air flow from High Octane (on their ebay store). Yesterday I took the rear seats, door trims, glove box, centre console lid, gear stick boot and handbrake boot down to Trimcare in Welshpool to be retrimmed in a material close to centre panel of the GT-R seats. Chris will be taking care of them all there and I should have back a week Friday. Some of these pieces will also be copping a logo I've designed for the car based around 'specB' which will also be placed at strategic locations on the body. The logo was designed with strong influence from the USDM Nissan Sentra SE-R specV.
This week while half of the interior is away, I'll finish off the boot Dynamat'ing now that I have had another box delivered, finish off the fuel system (delaying the Sard surge tank at this stage) and get it ready to turn over.
Drive safe.
Brendan
Tuesday, 5 June 2007 | | Categories: Audio, Interior
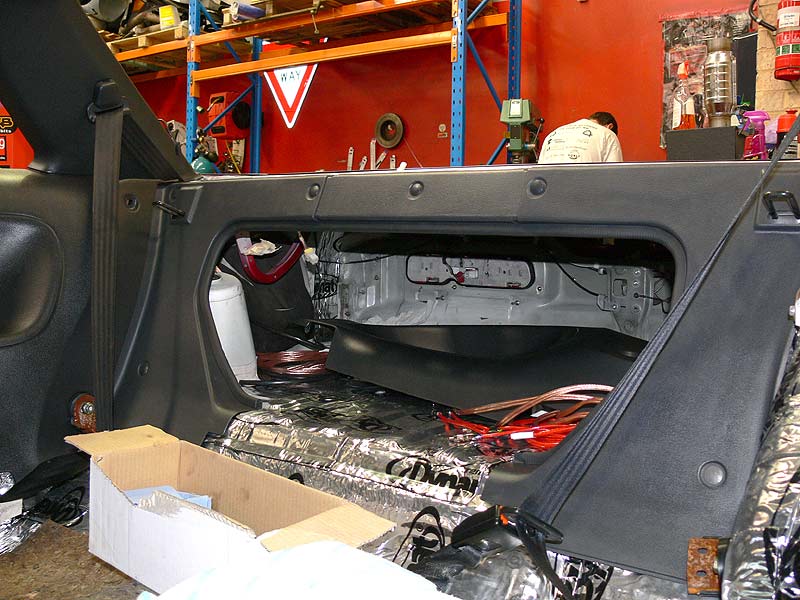
Finally after finishing the Dynamat in the main cabin, it was time to start fitting interior trim pieces back into Sillbeer. I would have been continuing on with the boot Dynamat installation, but I ran out half way through, so have to wait for another box to come from my ebay supplier (billy588). So first up it was through my box of bits and pieces for appropriate trim. Unfortunately that turned up a black for the back seat panel, so I went out to one of the shells and found the whole back section still intact. After a bit of grunting, and saw fingers on those little press studs (they really do fly when they pop out), I had what I needed. The cleaning process for most of this stuff is first to give it a wipe down with a wet sponge to remove the thick layer of dust. Second is a wipe down with some household cleaning spray to remove any dirt and grime. And finally a good wipe over with the tyre shine to give it back some moisture.
- Side interior trim
- Dynamat on rear floor area (driver side)
- Dynamat on rear floor area (passenger side)
The same car provided a lot of other panels, as well as from a few other sources. Rear seat belts were also fitted and test along with finding the hinges for the rear seat back - but they're quite rusty at the moment so will need to give them a quick sandblast before leaving them in place.
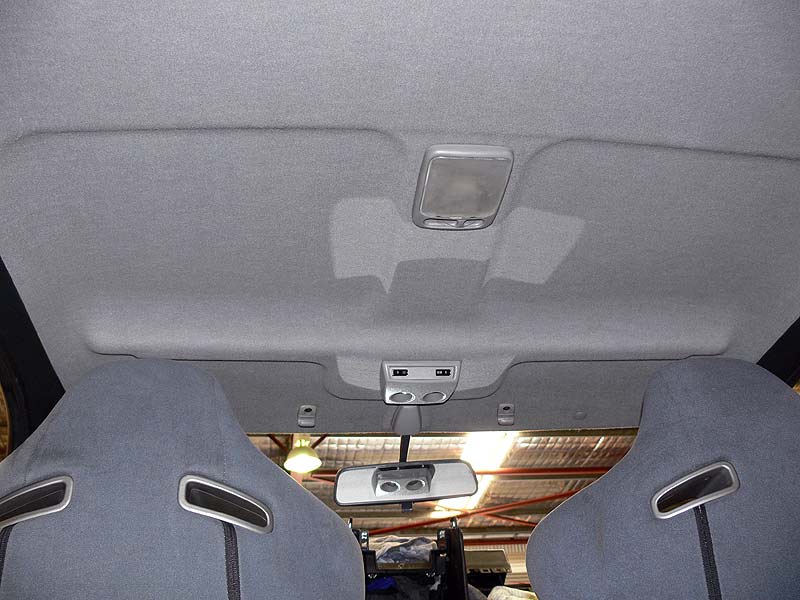
Another part of the interior is of course the roof liner (or hoodliner). I had a couple to choose from, but neither were in very good (clean) condition. So I chose the better of the two, and with some newly acquired Armor All interior cleaner, I gave the entire roof liner a good twice over (as well as a good scrub). The results are amazing and gives a nice smell to the roof too.
- Roof liner before cleaning
Saturday morning I attempted to find and fit a set of front seat belts, and I had some success in finding the correct brackets and the correct drivers side belt. Unfortunately the passenger side belt I found was made for another mounting angle so it would not reel out, only retract. This was after 3hrs mind you, so I gave up and have a new set on the way. In the mean time I tracked down a couple of good interior side panels - went through 3 drivers side ones before I found one with minimal scratches and all the clips in place. This is the one you see in the trim picture above.
While I was working (ie. wasting time) on the belts, Greg was in to make up the throttle cable bracket. The reason for a new one is that the GReddy plenum sits high in the engine bay and the mount on the plenum is also offset from the original location. Therefore and new low profile offset bracket was made. It looks mint, and after a lick of paint should be just fine visually too.
Marc at C-Red is working on the electrics this week, getting the wiring loom sorted and tucked away and the ECU plugged in. Hope there to be some news on when we can start her up when I go in on Friday.
Getting exciting now.
Cheers
Brendan
PS> Please note that I do get quite a few questions from people asking about things I have done previously on the car. To help out with this, I've dropped in a Google search for sillbeer.com to track down any info you're after.


