Thursday, 17 January 2008 | | Categories: General, Magazines/Blogs
Seasons greetings to all. Apologies for the break, but went on holidays for a couple of weeks...now back at work. So I suppose I should give you an update on how things are going. Well, pretty good on a whole. The last time I posted we had just had a tune, and although laggy, the power figure eclipsed my goal of 300rwhp. Of course, now we have to make it responsive. A story that is still playing (today actually).
Anyway, over the Christmas break, the family went on holiday down to Margaret River (about 3.5hrs drive south of Perth). As we were spending Christmas Day down there with the majority of the extended family, we had to take the 5 of us (the wife and I plus the 3 kids) and all the presents. Now my wife's car is by now means small, it's actually a bit of a bohemoth (1995 BMW 740iL) but still it wasn't big enough to carry everything. As such, I decided to take Sillbeer on an extended cruise down south. At this point, the car had only done about 1500kms, so I was a little hesitant to take her on such a long route away from workshops and cheap tilt-tray fees, but I'm proud to say she made it there and back without too much of a hassle.
To give you an idea of what it was like, from Perth down to Busselton bypass it was all smooth, but the last 90kms or so to Margaret River, the road goes real country. The suspension on the Sillbeer, although reasonably compliant, didn't like the rutted, potted roads on that stretch. You basically had to keep your attention at a very high level. Once down there, I took it out a little, but wasn't expecting from the little amount that I'd end up with a busted front parker/indicator light. It wasn't until I took it down to my brother-in-law's business to take a look at the car, that it was noticed. By the looks of it, someone has rubbed their black bumper lightly on my front bumper, which was high enough to crack open the parker light. Not happy Jan. Now the reason for taking it to my brother-in-law's business is obvious by its name - Margaret River Panel Beaters. You see, soon after getting the car moving, spider cracks started appearing in the rear bumper...an affect of not sanding back the original two colours of paint enough and possibly too much filler. After seeing that and a quick chat with Scott the spray painter, it was agreed I'd leave the car there the next day when I went back with the family and come get it a week later.
Well the job was top class. The paint colour match was brilliant, and with all the shake, rattle and roll of the trip back, not a crack to be seen. While they had it, they also gave it a good polish. Many thanks to Anthony (my brother-in-law) and Scott at Margaret River Panel Beaters for a top notch job - wish they were in Perth.
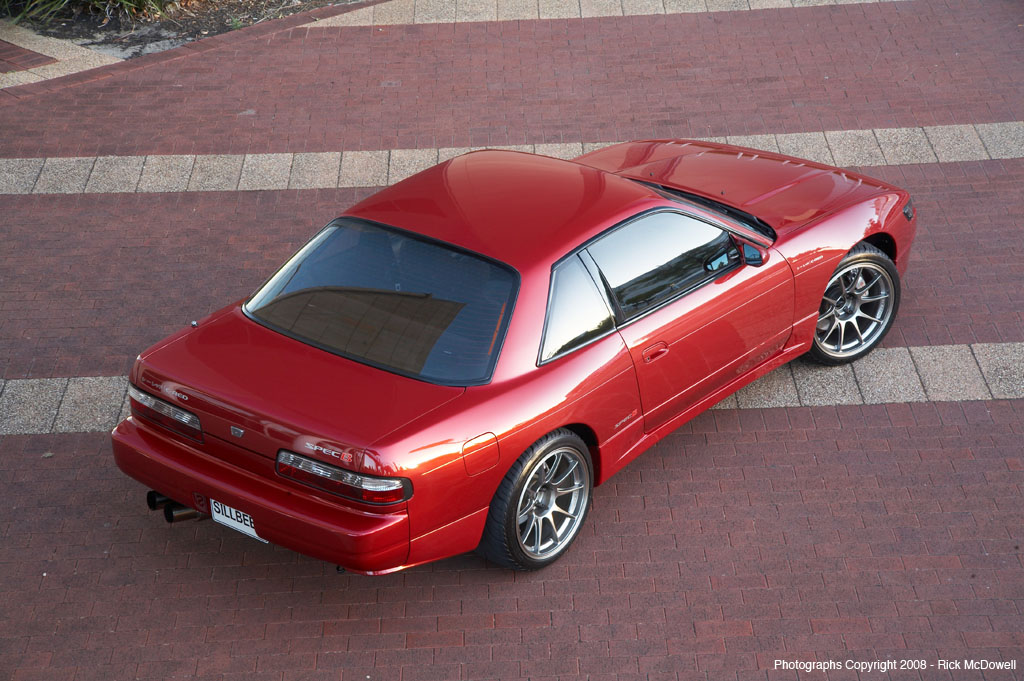
Photo Gallery
As the car had just been polished, an established local automotive photo-journalist Rick McDowell made time to take some pics of Sillbeer. Over a period of about 4hrs and with lots of experimenting here's a sample of the photographs that were shot (click on the photo above). Many thanks to Rick for taking the time to shoot the car. He tells me there's more to do though with undercarriage, more engine and interior and move shots to go. Once that's done, he'll be submitting them, along with a story, to a few international magazines.
He'll cover the whole story hopefully on how I got from this:

to this:
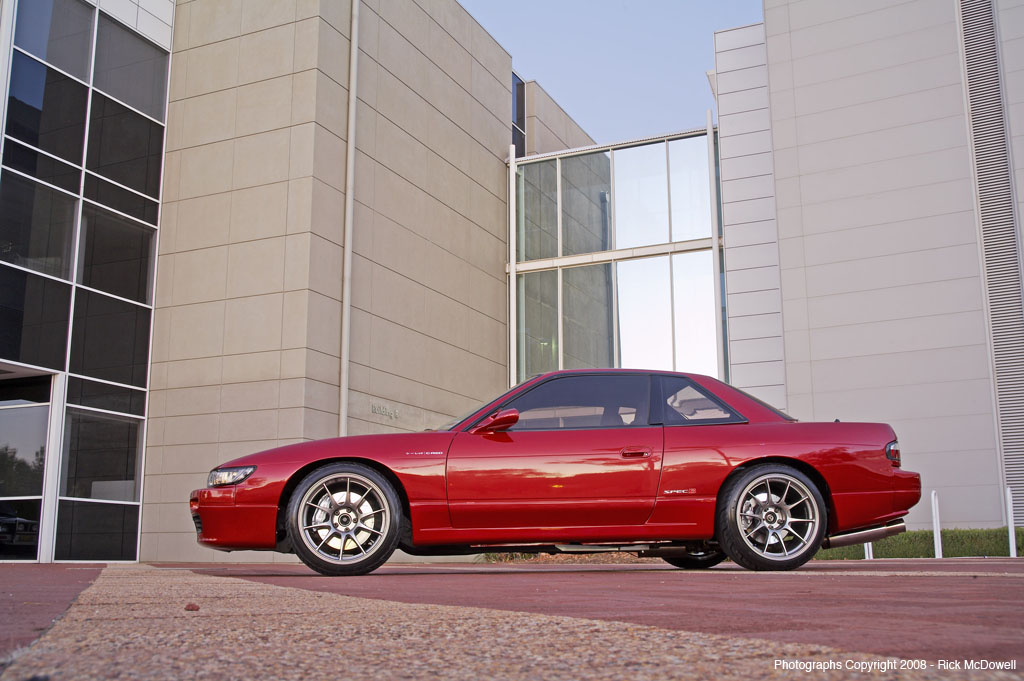
One thing you will notice in the gallery is the Defi Gauges mounted on the dash. I did this between the tune and going down south. The result was surpisingly good, and have now scrapped plans to do a custom gauge hood/mounting arrangement. Still to be mounted on the A-Pillar is the boost gauge which will have to wait for the time being until I can build up the fundage again. The job was relative simple, just using my eye, a ruler and some masking tape to pre-determine how the gauges were to be mounted. While I had the dash apart, I also tried to adjust my fuel gauge which was showing just over half full as being full. Unfortunately I adjusted it a little too much and now full is pointing past the vertical position.
Now there's still some rattles that I'm chasing down, the most of them in the doors were to do with the windows rattling on the back of the speaker magnets when in the down position. The main one at the moment is the right hand bonnet (hood) hinge. The pin that runs through the centre has worn enough that when the bonnet is shut, it rattles around in it's hole...and right at idle or 60km/h. For now, a piece of paper stuffed in the hinge is enough to stop the rattle, but I'll be working towards a better solution soon.
As mentioned first up, the car is up at Allstar Garage getting tuned...with a view to dial in the cam timing for better response and maybe even a little more power considering the car was still pulling at the redline from the first tune. If successful, the car will be getting a bit of pushing at this weekend's Motorvation where I'll be entering under the SilviaWA banner. There's driving events on including motorkhana, slalom and go-to-whoa as well as a dyno competition, sound off and overall car judging too. It'll be my first major show with the car in relatively complete format so very excited.
Will post up results of the dyno session when I find out, until then, drive safe.
Cheers
Brendan
Friday, 14 December 2007 | | Categories: Engine, General
Well then, where do I start.
After getting the car registered, and bits and pieces back on it was time for the shakedown. Basically driving around, checking for squeaks, leaks, rattles and hums. There were a few rattles in the doors that have been pinpointed and fixed, along with one on the bonnet (hood) hinge which will require another hinge. We had a problem with the air-conditioning though, where the seals were naff, and after it was gassed up the first time, it all leaked out. The seals were replaced, re-gassed and now it's all good. I went without A/C for a week or so in what was one of Perth's hottest week in the month of November ever. Ugh!
As for leaks, which are all part of the fun, there was one of the factory oil pressure sender, now fixed, and another from the oil seal around the crank pulley. Now this is not to do with shoddy work, but a symptom of the GFB crank pulley being made of aluminium. The oil seal had worn a groove in the soft ally, so the pulley was removed, machined down and sleeved with a harder metal. The team at C-Red have now fixed that all up and all is good.
The car has settled down nicely on the suspension, and considering the fairly hard spring rate of 8kg/mm front and 6kg/mm rears for the Racing Gear JTC'N1 Stage-V coilovers, it's reasonably subtle. I thing it could be made a little softer for street work though but I'm yet to mess about with the damper settings. I also think the rear coilovers are clicking a little bit on some of the larger bumps in the road, but this is yet to be determined.
One of the items I'm not quite enjoying though is the exhaust. At about 60km/hr in fourth, it has a very loud drone that just goes right through the car, and unless you have the stereo cranked, you can hardly hear the sub-doofer. So I'm looking to eventually change over to a nice Tanabe Medalion g-FORDAN blue exhaust which C-Red have in stock.
Now the engine was run-in over a period of about 3-4weeks, clocking up about 1300kms. It was then time to put her on the dyno for her first, but by no means the last, tune. Tuning is being taken care of by Sean and his team at Allstar Garage and the first session was yesterday. After running her up, she made a very laggy 312hp (233kw) at 1.4bar to rear hubs (Dyno Pack hub dyno). After a conversation with Sean, it requires some experimentation with the camshaft timing to bring the power back down to the low/mid-range with as its making boost at about 4800rpm and full boost at about 5800rpm. Once you're into the power though, it's solid and just gets going.
Now how do I feel about all this? Well, I'm not disappointed that's for sure. I mean the car has been completely apart and is now together again in a state that Nissan would not have dreamed of. It's been three years in the making, and a few weeks of trial and error, refining and troubleshooting is to be expected.
Oh, and the Defi gauges are now hooked up, but just not on the dash yet. And I chose to go with a GReddy Profec B-spec II electronic boost controller rather than the PowerFC Boost Control kit. Reasoning behind this is that it has a high/low boost setting that can be easily changed, and you don't need to be a rocket scientist to work get through the menu system and understand how the PowerFC handles boost settings.
Until next week, have a good one.
Cheers
Brendan
Thursday, 15 November 2007 | | Categories: Exterior, General
I've read that a few people had downloaded the images from the latest photoshoot and used as their desktop, so I thought I'd pump a few dedicated images out at varying sizes for those that wish to use them. Enjoy.
Desktop 1
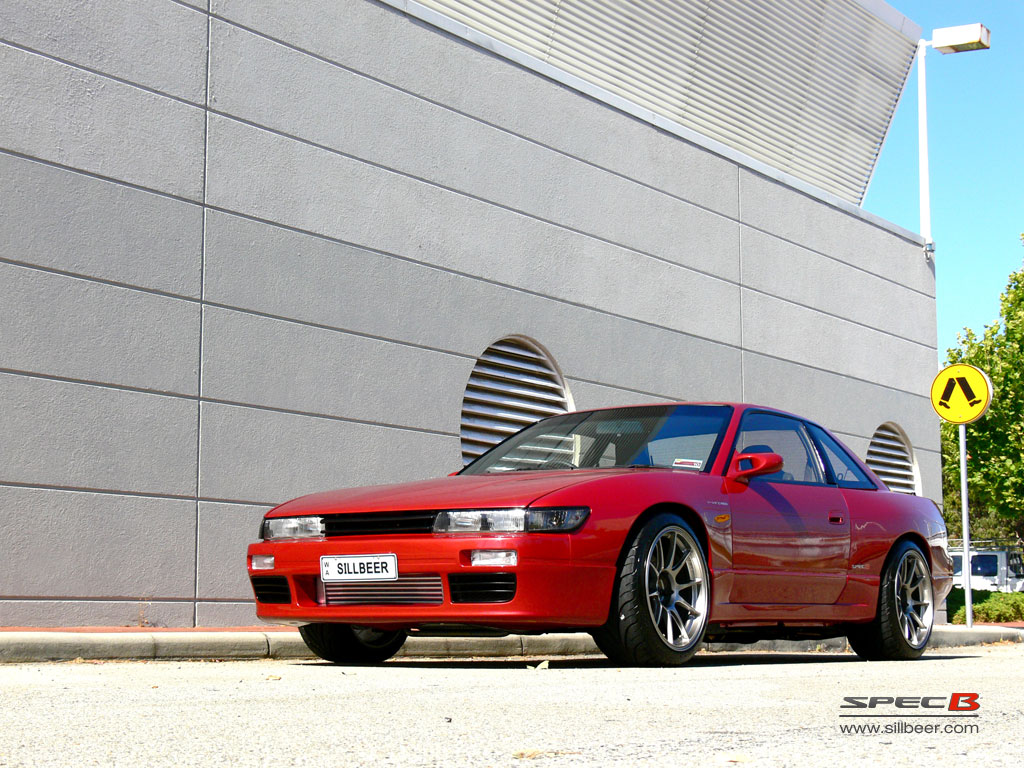
- 1024 x 768
- 1280 x 960
- 1600 x 1200
- 1920 x 1200
Desktop 2
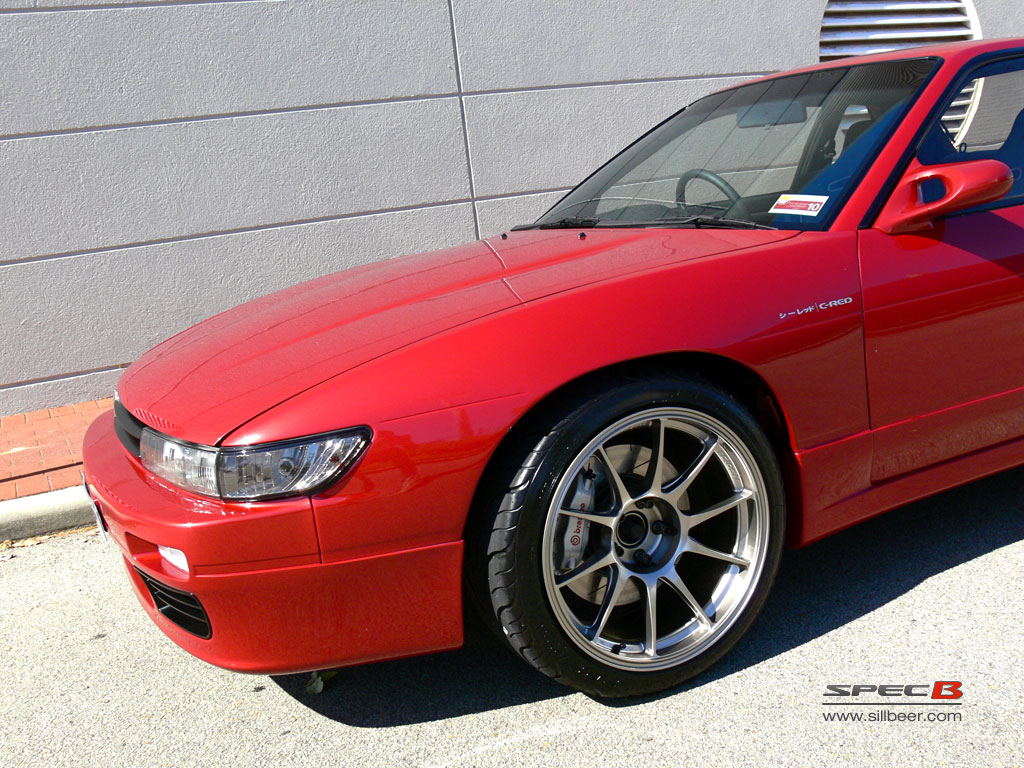
- 1024 x 768
- 1280 x 960
- 1600 x 1200
- 1920 x 1200
Desktop 3
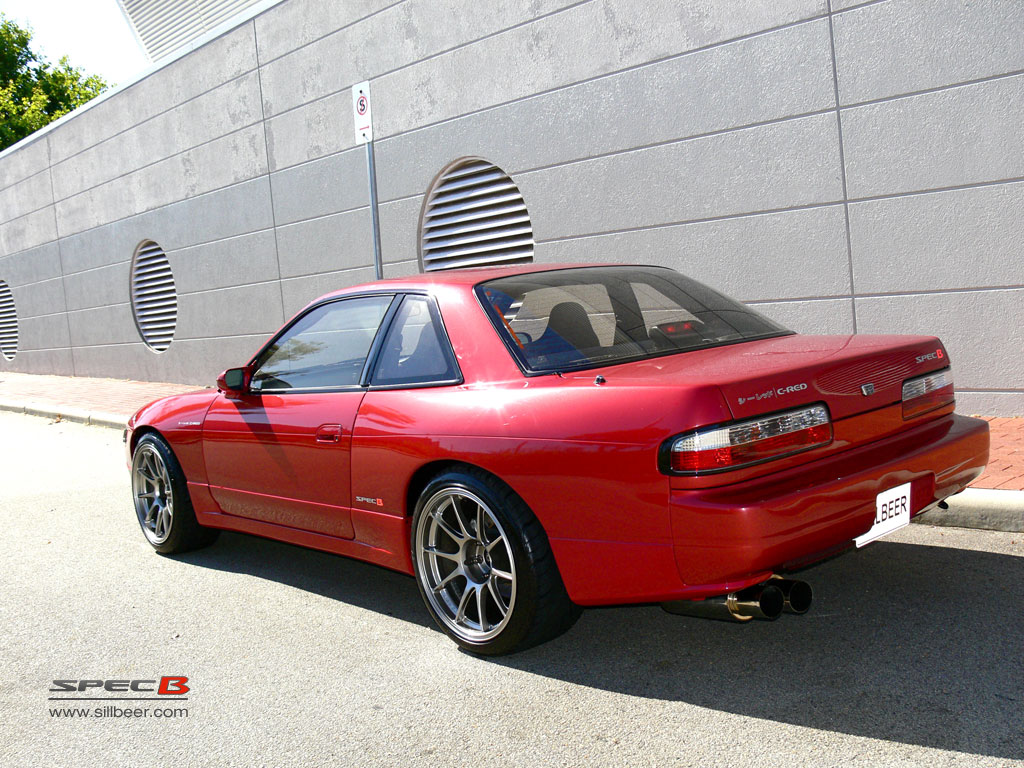
- 1024 x 768
- 1280 x 960
- 1600 x 1200
- 1920 x 1200
Desktop 4
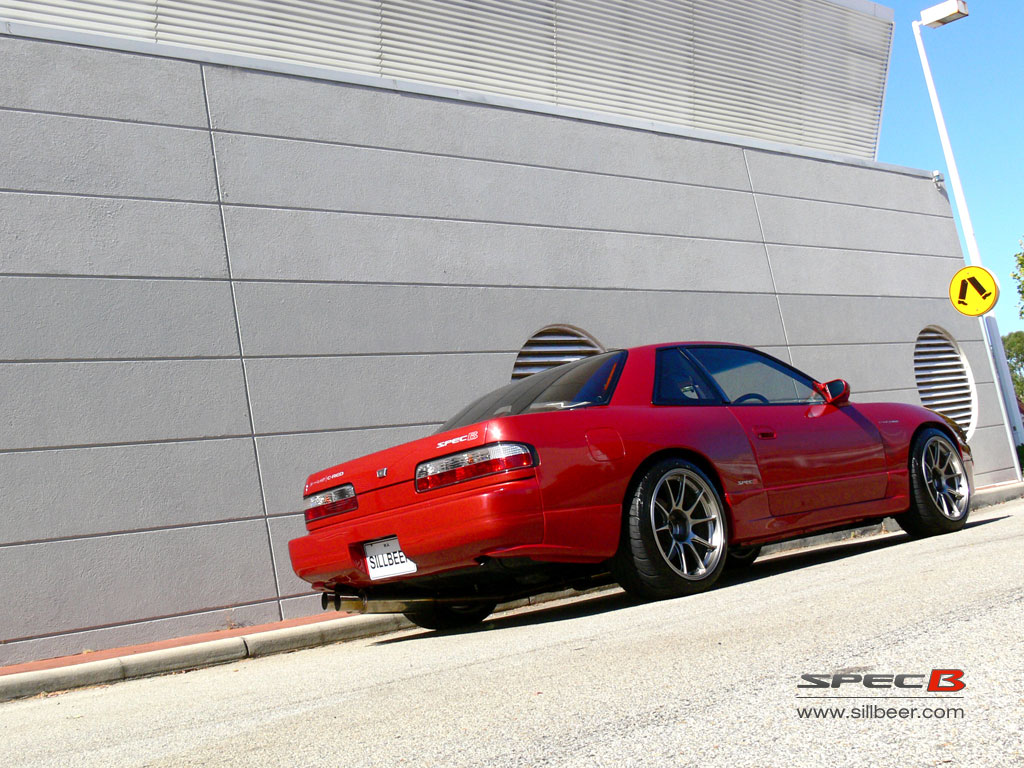
- 1024 x 768
- 1280 x 960
- 1600 x 1200
- 1920 x 1200
For help on using these as Desktops or Wallpapers, just do a search for it on Google.
If there's any specific ones you want from previous photos, leave a comment and I'll see what I can do.
Cheers
Brendan
Wednesday, 14 November 2007 | | Categories: Exterior, General
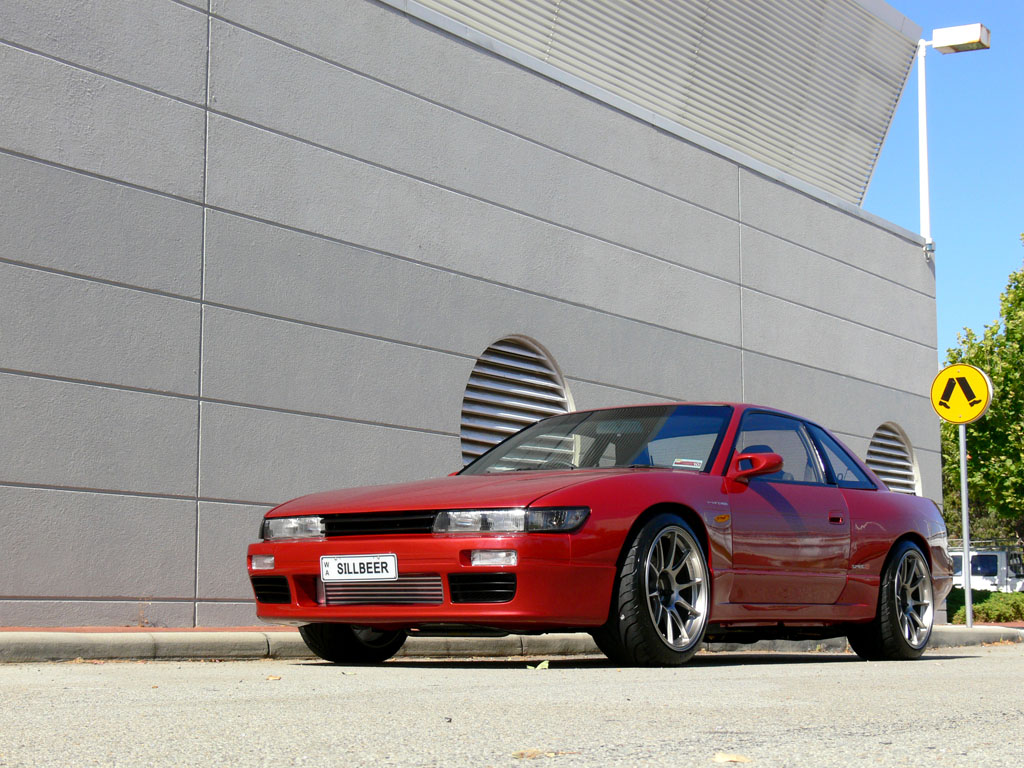
Photo Gallery
Alright, a couple of people were having a whinge at me for not having photos up, so I quickly popped out and took some so here they are.
Enjoy
Brendan
Wednesday, 14 November 2007 | | Categories: Engine, General
This week is a good week.
Yesterday (Tuesday) I was given the go ahead to pickup the car. It has had a run-in tune put into it by Sean at Allstar Garage on Monday...and in 39C (102F) heat I should add. Now, this was a special day for me as you would imagine, it was the day I could finally take my car home. Having started this journey on the 28th August 2004, that would make it 3 years, 2 months and 16 days to get it this far. To say I was nervous about driving it home was an understatement, but after driving it a couple of kms, I settled down and really appreciated what I and many others had created. The engine ran sweet (if not lumpy at idle due to the cam profiles), the suspension was tight, steering tracked true and the interior felt like new (as it should). That bodywork certainly lets you know it's there too, every time you look in the side mirrors..boom, take that.
I went and picked up the kids from school, they were all giggly about getting into the car too...I cranked up the tunes for them and they just loved it. Once home, I gave the car it's first ever wash. It has collected quite a bit of dust and crap since Autosalon as the cover hasn't been put on as much, and once clean the paint really did pop out so much more.
This morning was the first test in peak hour traffic, and did it serve it up...one of the worst days I've seen in a long time just getting onto the Freeway. Was it hard to drive? Well kind of, remembering it has a twin-plate clutch that hasn't really been run in yet, and a driver just getting used to a twin-plate again, I reckon it was pretty good. Give me another 2 weeks, and it would be a problem at all, just need to keep the revs up higher than I would in the Sigma.
I'll take a stack of pics soon and post up another gallery for those chomping at the bit to see how it's progressing.
Now is the journey over? Not by a long shot. Unfortunately when we switch ECU's over, the pin setup is slightly different between the ADM and JDM computers, which means the air conditioning isn't connected (although it has been gassed ready to go). But the weather is cooling down towards the end of the week, with a 30C today, and 28C tomorrow and Friday. We'll sort the aircon on Saturday along with the sump guard which I took delivery on Monday for. I will also run the sensor looms for the Defi Gauges and look towards getting those running...at least temporarily on the dash board. Then of course there's the run-in, which will be 1000kms of easy driving. The tune on Monday garnered a respectable 160rwhp on 6psi (0.4Bar) at 5000rpm (which is the current rev limit set in place for the run-in), so there's plenty left in it. Not sure what we'll boost her up to, but I'm saying the in region of about 22psi (1.5Bar), mmmmmm boost.
So keep an eye out for those photos.
WOOT!
Cheers
Brendan
Thursday, 8 November 2007 | | Categories: Engine, General
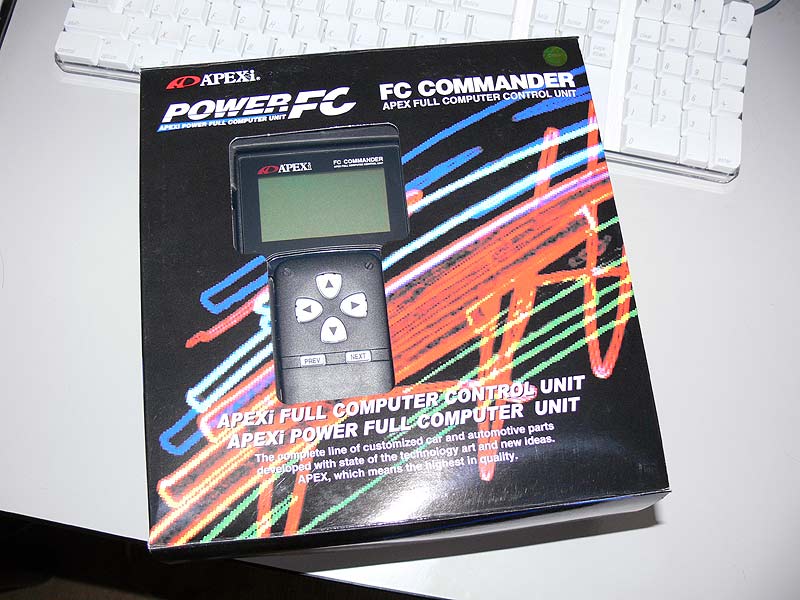
Yeah, crap title I know. Anyway, delivery of the Power FC (Full Computer) was on time and on Tuesday we dropped it into the kick panel, changed a few parameters around for the injectors and AFM and voila...sutartu! It's an S15 version as I originally planned on running a modded stock S15 ECU. We'll do a little bit of tuning to make sure the fuel is ok for light driving around, then have a proper tune coming up early next week. After that I can start running the engine in before leaning on it.
- Main ECU Unit (for direct replacement of the stock ECU)
- Power FC Commander (Hand Controller)
- Main plug interface
- Label on the side with serial number
- Accessories interface for Commander and Boost Control Unit
Speaking of boost control, I'll either be using the Power FC Boost Control kit, or a C-Red is now an official Trust/Greddy supplier, a GReddy Profec-B Boost Controller.
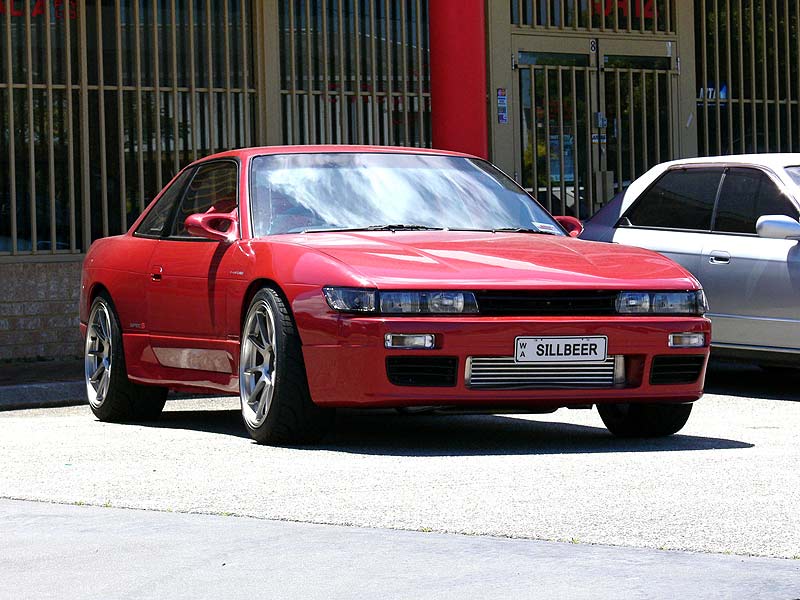
Now for the good bits. Yep the car is registered, and the plates are now on. Ride height has been adjust so that it has plenty of clearance on the coilovers, but may need to look at a different exhaust down the track a little to get even more clearance...this is a daily remember. The car is getting it's air con regassed today, (this morning) and I'll take it down to Exley's Tyre Service (where I got my tyres from) to get a base alignment done. There's way too much camber front and rear on the passenger (left) side of the car and too much toe at the front. Now I apologise for not giving it a wash before taking the pics, but time was short when they were taken yesterday.
- Front quarter view
- Front wheel showing the Brembos
- Side view showing new ride height
- Rear quarter showing plenty of tyre clearance
- Rear quarter view 2
- Left profile - OMG it's phat, too much camber
- Right profile view
The rear height might be dropped by another 10mm or so, but we'll see how it goes for now...that'll be all part of the fun of getting it closer to perfection. Still to come now is fitting of some additional chassis bracing I've yet had time to put on (URAS Chassis Rail Extention and Tunnel Brace), then I need to work out how to add the Defi gauges which are waiting in the wings.
Shakedown will follow while we work out the inevitable bugs. Stay tuned.
Cheers
Brendan
Sunday, 4 November 2007 | | Categories: General
Yeah, well you knew that from the last post, but I tell you, this engine is silent. The re-shim job on the head has resulted in one of the quietest SR's I've heard to date. After a bit of fiddling around with a couple of sensors not working, the engine was idling ok. The boys also spent a bit of time on the computer trying to get a base tune in to it for driving it around, but were have some major communication problems. I decided at that point to order in an Apexi Power FC and Commander, then have it tuned using the Datalogit module. This is a tried and test ECU, so with that landing on Monday, we hope to have a tune put down later in the week, early the week after. In the meantime, we also replaced the RG brake lines with ADR approved items from Maltech...custom ordered in a decent length as the RG lines were a little tight for my setup.
Once C-Red had it in a running condition, it was taken down to the pits and passed compliancing and was promptly registered - they were rather impressed with the quality of the build. This was a big weight off of our collective shoulders. I had the car registered in the set of plates I ordered last year - SILLBEER (der!), which have been waiting down at the Welshpool licensing centre since then.
Friday afternoon and Saturday morning were then spent fitting exhaust, suspension and brakes back onto the car. The exhaust was a pain, because getting clearance between the subframe and differential was such a hassle. In the end, I changed the rubbers used on the rear hangers, and that seemed to work out much better...still it took a good 2hrs. Friday afternoon I also managed to get rear left suspension arms changed back to the Kazama catalogue and RG coilovers, making sure to adjust the length of the arms to that of the stock ones to reduce likely of a huge geometry changes when fitted. Nice.
Saturday morning, I finished off the rear, refitted the front Kazama caster rods and tie rod ends, along with the RG coilovers. While in there, we re-fitted Brembos onto the front and bled the brakes. My right leg is very sore now from pumping so hard (thanks Greg). I finally fitted the Nardi steering wheel back on and Marc said I should take it around the block. I didn't need to be prompted twice.
Getting used to a twin-plate again wasn't too bad, but having work boots on certainly didn't help. I had to come back in briefly to refit the steering wheel because it was out about 30 degrees, but then it was out onto the road. After a quick check to see that I could stop, I drove around the block. OH MY GOD! Even though it still needs a decent tune and an alignment, the car felt brilliant. So alive, the cabin was a nice environment...it was just purely joy for me. Three years in the making, for myself then and there it was a gratifying occasion. The grin on my face was testament to that.
So from here what's left to do? Well this is shakedown time. We won't be taking it out to any 'public' events just yet, not until we've managed to clear away the decks of any possible gremlins that comes from rebuilding a car from scratch. I also need to fit the Defi gauges so we can keep an eye on all the vitals - I'll be heading to Trimcare for some help in that department. Sorry for no pics this time, but once I have some time with the car myself, I'll arrange for a few nice ones.
Cheers (woohoo!)
Brendan
Thursday, 25 October 2007 | | Categories: Suspension, Wheels/Tyres
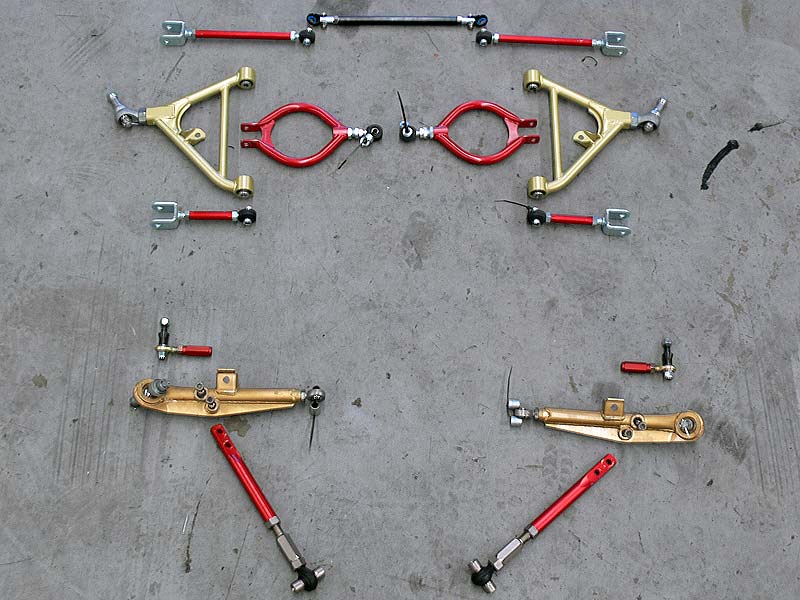
Good news first up. After some troubleshooting with the engine, the blokes at C-Red found the problem with the engine. It was found that with the standard shims in place, valves were not able to close completely as the head had basically been over serviced. After ordering a set of undersized test shims in from Precision Shims Australia, the valves were all reshimmed and all is working again. A big thanks goes to Precision Shims Australia...I sent them an email from the workshop on a Saturday morning, I got a call back in 15 minutes from Chris who advised that they were available and could be sent Monday, for delivery by Tuesday. I paid and all said and done...top human.
- Precision Shims storage box
- Shims - from 2.00mm to 3.00mm in 0.05mm increments
In the meantime, as can be seen by the top photo, I have been busy in preparation for compliancing. To ease that process all the adjustable arms have been removed, and a stock set re-fitted. I had this set already cleaned and painted, so it all looks new. Here's the photos of all the adjustable arms laid out on the floor:
- Front adjustable Kazama and Ikeya arms
- Rear adjustable Kazama and Ikeya arms
And here's a couple of pics of the front setup as it is now with the stock arms fitted:
- Front stock arms (from rear)
- Front stock arms (from front)
You can see a small Nismo logo on the front lower control arms, there are original Nismo LCA's, but I've repainted black and applied the logo myself. Also in view is the end of the Whiteline front sway bar.
An interesting result of putting the stock arms back on is the way the rear wheels now fit in the guards. With the Ikeya Formula arms, I couldn't get a good compromise to good fitment, and before the changeover, I had a set of 20mm spacers fitted. Below are a couple of photos with all the stock arms in place (but still lowered on coilovers), and although there's still to have an alignment done, they're sitting pretty.
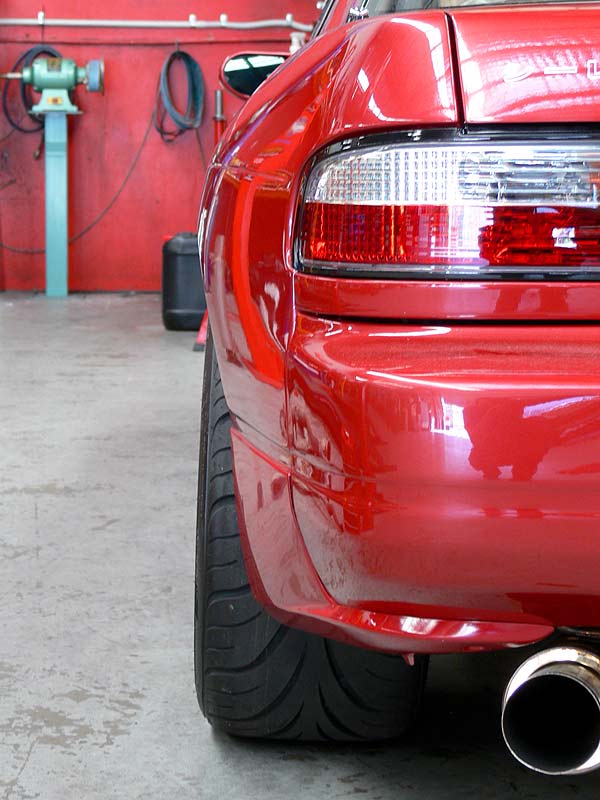
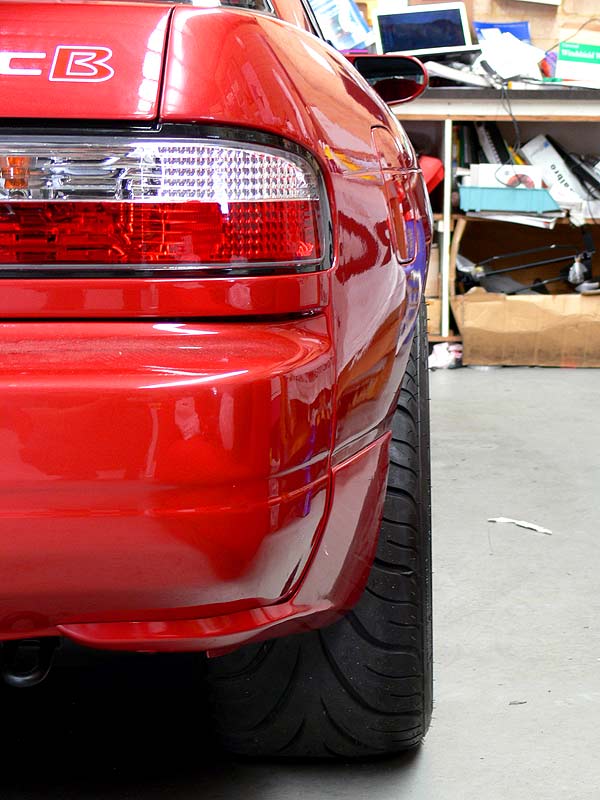
At this stage, I'm seriously thinking of leaving the stock lower control arms on and not refitting the Ikeya Formula front and rear lower control arms. I think if it was a full race car, that was super super low and full total control over alignment was required, they would be great...but for my purposes, I think they could be overkill. Decision yet to be made. I will however be using all the other Kazama arms including upper camber arms, tension rods and toe rods on the rear, castor arms and tie rod ends on the front.
Now all this time I've been driving the trusty (and rusty) Mitsubishi Sigma (Galant) Turbo around as my daily driver. It's actually a Japanese import, now an Aussie delivered car, and is basically a Starion four door complete with four-wheel vented disc brakes, rear independent suspension and 4G63B engine (Sirius). It's done over 315,000kms and is showing it. The latest item being the driveshaft - with the front universal joint being completely shagged and causing one hell of a vibration. So we had the driveshaft sent off for reconditioning. So what did I drive in the meantime:
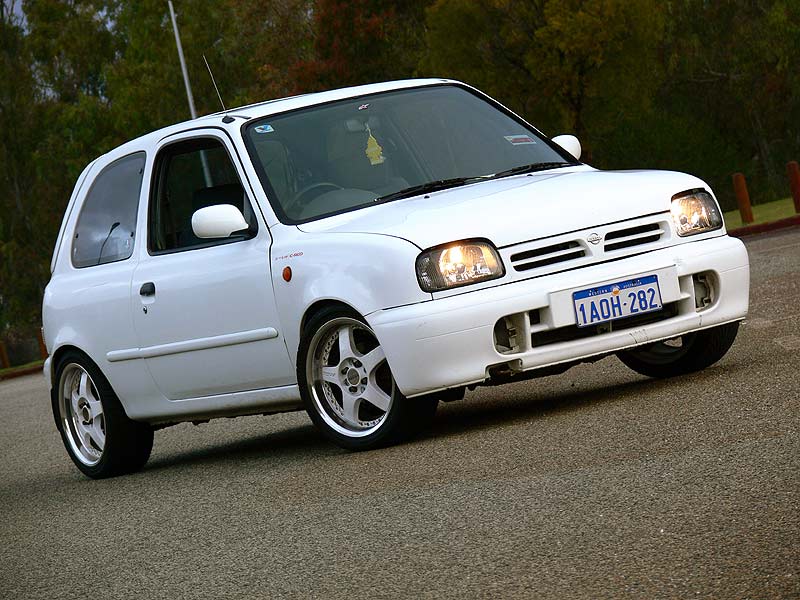
I was fortunate enough to borrow Jeff Ash's from C-Red's little Nissan Micra Super S. This little thing although not powerful, was very zippy. Jeff's in his usual mode has changed a few items though, including new front and rear lights, Lenso rims and Tanabe coilovers. This thing, although a little rough, was a great segway from the usual Sigma drive. Think go cart and you're not far off, although I think the beautiful Personal steering wheel and 8-ball gear stick knob had a good deal to do with the driving experience. I also created a little logo based on the March Cup branding use for the K12 March one-make racing series in Japan, and a little Porsche Carrera RS treatment. Some stripes down the lower side including logo may go on in the future.
- Micra from the rear
- Micra from the side
- March Cup logo
Anyway, we're racing to get the car on the road for the next SilviaWA club meet on 7 November. I can't guarantee it, but we're giving it a good go. Because it's a little odd for the club president to be driving around in a Sigma!
Cheers
Brendan
PS> Shameless plug for Woody who's selling Angry13, one of the nicest Nissan S13 Silvia's in Australia.
Friday, 12 October 2007 | | Categories: Engine, General
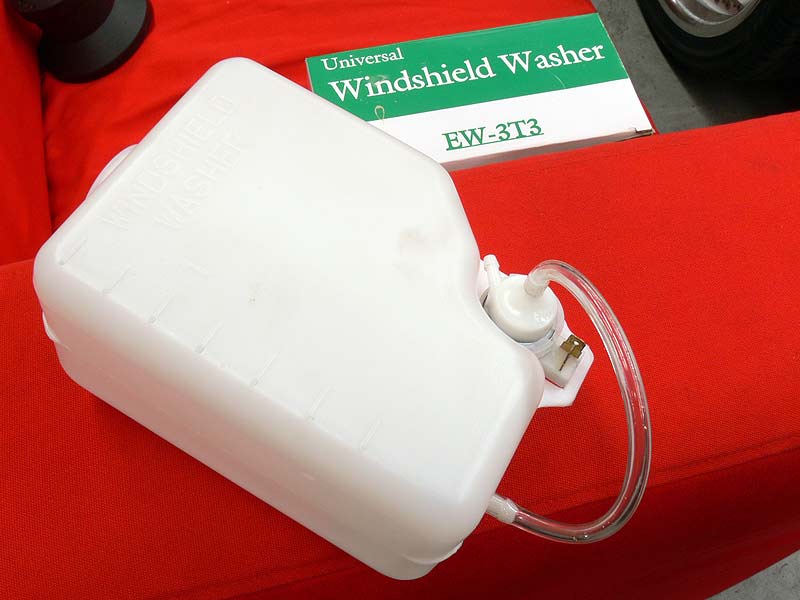
One of my pet hates when it comes to driving is a dirty windscreen, and of course to be registered, the car needs windscreen washers (squirters) working, so I needed to get them into working condition. Now, in an effort to clean the engine bay up a bit, the fuse box was moved to a position right next to the guard. This position however covered up the hole where the original washer bottles filling pipe comes up...so another solution was required. As the battery is now in the boot, it left a bit of space where it was, next to the intercooler pipe.
A quick trip down to Supercheap Auto found a universal washer bottle at a perfect size. We looked at a bunch of different locations, including down underneath the guard, but all solutions still has the problem of being able to fill the small capacity bottle, thus the location in the engine bay itself. After making up a bracket from stainless flat strap and giving it a coat of paint it all bolted in pretty effortlessly. I pulled the original washer plug and hose through, filled the bottle and connected the hose and electrics. To my surprise, the electrical plugs were a match and after dropping the battery onto charge, the squirters were all working mint. Photos off the stuff below:
- 'L' Bracket 1
- 'L' Bracket 2
- Bracket installed with additional bottle attachment
- Bottle installed and filled
Now that that was done, it was time to start thinking about putting the suspension back to stock for registration. The adjustable arms may or may not be re-installed. I'll take some pics of the position of the rear wheels for reference, but with the stock rear lower control arms, the rear wheels sit almost perfectly...and I'm rethinking my decision on whether I really 'need' the fully adjustable Ikeya Formula lower control arms. We'll get to that decision later once it's back on the road.
Cheers
Brendan
Wednesday, 3 October 2007 | | Categories: Engine, Interior, Suspension, Wheels/Tyres
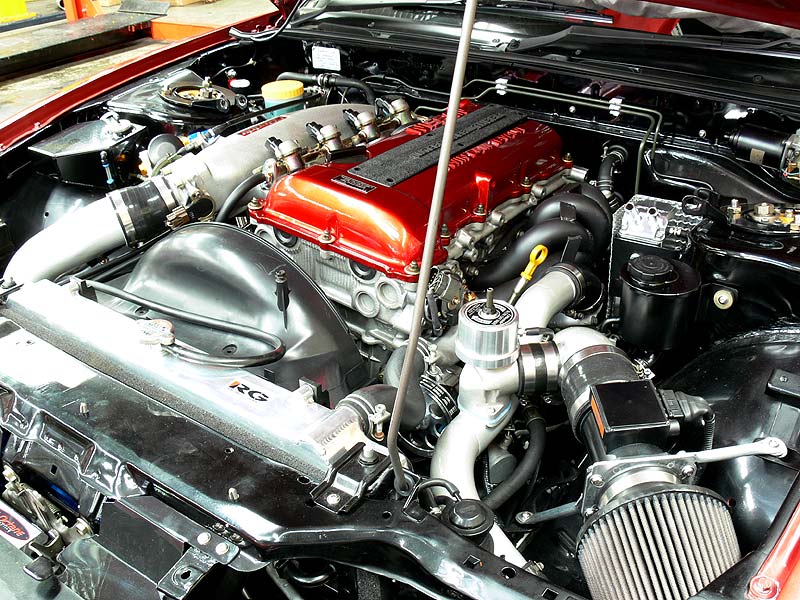
Wow, time flies...full stop. But yes, I have still been working on the car. We're currently going through some changes under the bonnet that are taking longer than expected which is causing a knock-on affect in having the car on the road. While this has been happening though, I have been continuing to do things on the car in preparation for its eventual trip over the pits. But first up, I never took photos of the engine bay while at the show which was a complete oversight on my part, so here are a few photos now:
- Engine Bay from front
- Engine Bay from driver's side
- Engine Bay from Passenger side
- Exhaust manifold detail
- GReddy Remote Oil Filter
- GReddy Oil Cooler
You may have noticed in those pics a nice shiny GReddy oil catch can (breather) sitting on the passenger side strut tower. Well this was fitted by me, using a custom mounting bracket and heat shielding that I fabricated (which I was very happy with). Final result looks reasonable clean.
- GReddy Oil Catch Can from front
- GReddy Oil Catch Can from rear
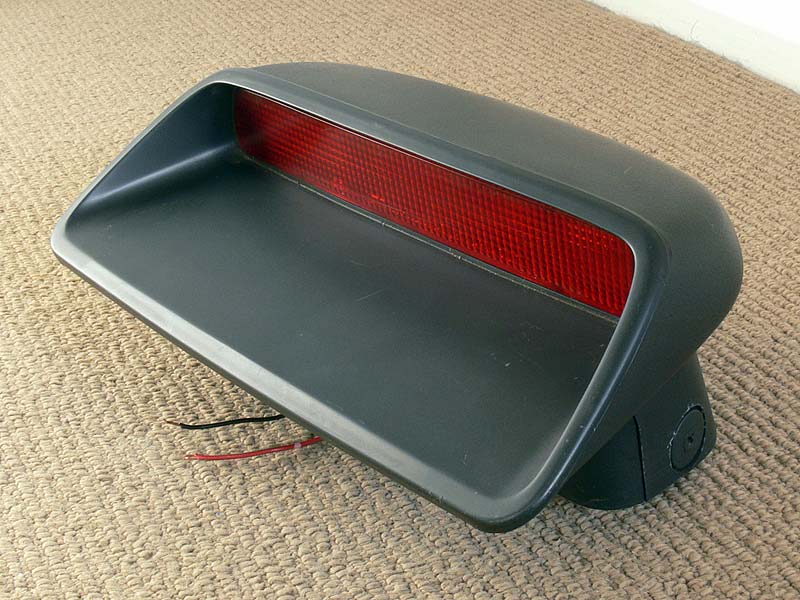
As part of the registration process, there are a number of items that needed to be addressed. The first is the rear high-mount brake light. Now I was originally going to get a Hella light from the local light store (Alanco), but remember that the S13 Silvia came out with one of the factory. As fate would have it, when I had a look on eBay, someone in the east was selling one...and after a frantic last 10sec bidding war, I came away the new owner of a genuine Nissan S13 Silvia High-mount Brake Light.
- S13 Silvia Brake Light (Front)
- S13 Silvia Brake Light (Back)
- S13 Silvia Brake Light (Side)
- S13 Silvia Brake Light (Bottom)
- S13 Silvia Brake Light (Lamp)
Now the sorta trick bit was figuring out how to mount the little bastard (note: it's not that little). After removing the rear parcel shelf (and the sub woofer), I found mounting holes on the metal shelf. Unfortunately the same couldn't be said for the wooden parcel shelf, which I went ahead and guestimated where the holes should be cut after doing a bit of measuring. Next up was figuring out how to get power to it, this is where I could kiss the Nissan engineers as they left the plug sitting on the loom that runs across the rear window. I cut the retaining tape and hey presto, all it plugged straight in. After bolting on the mounting bracket and a few backwards and forwards with the wooden parcel shelf, it was installed.
- S13 Silvia Brake Light Mounting Bracket
- S13 Silvia Brake Light Plug (Wire/Loom)
- S13 Silvia Brake Light Parcel shelf modifications
- S13 Silvia Brake Light Fitted (from inside)
- S13 Silvia Brake Light Working
While on the parcel shelf, I installed the child restraint belt brackets. Now I installed the bolt holes a few months ago, so this was a very simple job. Using the Klippan Child Restraints from Repco (I think), it was just a matter of removing the pre-cut piece in the wooden parcel shelf, a hole made in the material and bolt them in. All done in about 5 minutes, but crucial for registration and taking my 1yr boy for a spin.
- Klippan Child Restraint
- Child Restraint (fitted)
- Child Restraint (fitted)
As the car is getting registered, it will no doubt be subjected to their height test which usually equates to the car needing to be 100mm off the deck at any point under the car. After fitting up the exhaust a few weeks ago, a quick check under the car revealed it had a lot of height required to clear. At only 55mm off the deck, I needed at least another 55mm to get me in the safe zone. The procedure to do so was reasonably easy though with just a matter of taking off the bottom coilover mount and winding both sides out until it all cleared. This was done for the front too, but this consequently cancelled out some of the clearance done on the rear. I'm in two minds yet as to whether I will just put stock shocks/springs on to get the registration process over and done with. Here's a before and after shot anyway:
- Wheel height before
- Wheel height after
- Exhaust clearance after
Another reason for all these delay's is the fact that I'm also spending more time with the family, which means less time on the car...and without doubt, family comes first. I promise not to leave it so long next time (like you've never heard that before from a blogger).
Cheers
Brendan


