Category: Wheels/Tyres
Tuesday, 5 December 2006 | | Categories: Engine, Driveline, Suspension, Wheels/Tyres
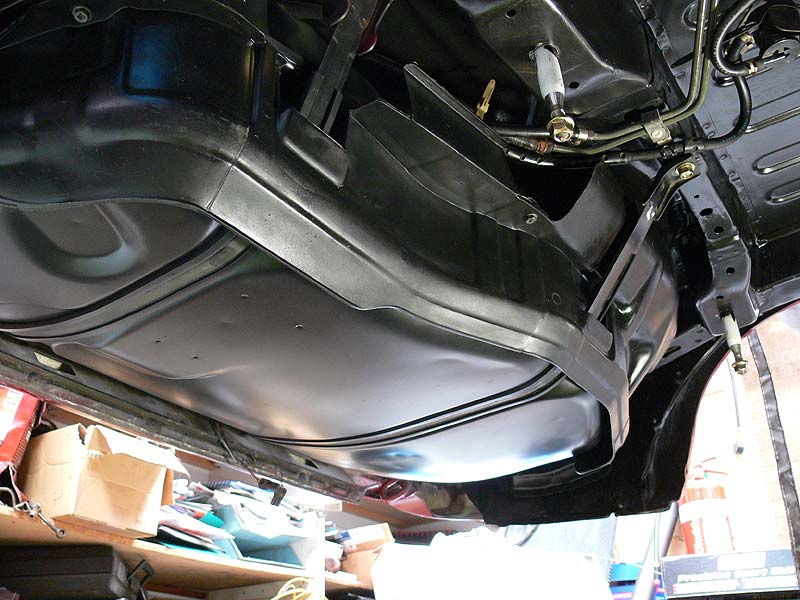
OK, so here's how it goes. The week before last I went ahead and painted the fuel tank using some of K&H;'s Chassis Black paint. Was touted as being chip resistant yada yada. So after prepping the tank with a quick wet sand using 400 grit paper, I sprayed it on...outside...in the sun. This turned out to be bad move. Number one problem was the dusted, number two was the tank getting hot making the paint finish a little strange and three the slight breeze present was blowing the spray away before it hit the tank. Needless to say I wasn't happy with the finish...plus it was way too shiny.
- Wetsanding the tank
- Finish using K&H; Chassis Black
So I let it dry for a week hoping the shine would subside a little but on Saturday, it still didn't look any good. So out it came for another coat of paint (which in the process of moving it, I scrapped it back to bare metal...so much for chip resistant). I think next time I'd use the VHT Epoxy Paint in Satin Black, but this time I used the VHT Caliper Paint in Satin Black, along with painting it inside for minimal dust flying around. All in all I gave it about 3 coats of this early in the day and the finish was much better and I'm glad I did it. While it was drying, I cleaned up the metal straps that hold the tank in place along with getting a hand from Clint (cceg) to clean the rubber strap covers (so the tank doesn't rub metal-to-metal on the straps). Along with the rubber straps, we cleaned the plastic tank surrounds as well which took a little bit of elbow grease to clean with some prepsol, but was worth it, giving it a final coat of tyre shine to bring it up to spec.
- S13 Fuel Tank Fitted (from front of car)
- S13 Fuel Tank Fitted (from rear of car)
- Fitting rubber nozzle surround
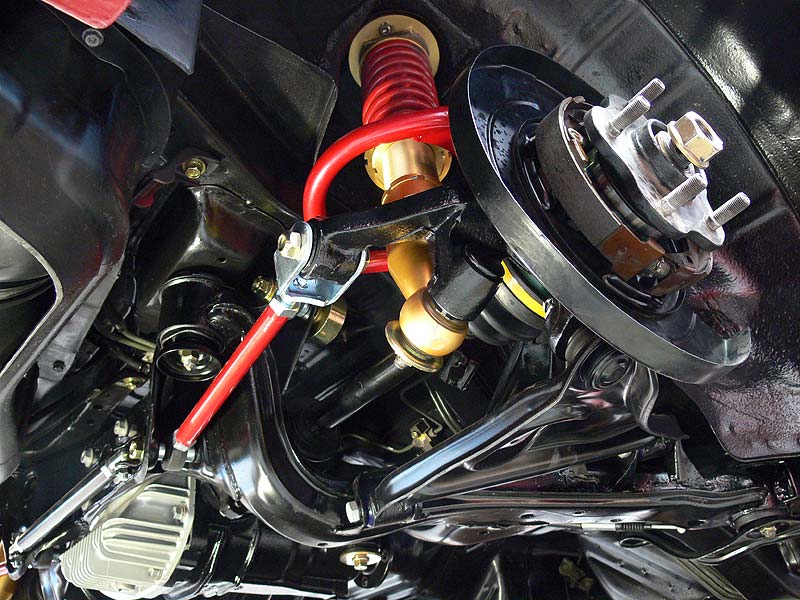
We were on quite a roll on Saturday, and Roy was staying back later than the usual close time so with Clint helping out, we bolted the subframe up and fitted the rear RG V-Stage coilovers as well. As you can see from the photos, it's looking mint with all the Kazama parts in place!
- S13 Rear Underbody 2
- S13 Rear Underbody 3
- S13 Rear Underbody 4
- S13 Rear Underbody 5
Now due to a bit of peer group pressure from Dally and Roy, I've gone ahead and purchased a full set of the Ikeya Formula Lower Control Arms (front and rear, otherwise known as roll-centre adjusters). The reasoning behind this is that I've done pretty much everything else, why not do this as well. The fronts I managed to pick up second hand for a good price (pictured), but the rears will be new and have ordered them through Aston at JShop. I've received the fronts already as they were already in Australia, but the rears will be coming from Japan, so your guess is as good as mine when they'll be arriving...hopefully prior to Christmas.
- Ikeya Formula Front Lower Control Arms for S13 Silvia/180SX
- Ikeya Formula Front LCA Bolts etc
And news just to hand, my rims are on their way downunder...but coming by ship it will be slow going. Should be here later this month or January. And for those who didn't read the previous post back in late May, here they are again:
WedsSport TC 105N

Front: 18x9.5+10 (8.0kg)
Rear: 18x10.5+12 (8.35kg)
I've also ordered in a new steering wheel. The one I had pegged will be fine for track duties, a Sparco #215 Competition Steering Wheel suede job, but I need a durable leather one for daily driving. The winner was a Nardi Rally 35 Deep Corn with about a 90mm dish, black leather and red stitching...perfect!
Cheers
Brendan
Thursday, 5 October 2006 | | Categories: Brakes, Suspension, Wheels/Tyres
Many apologies for the delay in action over the last couple of weeks, I needed a break and sometime with the kids.
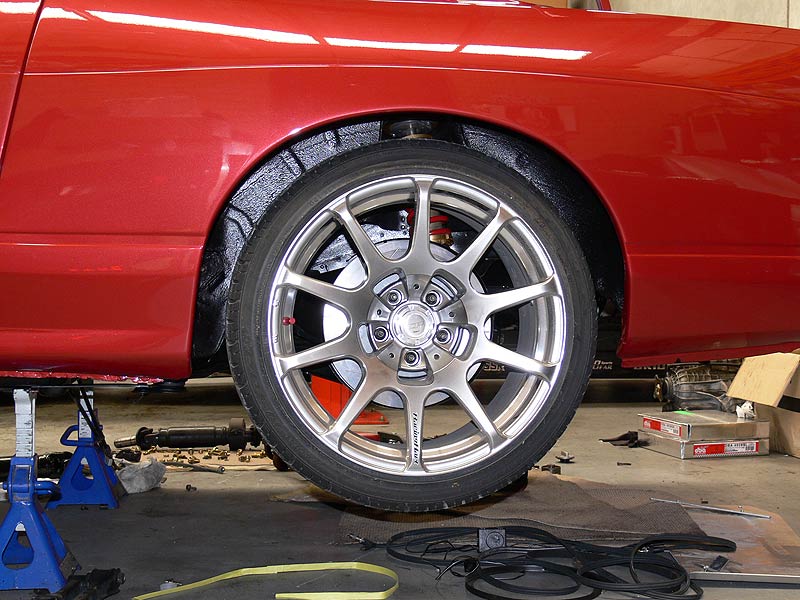
Anyway, a couple of weeks back I was prepping some stuff around the new plating kit I'm working on (to make old bolts and brackets shiny and new again), and Trent from TKO Tinting rocks up at C-Red for some cooler pipe clamps. After a bit of ooohing and aaahing at his nice red R32 he's been building he offers me the chance to trial fit his new shiny rims. They're a newish model from Racing Hart called the CP-S10 and from memory they're 18x10+19's which are fairly close to what I'm after. Now you can see from the pics here that even with these specs, they're well within the 50mm wide M-Sports guards. The wheels I have on order at the moment are the Wedsport TC-105N's with rear specs of 18x10.5+12 (see previous blog post for decent pictures), so looking at these in front of me we're thinking a 20mm spacer could be required to fill the guards nicely.
- Side on View of CP-S10 fitted
- Rear View of CP-S10 fitted
- Front on View of CP-S10 fitted
- Coilover clearance 1
- Coilover clearance 2
From those angles you also get a really good feel for how wide it is too. Mmmmm, yummy. Hope I can fit it into the carport at home.
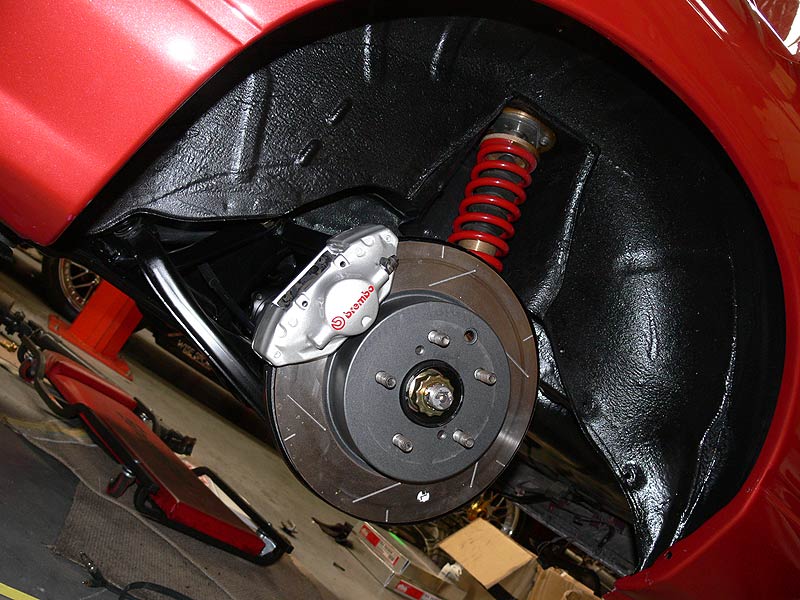
While I had the brake rotor and coilover fitted, I thought I'd just trial fit one of the rear Brembo calipers I'd re-finished. Doesn't it looks tops! There were no pads in these and I had a hard time finding the original bolts as they use a much more coarse thread than standard Nissan bolts. I think I have lost the fronts :( While I was there I took a shot of the 5-stud hubs I'd cracked open too.
- Nice shot of the rear caliper fitted up
- Close up of caliper and rotor
- With an R34 GT-R 18" wheel fitted
- Front aftermarket S13 5-stud hub
Cheers
Brendan
Thursday, 1 June 2006 | | Categories: Wheels/Tyres

Yep, that's right, I might be changing the rim I'm getting. I've never been 100% on the CE28N's, and when I saw these WedsSport rims - they just clicked. Less fussy around the centre hub, less spokes, just a nice clean designed rim. And the colour is perfect too - I wasn't sure a custom colour in Gun Metal for the CE28N was going to be my liking. As it happens, these could be cheaper too. The rim shown above is 18x10.5+12 (8.35kg) which will be just about right for the rear, and along with that I'd be ordering an 18x9.5+10 (8.0kg) for the fronts.
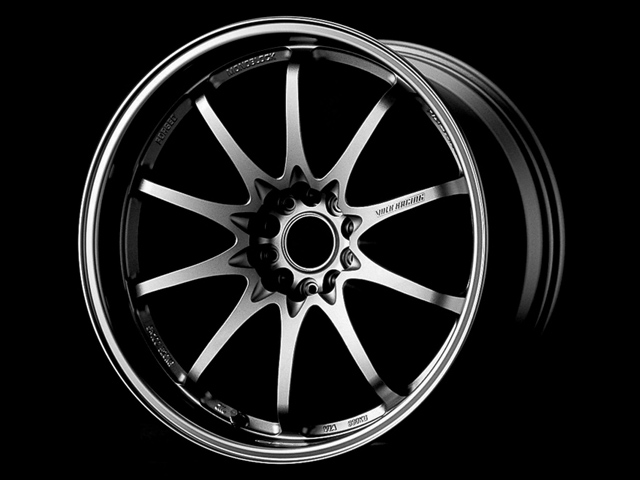
The offsets available on the CE28N's were slightly less, so that's a bonus too with an extra 5mm on the front and 6mm on the rear to fill the guards out. Both are a really nice rim and both are lightweight, but for me I just prefer the WedsSports. One more plus for the WedsSports TC 105N is that they're a 2006 release so they're hot off the press.
Will keep you posted.
Cheers
Brendan
Wednesday, 14 December 2005 | | Categories: Suspension, Wheels/Tyres
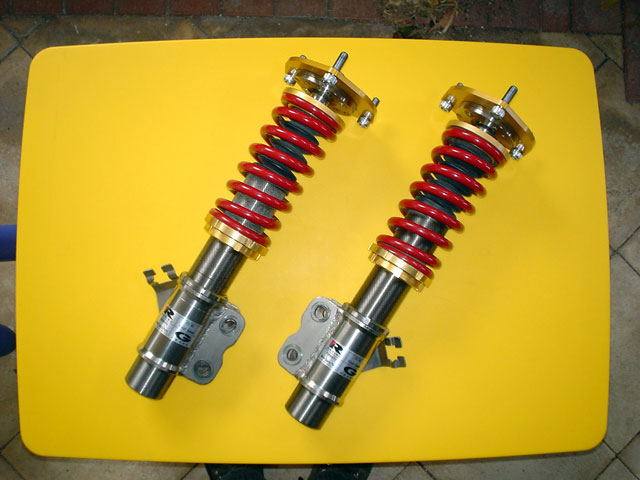
I've been chasing these coilovers ever since they were sold from C-Red's Pig v2.0 about 12mths ago. Due some very unfortunate circumstances that occurred with the owner of them, they came up for sale and I handed over the cash for them - thanks to kev_s13 on SilviaWA forums for holding them for me while I got the cash together.
The coilovers in question are Racing Gear's (RG) top of the line street/circuit damper commonly known as the RG JTC'N1 Damper V-Stage (quite mouthful, but impressive name nonetheless). With C-Red being the Australian distributor for RG, it was only appropriate that I go with a set, plus visually they will match the rest of the car - something the green Teins or purple HKS wouldn't. Here's a quick product blurb:
Racing Gear's ultimate Road/Race/Drift suspension system, the JTC'N1 V-Stage coilover allows a 5-step damping adjustment to go from the street to the circuit.
The adjustments can be set of steps 1 through to 3 for the majority of driving (ie. street), switching to steps 4 and 5 for circuit/drift work. Setting of the dampers is simple with use of a special tool to that comes with the system. For a solid street ride dial in 3, and for the full circuit ride - paired with R-Comp tyres, crank it up to 5. Coupled with the adjustable camber tops, and adjustment of dampers front and rear - the V-Stage is a must for those wanting to do everything.
These should suit well the combination street and grip driving I'll be doing in the car and look forward to driving a car that has had the chassis tuned with such equipment on board.
When I picked them up from Kev, they had the usual road grime and unfortunately a little overspray on them (I think from when the Pig was being built). With a fair bit of cleaning using some prepsol, they've come up a treat (but not quite out-of-the-box).
Some pics of these beautiful coilovers:
- RG JTC'N1 Damper V-Stage Front Coilovers
- RG JTC'N1 Damper V-Stage Front Camber Tops
- RG JTC'N1 Damper V-Stage Front Label
- RG JTC'N1 Damper V-Stage Rear Coilovers
- RG JTC'N1 Damper V-Stage Rear Tops
- RG JTC'N1 Damper V-Stage Rear Label
Car has been at the paint shop for a couple of weeks now so will be back before Xmas...I hope. Other things happening at the moment are a change of plans in boost control duties. The plan was to use the new Turbosmart eBoost 2 unit, but I've decided to trial the soon to be released Boost Control function in the new BikiROM (which is the ECU I'll be using too), this means keeping the Defi Boost gauge I had for sale. Have also had the gearbox housings and rocker cover acid dipped to clean and ready for paint. The gearbox will get a coat of VHT Aluminium paint finshed with a coat of VHT clear. This will help in keep it clean. The rocker cover will probably get a coating that Competition Coatings have - heading down to see Lyndon at Competition Coatings in Wandi next week to see what colours are available. This is to reduce the possibility of chipping as the coating is super strong (I'm assuming a ceramic coating of sorts).
Another thread of discussion/work/decisions has revolved around rims. Originally thinking that 19's would be a good idea, after some discussion with others, the reality is that although looking great, 18's are a better choice for cost on rubber and competition use. So the specifications that are currently in play are:
Volk Racing CE28N
Front: 18x9.5+15
Rear: 18x10.5+18
In Titanium Silver
Tyres
Front: 245/35R18
Rear: 265/35R18
I'd really like a different colour, but its not released in a dark silver as per the mockup below:

To give you an idea of what a similar darker silver would look like, I came across these pics of a Yahoo Auction. These are 19x9+24 and 19x10+24 on a 350Z:
- Closeup
- CE28N on 350Z Front
- CE28N on 350Z Rear
The brakes do look tiny under these, and I'll be using similar sized Brembos (front and rear). But with 18's, they won't look so small (even though the fronts will use the 330mm rotors. I had thoughts of going a larger rotor, but I still want the option of being able to fit a set of R33 GT-R rims (with spacers) for track work.
Cheers
Brendan
Wednesday, 7 September 2005 | | Categories: Exterior, Wheels/Tyres
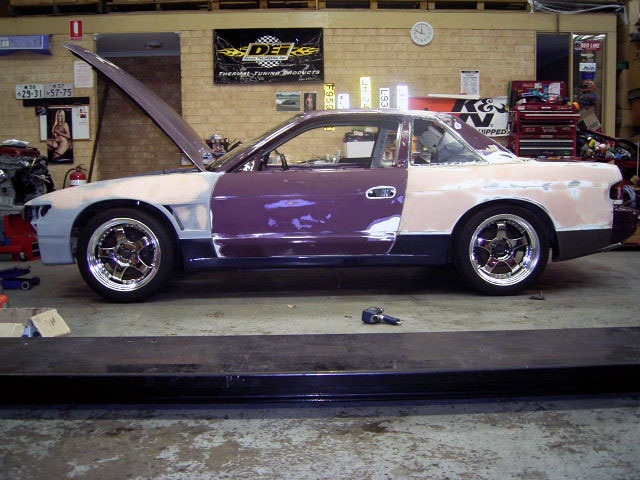
Well, big up to Ben for bringing his rims in on Saturday to test out the fitment and work out offsets that I'll be requiring. Before he got there I wacked on some shagged but lowered coilovers to get a better idea of height and the car is now the automotive version of the leaning tower of Pisa. There being at least a 5deg angle looking from the rear of the car left to right.
Anyway, Ben's rims are SSR SP01 Professors of the following specs - (F) 17x9 +24, (R) 17x9 -1. Quite a nice combo really, and they fitted up very nicely under the guards. We had about 20mm clearance to the outside line of the guards on the front, maybe a little more, and about the same on the rear - the fronts however didn't have much camber at all if any dialed in so you could add another 3-5mm of clearance.
Some pics of the testing session:
- Me being surley
- Side Profile from front
- Side Profile from rear
- Quarter shot Rear
- Quarter shot Front
- Rear Guard profile
- Front Guard profile
- Side shot
- Rear coilover clearance
- From above'ish
Since Saturday, I've been trawling all the good rim manufacturers across Japan, and was looking closely at the Gram Lights 57PRO's - a really nice dishy rim with about any offset you want to order. On Sunday night/Monday morning, Jash mentioned that the Volk Racing CE28N's could be worth looking into - these being something I've considered in the past but not really looked into greatly. I took another close look and came to the conclusion that they were pretty much what I'd be after, and of the same stature as the mighty QF's.
So after check through the sizes, I'm going to step up to the plate with some 19" rims of momentous proportions for the Sillbeer project:
- Front: Volk Racing CE28N 19x9.5 +12 (Tyres: 245/35ZR19)
- Rear: Volk Racing CE28N 19x10.5 +12 (Tyres: 265/30ZR19)
Pic of the rim in 19" bronze, which is pretty much what I'll be looking at:
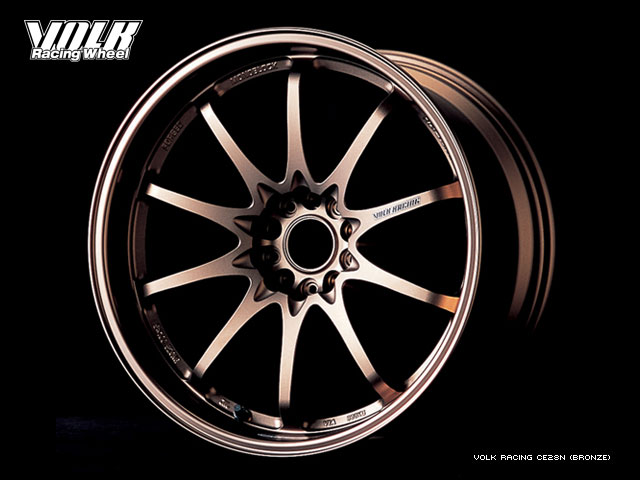
As you can see from the pics, the larger guards really tend to dwarf the 17" rim, one of the reason why I'm going 19's. You also rarely see dishy 19's on an S13 Silvia so thought it was about time (except for the Wise Sport 19's on C-Red's Pig v2.0 [pic: Franz])
On another front, I'm looking to kit the car out with some specialised bracing from a newcomer to the scene - Zenith Tuning. Not that new really considering some of their products are already gracing a number of the Drift Nats competitors. I'll be using in no particular order their Guard Braces, Steering Column Bush, Rear Cradle Bushes, Boot Brace and C-Pillar Brace (still under development). I'll make sure I get plenty of info from Brad on these before doing a quick write up (you can see from of these for sale already on the NissanSilvia.com forums in the Sponsors for sale section).
Seeya
Brendan
Friday, 5 August 2005 | | Categories: Engine, Wheels/Tyres
Well there's a few things to report this post. The body has finally been completed, thanks to Tom it's been prepped and is now ready for paint in all its wide body goodness. Just waiting on some room at C-Red before bringing it back to check wheel clearances etc, make sure intercooler will fit and then it'll be off to the paint shop. Paint colour is 95% sure of being Mazda 'Velocity Red' - but of course it's open for changes up until it goes into the booth.
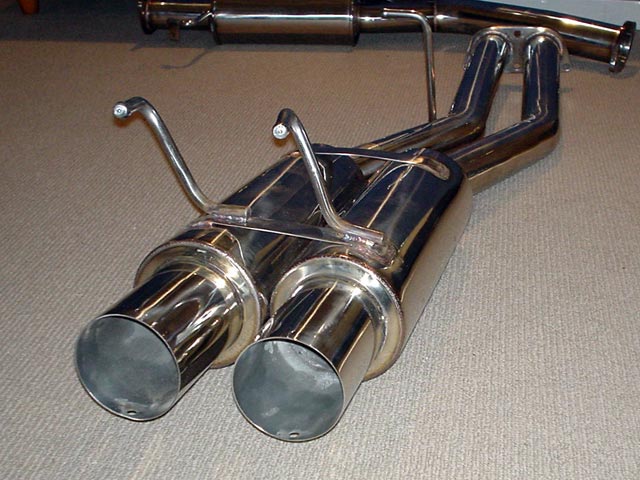
As you can see from the pics, I've purchased a Dual N1 exhaust off of the SilviaWA forums (thanks Dylan). Price was $500 - which I believe was very reasonable for the quality of the product. I've been advised by Dylan that it's fairly quiet, so I may have a second front section made up without the large muffler to go that little bit more obnoxious. I've also picked up a Sard Rising Rate Fuel Pressure Regulator and have begun the prep work on the rear subframe.
Pics of the GReddy goodness:
- XSPOWER Dual N1 Cat-back Exhaust (Full System)
- XSPOWER Dual N1 Cat-back Exhaust (Rear Section 1)
- XSPOWER Dual N1 Cat-back Exhaust (Rear Section 2)
- XSPOWER Dual N1 Cat-back Exhaust (Rear Section 3)
- XSPOWER Dual N1 Cat-back Exhaust (Rear Section 4)
- XSPOWER Dual N1 Cat-back Exhaust (Front Section)
- XSPOWER Dual N1 Cat-back Exhaust (Extras)
- S13 Rear Subframe
- Sard Rising Rate Fuel Pressure Regulator
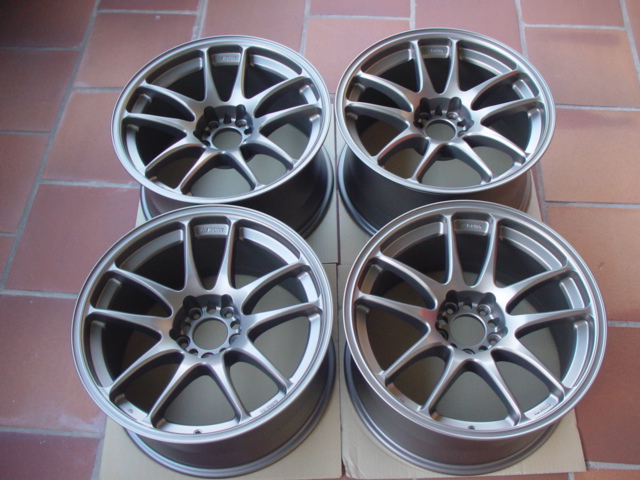
Along with this, I've come to the conclusion that the wheels I have, the Buddyclub P1 Racing QF's (18x10 +12 all round) are going to be too big on the front as it's not possible to get them in 18x9 at a decent offset that I'll need (remember I have 50mm wide front and rear guards). So the search is on for some alternate rims, size I'm aiming for at this point is the same as original planned of (F) 18x9 and (R) 18x10, but will go down to (F) 18x8.5 and (R) 18x9.5 if I have to. The candidates so far as follows:
- Work Emotion CR Kai
- Work Emotion CR Kai - Gun Metal
- Gram Lights (Rays) 57PRO
- Gram Lights (Rays) 57S-PRO
- Team Dayton Racing (Rays) 505
Order also went in today for a full set of Defi-Link Meter gauges including Turbo, Oil Pressure, Oil Temp and Water Temp (plus the Control Unit II).
Will post images of the body once I get a look at it, so for now...
Cheers
Brendan


![]()


