Wednesday, 22 September 2004 | | Categories: Engine

This Saturday gone was spent cleaning up the engine bay ready for it to be painted. As goes with most things, the better the preparation the better the finished product. Basically used Spray & White All Purpose Cleaner to get the grime and crap off, then did a final wipe over with some prepsol (Grease & Wax Remover) to make sure it was clean. Had to use an old toothbrush in bits to get built up dust and grease out of the weld creases and corners. All up it came up fantastic.
Pics of the engine bay at the end of the session:
-
Front (
Before)
-
Top
-
Driver's Side Bay (
Before)
-
Passenger Side Bay (
Before)
Not sure what's next, just a matter of waiting for the panel guy to become free.
Cheers
Brendan
Friday, 17 September 2004 | | Categories: Engine

Well I've just popped down to C-Red to check out their new shipment of East Bear goods that landed yesterday. In the shipment were three sets of their new Reclining Seats which debuted at this years Tokyo Auto Salon. I've been waiting to check these out for a while and I wasn't disappointed. They're just beautiful, and as such have put an order in for some Black ones for the Silvia. This means I'm selling...opps sold my GT-R seats to Woodie.
If you're interested in checking them out, run on down to
C-Red before they all go. As of now, 2 sets have already gone and only 1 set remains. Prices will be around $900/seat + rail mark.
Cheers
Brendan
Tuesday, 14 September 2004 | | Categories: Engine

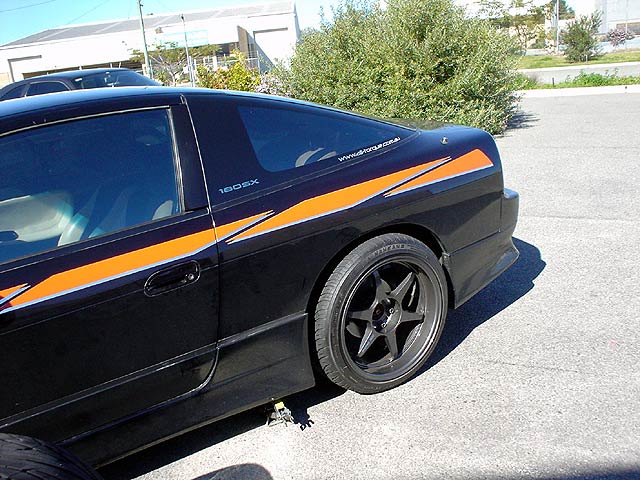
As it happens, when I went into C-Red on Saturday, Joel has his 180SX in there for a service. Now Joel has a 5-stud conversion, and I've been needing to test out QF's on a 5-stud S13 with standard rear cradle (Pig V2.0 has GT-R rear end). So between work being done on his 180, I ripped the wheels out and slapped them onto the back. I'm glad I did as there is definitely a requirement for as wide a guard as possible which I think will be the 50mm guard from Wise Sports. As you can see from the photos, it's pretty evident that they'll be required - understandable really when you consider the +12 offset that these 18x10 rims have : )
Pics of the engine bay at the end of the session:
-
From front
-
Side Rear
-
Ruler Measurement
-
Straight On
-
From the Rear
Cheers
Brendan
Tuesday, 14 September 2004 | | Categories: Engine

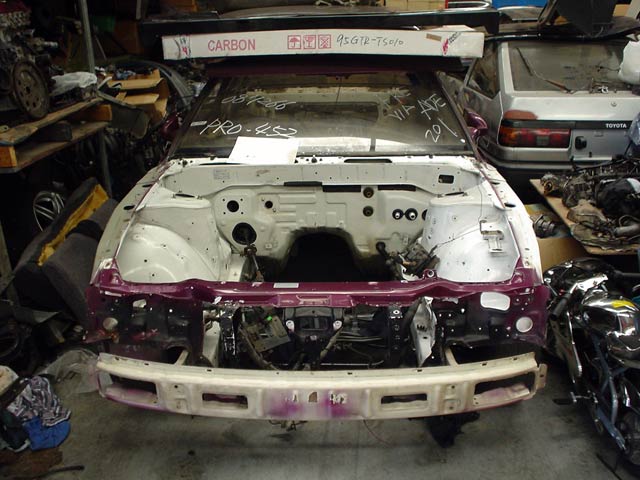
Finally got back into the workshop on Saturday to strip the engine bay of all lines, master cylinder, booster etc etc. Main pain was finding all those little black plugs they spot around the engine bay - always wonder what they were actually meant for. While I was at it, I took the exhaust off as it was just hanging there anyway. The front guards have been removed also, as they'll be replaced by some nice wide body action from Wise Sports.
Pics of the engine bay at the end of the session:
-
Top
-
Driver's Side Bay
-
Passenger Side Bay
-
Front Left
-
Front Right
-
My Daughter was there to help me
-
She loves the camera
-
Beer O'Clock
-
Marc doing what he loves
Well it's pretty much ready now for the paint/panel work to be done, and have worked out from a fitting session of the QF's that I'll be needing the 50mm widebody guards at the rear. See seperate post for details and photos.
Cheers
Brendan
Wednesday, 8 September 2004 | | Categories: Engine
Well, I had the turbos off the GT-R rebuilt through Per4manz Turbochargers a couple of weeks ago, and they've now been sold to a chap in Queensland I think (07 area code). This is the last item that can be sold from the GT-R after selling the gearbox last week (that guy got a bargain).
So, haven't been able to do much in the way of the Silvia being Fathers Day last weekend and all, and this weekend I have Charli to look after so finding it hard to get down to the workshop. Have asked Jeff to get the boys to start looking at the engine. Forged internals will be coming, and will be getting the bottom cryo treated as I did with the GT-R engine. Also looking at getting the pistons ceramically coated too.
Decisions to make will be how far I go with the head also, with the engine I have it has already been ported and polished, but whether or not I get Step 1 or Step 2 cams will determine if I need to replace valve springs as well.
Feel free to make comments on my blog - feedback on what you think I could do is always welcome.
Cheers
Brendan
Tuesday, 31 August 2004 | | Categories: Engine

I'd forgotten that back in May I did a couple of tests of the 18x10 (+12) P1 Racing QF's on a couple of different S13's. The first was the C-Red Driftpig v2.0 (Sileighty), the second was Joel's 180SX. With the Driftpig, the front rims stuck out considerably mainly because of the spacers required to clear the coilovers. The pictures you see show the suspension set with maximum -ve camber (about 7degrees!). The rears fitted, and needed 15mm spacers to fill the rear guards (which are 30mm wider Wise Sports. However the rear of the Driftpig also has an R32 GT-R subframe fitted - this may be the reason the spacers were required. Another test fitting of the QF's will be coming up soon on the shell once we fit up some 5-stud hubs.
Joel's 180SX didn't have front coilovers fitted, but did have a 5-stud conversion, this the reason why the rims didn't require any spacers. The guards on Joel's car I believe are 30mm (could be 20mm), and having a look at the ruler, it would seem that for 10" rims at the front, I would need another 30mm or so of guard. Thankfully we'll only be going 9" at the front.
C-Red Driftpig v2.0 (Sileighty)
http://www.ipixel.com.au/temp/p1-qf-s13sil80/index.html
Joels 'Pivot' 180SX
http://www.ipixel.com.au/temp/p1qf-joel/index.html
BTW, the front bar you see on the Driftpig is more than likely what will be fitted up to the 'Silbeer'.
Cheers
Brendan
Monday, 30 August 2004 | | Categories: Engine

I rolled the shell out that will be turned into a true 'brenspec' Silvia on Saturday. Started out by removing the headlights, front and rear bumpers, side skirts and cleaning out the interior. The front Nissan Aero Sport bar has certainly seen better days, so I'm afraid I won't be using it. Has had too many hits and there's too much bog on it for my liking. The side skirts likewise have taken a couple of hits, and removing them wasn't too easy and have torn a chunk away from inside the door sill area. Once the skirt were removed, a hit has been revealed under the body - but this is easily repairable.
Pics of the shell at the end of the session:
-
Front
-
Passenger Side
-
Rear
-
Driver's Side 1
-
Driver's Side 2
-
Engine Bay
-
Hit 1
-
Hit 2
Next is to strip the engine bay of everything including the harnesses so it can all be painted at the same time. Aiming to send it off in about 2 weeks if I've managed to get everything done that needs to be done by then.
Cheers
Brendan
Friday, 27 August 2004 | | Categories: Engine
NOTE: This is not my engine.
Just came across someone who's done their SR20 rocker cover in black wrinkle finish paint, I think it looks very cool, although I may be going red instead of black myself:

What does everyone reckon?
Cheers
Brendan
Friday, 27 August 2004 | | Categories: Engine
No biggy, but I've noticed that the GT-RS kit I bought was specifically for the S14/S15. Apparently the S13 kit comes with the inlet and compressor outlet adaptors too.

Thanks to 'orbitor' on nissansilvia.com for the use of the picture.
Cheers
Brendan
Thursday, 26 August 2004 | | Categories: Engine

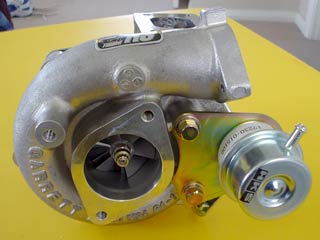
Well it finally arrived. Could have picked it up Tuesday according to the Australia Post card but we only got it in the mail this morning. Hadn't even been cracked from the HKS factory so all is good on that front. It's a beautiful turbo too, and to prove it here are some pics (they're big so apologies to dialup users):
HKS GT-RS Turbo for Nissan SR20DET engine:
-
Front
-
Badge
-
Compressor
-
Internal Wastegate Actuator
-
Left Side
-
Right Side
-
Exhaust Turbine
Can't wait to strap this baby on.
Cheers
Brendan


