Category: Exterior
Monday, 8 January 2007 | | Categories: Exterior, Suspension
Well well well. Been a while since last post hasn't it. December was a rather busy month getting ready for Xmas. The wife had a deadline of Xmas day to get our front gardens done, so weekends were spent digging, prepping, etc. Glad to say I did make the deadline and we now have a little tropical grotto out the front. So there's the reason for little work being done on Sillbeer.
So after Xmas, I spent a week off to spend time with the family which was thoroughly enjoyable - plus the workshop was closed so I couldn't do anything anyway. Last Tuesday I was in there, and planned to be there for three full days.
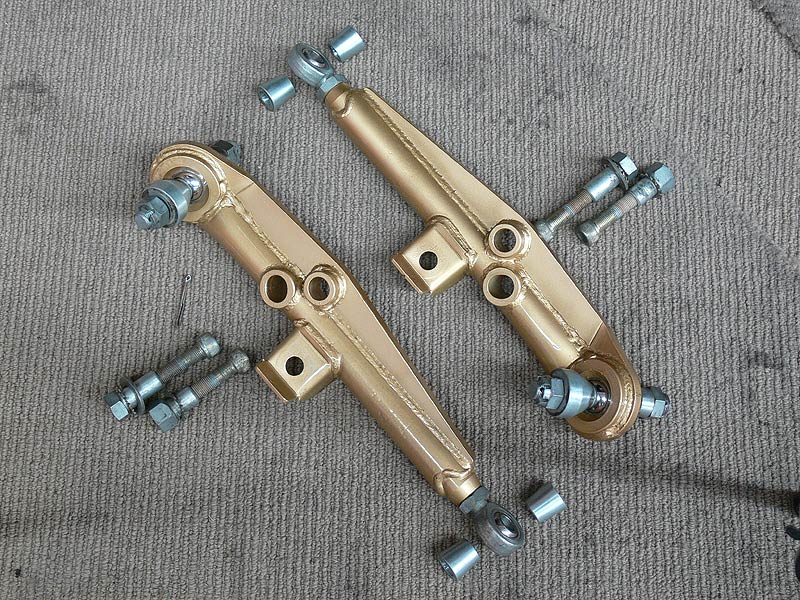
First on the agenda was to get the Ikeya Formula Front Adjustable Lower Control Arms finished off. They are pre-loved items so weren't in top shape, so I sanded them back a little and gave them a fresh coat of gold (not quite Ikeya Formula gold, but close enough for this) along with a coat of clear. The nuts and bolts etc were in pretty used condition, and I didn't have the inclination to sandblast them and electroplate them (funny considering I bought the electroplater for just that reason), so instead I got out the prepsol and a wire brush and gave them a quick once over. They didn't come up too bad either.
- Ikeya Formula Front LCA's prepped for paint
Next on the agenda was getting the windows and window surrounds all ready to have the glass refitted. The rear screen had something on it similar to the dimpled surface of a basketball which took about 2hrs all up to remove it. Ugh!! Then the old sealer was removed and given a good clean. Following on the rear quarter windows were cleaned up and the old tint removed (which was completely clear due to age and sun). The tint glue was especially a pain to get off, using a razor blade certainly helped.
- S13 Silvia Rear Windscreen Glass
- S13 Silvia Rear Quarter Window Glass
Then came the real challenge...chasing down all the bits of surround for the rear, quarter and doors. This probably took a good day and a half to find all the bits, fasteners from about 4 different wrecks that C-Red has for just such a situation. Some bits were even found in puddles of water sitting in the wrecks. In the end, I managed to get all the bits needed, although I will be needing to get new door seals, new front screen along with new front and rear window retainers.
- S13 Silvia Rear Windscreen Lower Surround
- S13 Silvia Door Surrounds and Rubbers
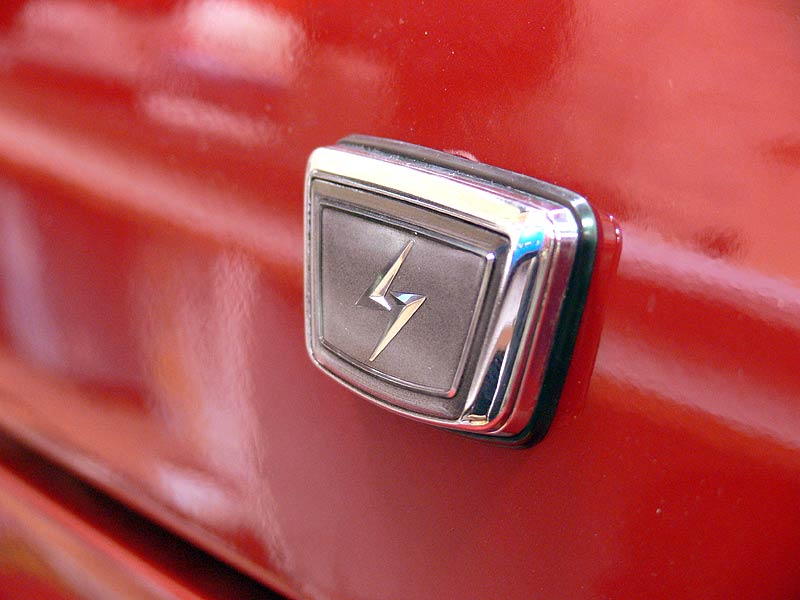
Oh, and I also added a nice boot lock in the form of an old CA version lock, just because I like it better than the SR version.
After the exterior bits, I focussed on find the scuff panels and lower kick panels. These were a little harder to track down, but finally got a full set along with the correct fasteners and gave it all a good clean in the shower, a wipe down with prepsol and finally a good lashing with the tyre shine...now look great (pics don't do them justice).
- S13 Silvia Door Scuff Panel
Following on from the windows and stuff, I decided it was time for a bit of a clean up. Needing access into the boot, all the bits and parts I've been storing in there needed a new home so the side skirts and other body panels waiting to be mounted were stored in a safe place and the parts were moved into the place where the rear seat will go. Giving me access to the boot which was a freakin' mess after spending plenty of time at the panel beaters. I started off with a vacuum, then some all purpose cleaner and finally a wipe down with the prepsol. This should give a nice clean surface for the Dynamat to stick to.
- Clean Boot (left)
- Clean Boot (right)
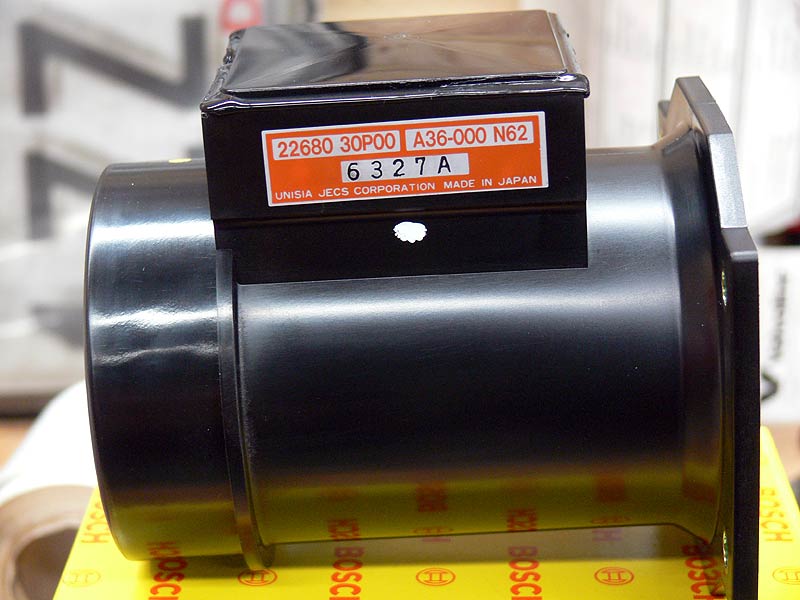
Now I have been tossing up what sort of engine management I'm going to use for sometime, and wanting to keep it to a good street car with the occasional track squirt, I wanted good cold start functionality and economical freeway/highway driving. So I've decided to give the latest BikiROM a go using an S15 ECU. This will require the need of a Z32 Air Flow Meter, so Jeff ordered in a Bosch one for me - nice and new, and give me good driveability (sp?).
- Bosch Z32 AFM Box
- Bosch Z32 AFM Label/Side
- Bosch Z32 AFM Inside
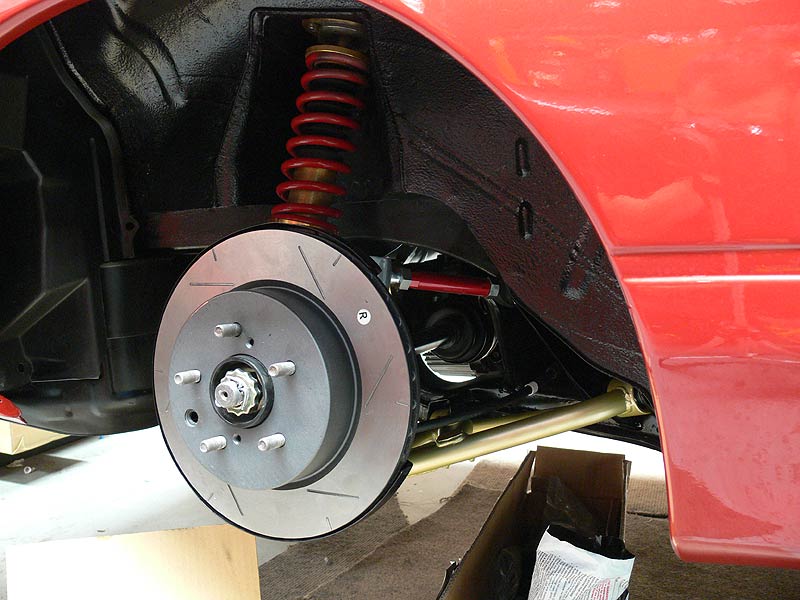
Something that I've been wanting for get sorted for sometime it of course the suspension, and with all the parts needed now at hand to finish it off, I got stuck into it with only the front and rear lower control arms being the final major bits to go (sway bars will get fitted later - but at least I have them). First up the stock rear LCA's were removed which was relatively easy - remove split pin, nut and them give the hub carrier a few good hits with the hammer and she fell out. Next up I fitted the inner mounts first on the Ikeya Formula Adjustable Lower Control Arms followed by the outer ball joint. Damn it looks good.
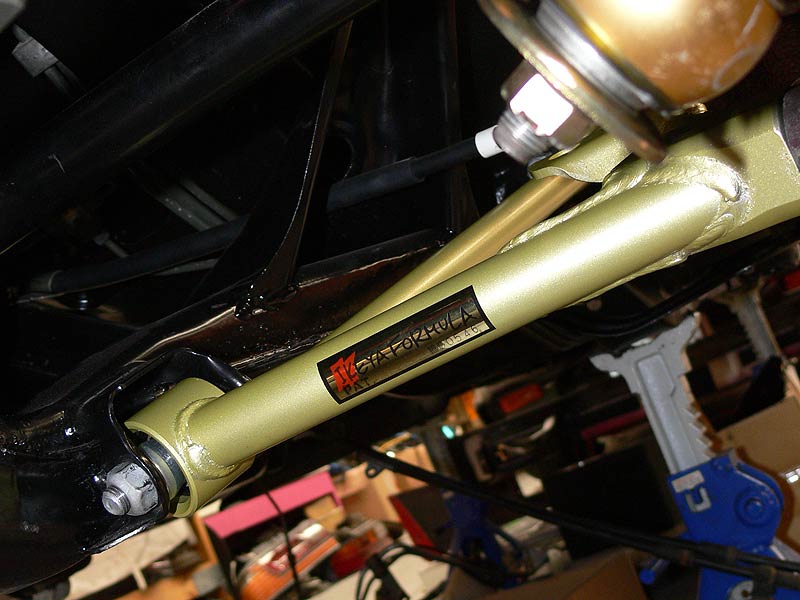
- Ikeya Formula Rear LCA's Installed
- Ikeya Formula Rear LCA's Ball Joint 1
- Ikeya Formula Rear LCA's Ball Joint 2
And then it was onto the fitting the fronts which were prepped prior. Once I got the correct installation order for the spacers etc on the ball joints, everything went pretty smoothly. And they look hot too.
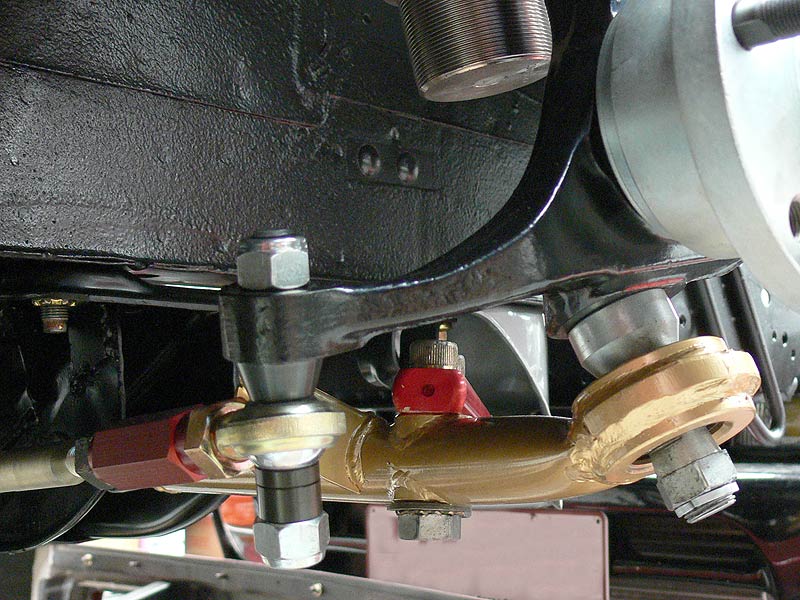
- Ikeya Formula Front LCA's Installed 2
- Ikeya Formula Front LCA's Inner Mount
Second last step was to go around and tighten up all the suspension ready to hit the ground followed by the tightening of all the wheel bearing nuts (which I had to go out and buy a 36mm 3/4" socket and 1/2"-3/4" adaptor :( cost = $50). It's now at a stage where the discs and be mounted up, calipers bolted on and wheels fitted. I think I will do this next week so that it can be rolled around the workshop. Josh at C-Red will be completing my engine and gearbox over the next couple of weeks (hopefully) and we can then drop the front suspension, mount the engine and gearbox, and put it all back again with then need to scratch the engine bay.
Phew, that was a big update, 'til next time.
Cheers
Brendan
Tuesday, 6 June 2006 | | Categories: Exterior, Driveline, Paint
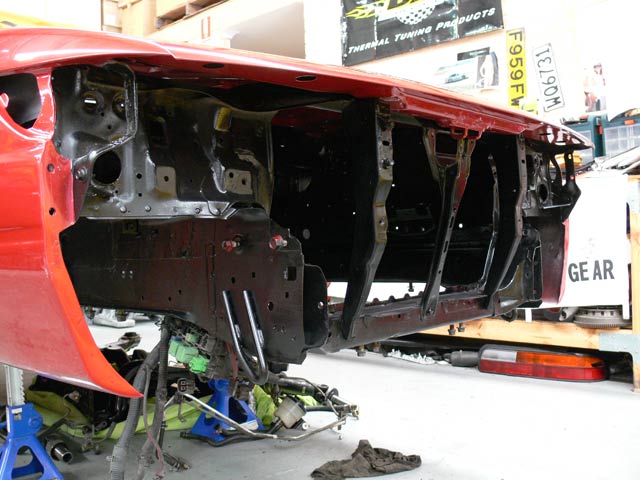
Nothing much to report really, I went in and finished up the underside on Saturday and completed up to the front of the chassis rails (removed front bar to do this). I've now got the all the Brembo's off the Pig now, so will be cleaning and painting them sometime this week. At the moment the plan is to go silver with red Brembo logos - still not sure if these will be painted on or stickered on with a clear over coat.
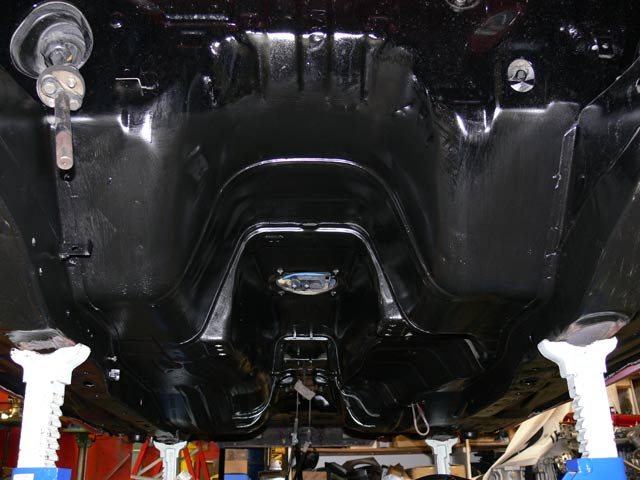
Next on the prep list is the driveshaft, differential (GT-R) and half-shafts (also GT-R). These are still at the workshop for the time being because if I bring too many parts home the wife gets a little miffed which is quite understandable.
Would have done more work on the car over the weekend, but had to get the bathroom and laundry ready for the tiler starting today. This job was a real paint in the arm. I had already removed the tiles, but that left the adhesive still intact. So out with the bolster and hammer on the walls (hit my hand several times), and them my trusty Ozito jack hammer on the floor. All up I was going at it for 10hrs straight over the weekend.
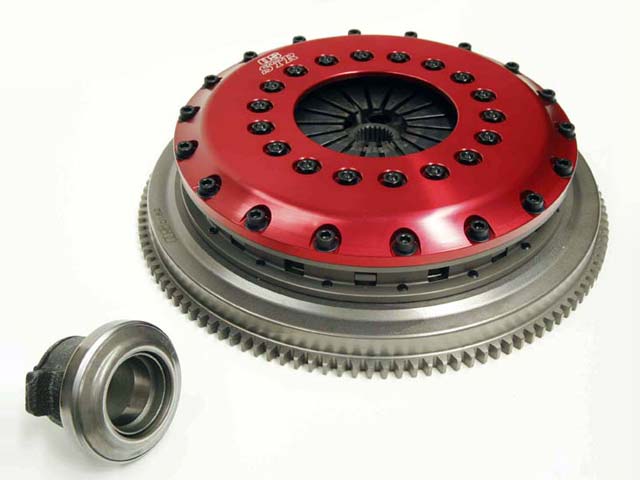
Oh, and I've decided to not much around with the clutch and have an OS Giken STR Twin-plate on order.
The New OS Giken STR series can handle up to 600hp, yet retains drivability very close to standard with 30% lighter pedal effort than most multi-plate clutches. By using special new plate and diaphragm designs, OS Giken has achieved ample power handling with just 715kg clamping pressure. This makes the STR series perfect for everyday driving applications, along with most race and drift applications.
The clutches come complete with lightweight chrome-moly flywheel, ruby red-anodised billet aluminium clutch cover and the required bearing/carrier set or pull-push converter kit where required.
On blog matters, I've managed to secure the use of www.sillbeer.com as a domain and am just awaiting the owner to redirect the DNS records to my server before I move the blog over to it. Stay tuned.
Enough for now, more next week.
Cheers
Brendan
Tuesday, 30 May 2006 | | Categories: Exterior, Paint, Suspension
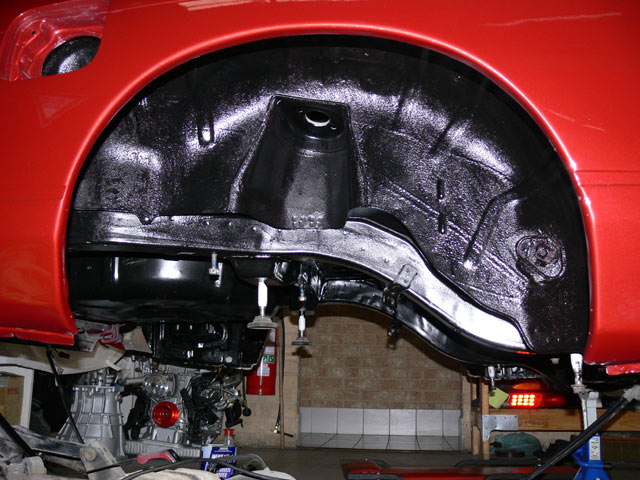
Actually, I felt more like Michaelangelo than Picasso doing the undercarriage painting - being on my back looking up (occasionally dropping paint in my eye/mouth/ear etc). This painting part was a little time consuming, and I still need to apply a second coat in bits (smoother areas) to get rid of the brush marks. The rougher parts under the car were a cinch though so all good there. Still not 100% finished though, as I need to remove the front bar, and paint the end of the chassis rail (see front wheel well pic below) and around under where the radiator is mounted. The paint I used I touched on in the previous post, and to give you an idea of coverage, I've done about 90% of the job with about 80% used of the paint (not much room for error).

- Front Wheel Well Painted
- Rear Wheel Well Painted
- Tunnel Painted (Before 1, Before 2)
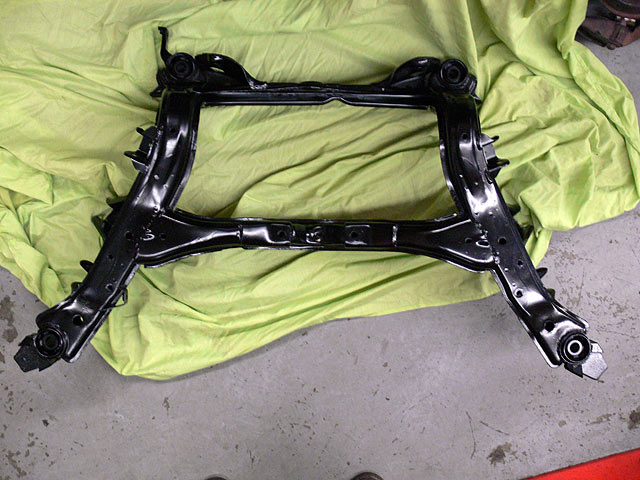
As well as the undercarriage, I've been busy getting all the subframes and associated bits ready to be bolted back together. The rear subframe I had painted up previously, but we had to melt out the subframe bushes which of course messed some of the paint job up so the hold rear subframe was painted again. This then had a set of Nismo Subframe Bushes pushed in. I decided to go with these rather than the aluminium bushes so I don't get as much noise/vibration coming up through the floor. The rear lower control arms have also had their original bushes melted out and they've been resprayed now too. Will be fitting a set of Nolathane bushes (in red of course) into these.
I'll be using an S15 powersteering rack which I cleaned up along with the brackets and heatshield. This will get a new set of rubber boots too. The S13 subassemblies (which the hubs bolt onto) have been cleaned up and painted, and we're hoping we can get a set of 350Z disc brake shields from the 'Track' edition to fit up for the factory look around the R33 GT-R Brembos I have going on.
- Front Subframe
- Front Subassemblies
- Rear Subframe
- Nismo Subframe Bushes 1
- Nismo Subframe Bushes 2
- Rear Lower Control Arms
- S15 Powersteering Rack (among other things)
- Powersteering Rack Heatshield
Next is to complete the undercarriage painting, then onto prep and paint of the brake calipers - which at this point in time will be done in Silver with Red Brembo logo and a coat of gloss clear. Then once all the Kazama suspension parts arrive, the rear end will be bolted together along with (for now) a GT-R diff and half-shafts.
In the meantime, I've gone ahead and ordered the Nismo Power Brace (a review of which is here), Do-Luck Style Ladder Brace (goes between chassis rail under the gearbox) and Rear Lower Tie-Rod Brace (you may have seen these link the rear lower tie-rods together on the rear subframe). Then to make sure I'll be getting enough fuel, I've ordered in a Sard Fuel Collector (Surge) Tank (preview picture). Now I could have gone a normal one, but then the fuel pump would need to be mounted in the boot causing lots of unwanted noise. The beauty of the sard item is that the fuel pump sits inside the surge tank - making it nice and legal, nice huh?! The tank is currently in Melbourne and assume it'll be here by weeks end. Phew.
Cheers
Brendan
Monday, 15 May 2006 | | Categories: Brakes, Exterior, Paint, Suspension
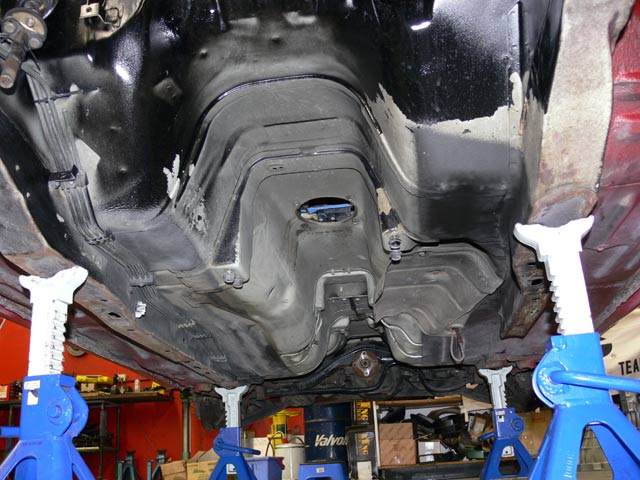
So this Saturday was the start of the final strip. Went out to Bayswater on Friday and picked up some PPC Chassiscoat and PPC Marine Clean. Then once I'd put the wheels back on the car, dropped it, rolled it outside and jacked the front and back up, I proceeded to use the Marine Clean (pretty good stuff) in concert with the Karcher high pressure hose to clean the undercarriage. The photo above is what it looked like after cleaning. It's not 100%, but after a quick wipe over this Saturday with some prepsol, I'll be giving it a nice coat of the PPC Chassiscoat. This paint is specially made for chassis and suspension components as it dries rock hard (a nice Satin Black) and is resistant to stone chips etc.
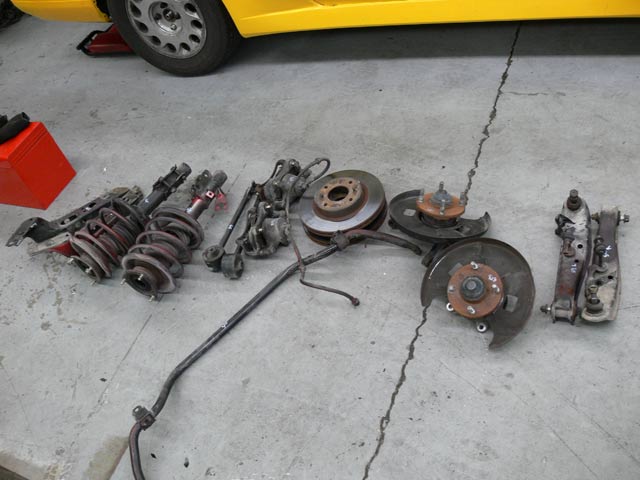
After the clean, a quick blow with the air compressor and it was back inside (after a quick rejig with car positions in the workshop and a mop of the floor - I like a clean working environment after all). Up on stands again, I made quick work of removing the struts, lower chassis rails and finally the front subframe. Dragged out of the road, it was then disassembled so I can clean and paint the subframe (with the Chassiscoat). What you see above is the leftovers that won't be going back on the car, instead replaced with new/used/uprated parts.
- Unpainted front subframe
- Engine bay without subframe
This Saturday it'll be onto removing the rear subframe, clean up the undercarriage a tad more before applying a coat of paint. In the meantime, I've been busy at home. Have cleaned the front subframe, an S15 power-steering rack, front hub knuckles and brake disc shrouds (which will be trimmed so the 330mm Brembo rotors can fit). Will try and spray paint these items before the weekend.
Cheers
Brendan
Tuesday, 9 May 2006 | | Categories: Engine, Exterior, Driveline, Paint
Yeah, I know, lame title, but it's hard to keep coming up with new witty titles all the time 
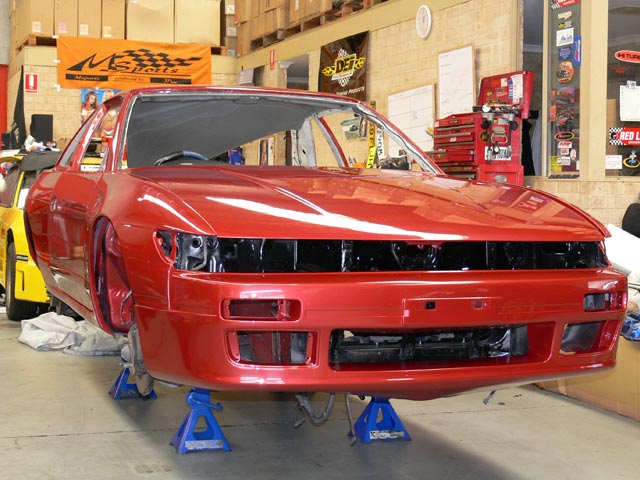
Well after the unfortunate failure of the SD (memory) card in my camera on Saturday, I got another on Monday and scooted out to C-Red to get some replacement pics. It really feels like I'm getting somewhere now, with attention turning to the underside/chassis. Enjoy these pics:
- Front View
- Front View (driver side)
- Front Quarter 1 (driver side)
- Front Quarter 2 (driver side)
- Side View 1 (driver side)
- Side View 2 (driver side)
- Rear View
- Rear View (passenger side)
- Rear Quarter (passenger side)
- Rear Quarter (driver side)
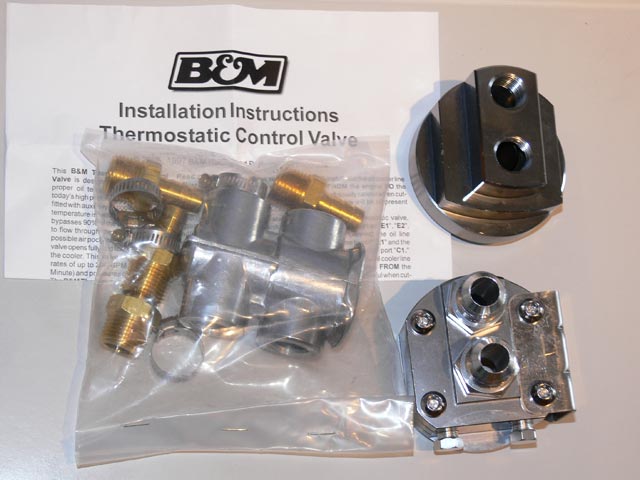
Next up is the arrival of my B&M; Inline Oil Thermostat (in the plastic bag), which I purchased from 'spandex' (who now has a website of his own as well - www.midnightmods.com.au) on the NissanSilvia.com forums (highly recommend the great service you'll get). This will make up along with the oil filter sandwich plates and the remote oil filter mount, the main part of my oil cooler setup. Still to get will be the oil cooler core which will probably be a top quality Serco unit from Go Gear in Mt Hawthorn. Once it's all mounted, I'll get the Earls lines made up to suit again with the Black connectors rather than the standard blue and red ones.
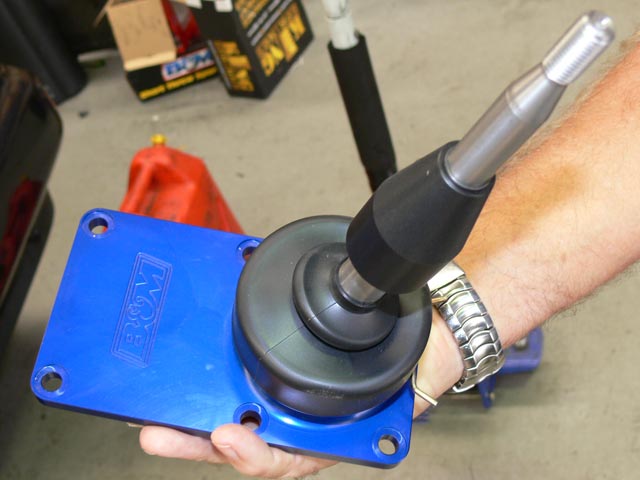
Another item to arrive recently through C-Red was this B&M; Short Shifter for the S13 gearbox. This will reduce the throw required on gear changes, making way for quicker times on the track when needed. This will mount up on the gearbox which has been resprayed, but may be powder coated instead now.
- B&M; Short Shifter for S13 (top)
- B&M; Short Shifter for S13 (bottom)
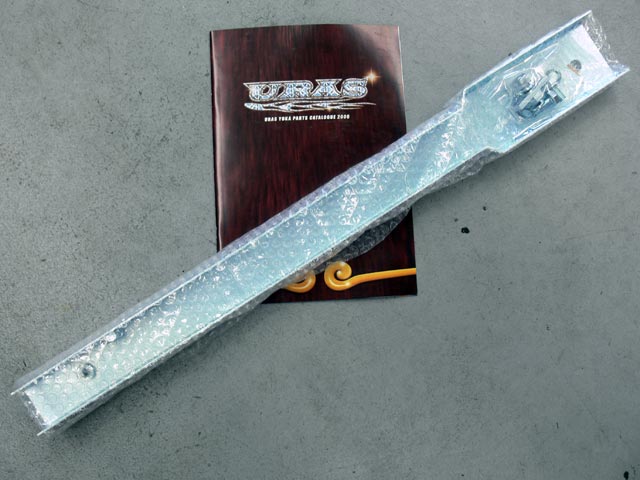
And finally, I received my new URAS S13 Chassis Rail from Japan. I ordered this through 'BT-Revolution' on the NissanSilvia.com forums and again I recommend this trader as I was taken care of very well. Now, why do I need a chassis rail, well if you've ever peeked under the S13, you notice that the passenger side chassis rail doesn't run all the way to the rear before supporting the rear sub-frame. Well this item bolts up and completes the missing rail, increasing chassis rigidity. For the rest of the chassis, I already have the Cusco strut tower bars, Zenith A-Pillar braces and the Zenith rear boot brace, I'm still looking into tying parts of the gearbox tunnel together along with a front castor rod chassis brace of some sort (either small brace or Nismo Power Brace).
Well hope you enjoyed this Mega May update, should be accelerating the amount being done to the car now that it's back in my possession (so to speak).
Cheers
Brendan
(aka. Grandpa [SWA], Sillbeer [NS] or VSPEC32 [SAU])
Saturday, 8 April 2006 | | Categories: Exterior, Old School, Paint
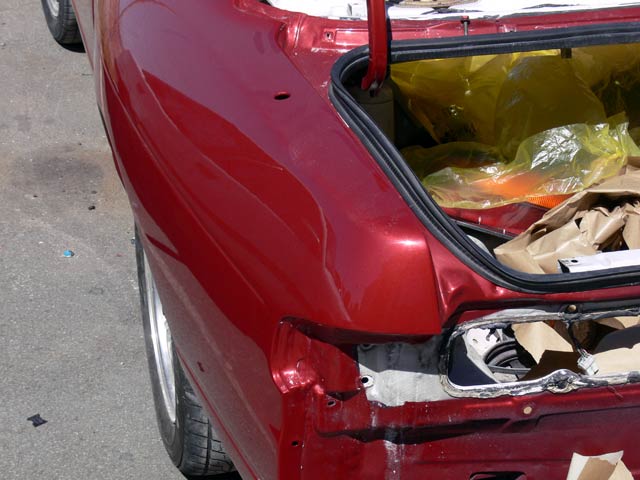
Sorry for the delay in getting the pics up, but been a busy week. Anyway, these were taken last week at the painters, so haven't seen since they've buffed it up. For those who don't want to read back the colour is from Mazda and called Velocity Red. It's available through most of their model line up from the Mazda 3 up to the RX-8.
Red will certainly make this faster:
- Rear Quarter (passenger side)
- Rear Quarter (driver side)
- Rear View (passender side)
- Rear View (driver side)
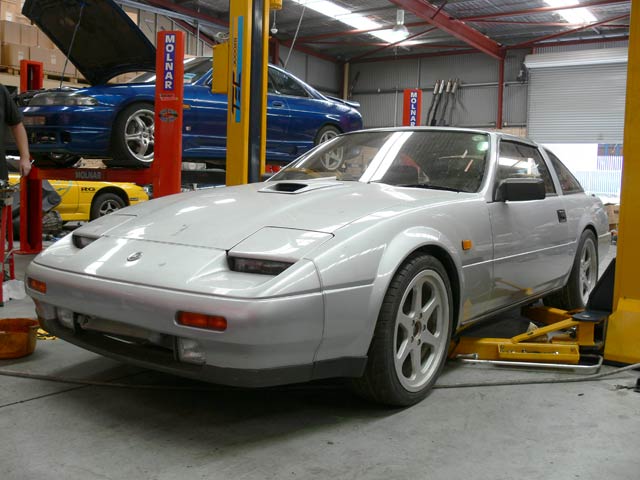
On another note, I'm looking to move the Galant Sigma Turbo on. Have had/known here for over 13 years and she's clocked over 300,000kms (160,000km on its current rebuild - done by Malcolm Crockenburg, the WA Ralliart arm). And this is by no means set in stone (needs to be cleared by the Finance Ministry), but C-Red have a beautiful late 80's piece of machinery that I've been eyeing off since it landed in mid/late 2004. It's a 1988 Nissan 200ZR-II Fairlady, in Silver, running an RB20DET ECCS (standard engine for this car) with some light modifications. It needs a bit of a clean up, but we've cranked her over and she starts first pop and Jeff has had the rust cut out too so that's a bonus.
On 18's and low, she sits beautifully, although it's a bit too low at the moment:
- 200ZR Front
- 200ZR Side/Rear
- 200ZR Targa Roof
- 200ZR RB20DET ECCS Engine Bay
If anyone is interested in a great reliable bunky (with aircon, CD player and recently fitted Mitsubishi FTO sports seats), send us a message.
Cheers
Brendan
Wednesday, 28 December 2005 | | Categories: Exterior, Paint
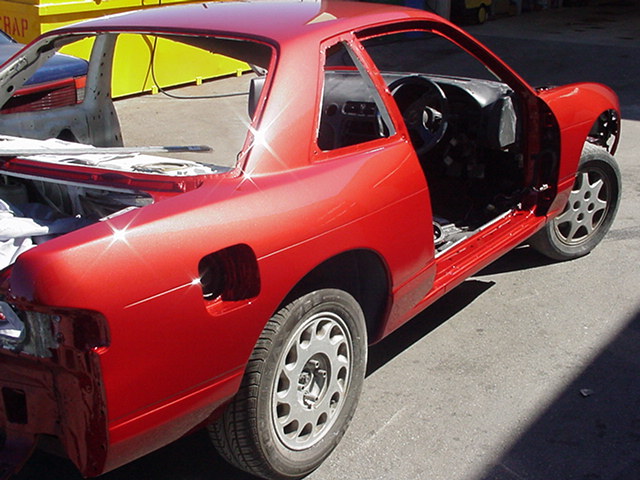
Well what can I say, it looks f%^∈ tops!!! This is straight off the gun so still some finishing touches to do but it looks real good. I'll shutup now so you can look at the pics.
Wow:
- Front view drivers side
- Front view drivers side 2
- Front view passenger side
- Front view passenger side 2
- Rear view/Side
- Rear view 2
- Roof Front
- Roof Rear
- Side'ish View
Cheers
Brendan
Tuesday, 27 December 2005 | | Categories: Exterior, Paint
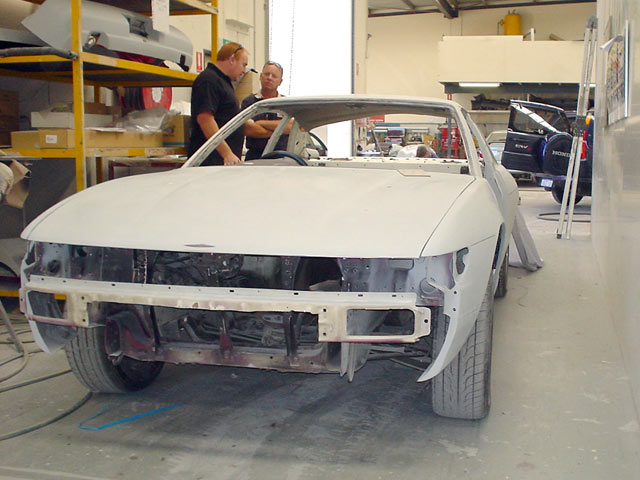
So by the time you read this, I'm hoping the car now has a coat of red on her. Last Wednesday I went out to Assure in Canningvale to look at the body. It was in primer, and after talking to one of the staff, was due to get paint the next day (Thursday). Not 100% sure when I'm likely to see the body again, but would assume it'll be within the next week or so. Now being all in a single colour, albeit a drab grey, the wide body isn't so noticable unless looking right down the side. The front guards almost look stock too, even though they're 30mm wide than stock.
Here's what she looked like:
- Front view drivers side
- Front view passengers side
- Rear view/Side
- Roof
Can't wait to see her now that I know she should be looking much closer to finished. Once back in the workshop, the glass will be replaced and then comes the long haul to put it all back together again..
Cheers
Brendan
Wednesday, 30 November 2005 | | Categories: Exterior, Paint
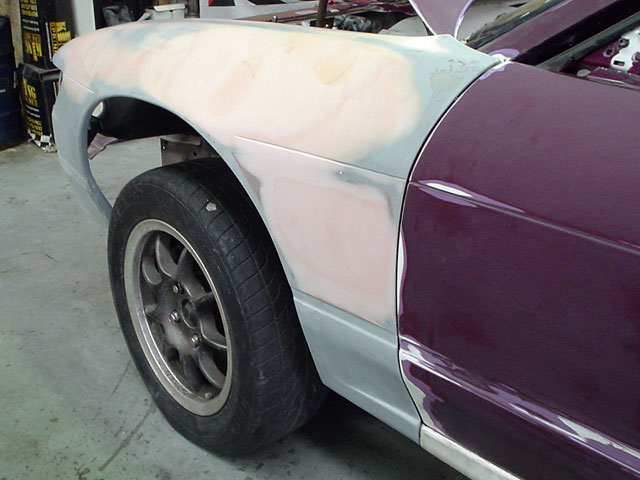
A few posts back I mentioned the problem with fitting the Zenith Guard bracing with the vented Wide Body guards from M Sports. Basically they wouldn't fit due to the diagonal support fouling on the vent. So thanks to Tom, I've now had the vents removed and I reckon this is going to look more and more stock than ever - just really freakin' wide! Also had Tom cut the front bar around the intercooler and as you can see from the shots, he's done a really really good job.
And some news I've been waiting for for a long time, the car has been shipped off to get paint, and I'm hoping it'll be back before Xmas so I can do some work on it over the Xmas break.
Some pics of the modified guards:
- M Sports Front Guard sans vent (Left)
- M Sports Front Guard sans vent (Left)
- M Sports Front Guard sans vent (Right)
- S13 Front Intrusion Bar cut for FMIC (Front-mount Intercooler) fitment
- S13 Nissan Aero Bar cut for FMIC
Should be a few more updates soon as I start to get things like coilovers etc sorted.
Cheers
Brendan
Wednesday, 23 November 2005 | | Categories: Exterior, Paint, Suspension
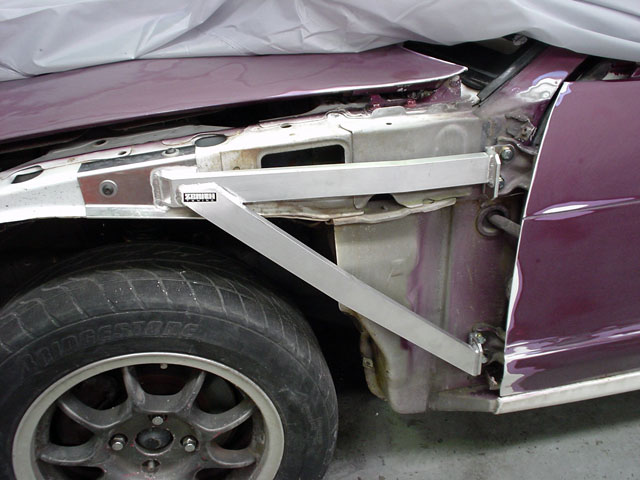
As part of the plans to stiffen the chassis, I came across a coming out of Adelaide called Zenith Tuning on the NissanSilvia.com web site. They're mainly focussing on bracing of all sorts and the first of many items I've picked up is the front 'Guard Bracing'. This has already been tried and tested in the heat of competition drift and is fitted to reduce chassis movement vertically at the front of the vehicle giving better suspension and braking response. The bracing is fitted from the front door hinges and fixed to the top of the inside guard structure, with a diagonal brace stretching from top of the guard to bottom door hinge as can be seen in the pics. The construction is of the brace is from aircraft grade aluminium making it extremely strong and extremely light.
The only downside is in the installation of the top bolts. This is where you need to get smart about getting a washer and bolt down a very narrow channel.
Some pics of the install:
- Zenith Guard Brace
- Zenith Guard Brace Door Mounts
- Zenith Guard Brace Top Mounts
- Access Hole 1
- Access Hole 2
Installation was relatively straight forward, encompassing fitting the door hinge mounts first with the extended bolts supplied. Drilling the holes in the top mounts - choosing a top and side whole for my setup (no rule of thumb here). Then last but by no means least, getting a washer and nut into a very tight space using a long spanner, some sticky goo from the interior door panels and many choice swear words.
In the end they really look the goods and can't wait to feel it the difference too. There is a caveat on fitting these with 'widebody' guards though. As most of these wide aftermarket guards come with vents behind the wheel arch, these braces will foul on them. There are two choices open to you at this point, either hack into the vent or as what I've done, have someone remove the vents altogether (Tom came to the rescue again on this).
Other bracing that I have so far are front and rear Cusco OS strut braces, Zenith Boot Brace and Zenith C-pillar brace (still yet to determine if it will fit as it's for a 180SX). Also got some Zenith aluminium pineapples for the rear subframe and a Zenith Steering Bush to give better steering response. All these bits should tie the chassis together quite nicely.
Update: As of a few hours ago, the guards have been refitted, and the front bar is being cut to suit the intercooler. A lot of preparation has already gone into the body, so the painter has been called to come down and check out the amount of work required. The choice of colour has been with me for some time, and I've chosen Mazda's 'Velocity Red'. It's a beautiful red with a slight orange tinge as well as a small fleck to boot:

Should know a bit more by the end of the week, but I'm pushing to get it in for paint prior to Christmas so I can do more work over the break.
Cheers
Brendan
Page 2 of 4 pages < 1 2 3 4 >


