Category: Brakes
Friday, 23 June 2006 | | Categories: Brakes, Paint
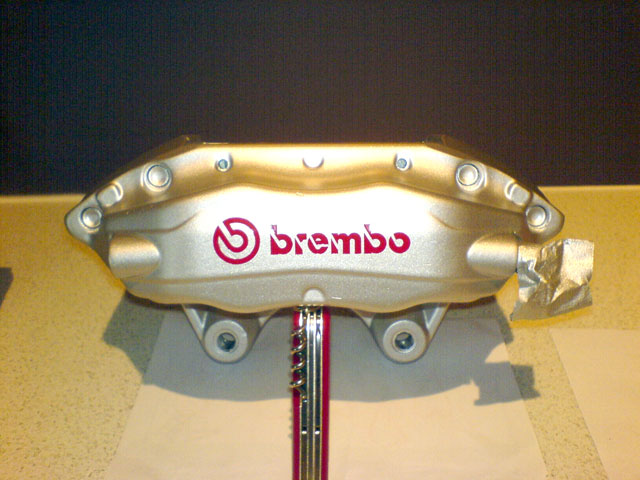
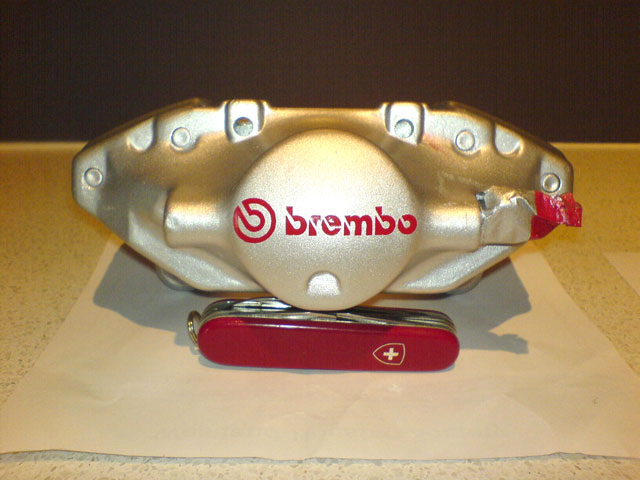
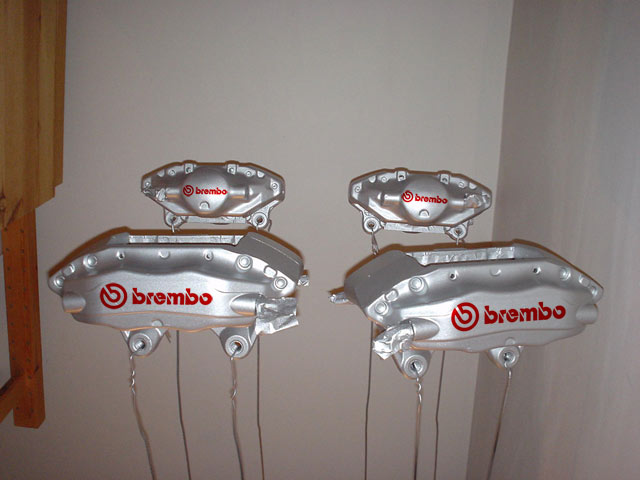
Well, I went home last night - and between my son Kai crying, I managed to paint the red logos onto the calipers. The mask/frisket worked well. Although, I didn't have any idea when to remove the mask, so I tested one of the fronts and it came off OK, with only minor blemishes. Tried one of the rears however and it wasn't as successful. I left the second rear until this morning and it came away really nicely (as pictured). It's not bad for an amateur job, and once it has the clear coats on, the finish should be pretty flash.
Cheers
Brendan
Thursday, 22 June 2006 | | Categories: Brakes, Engine, Driveline, Paint
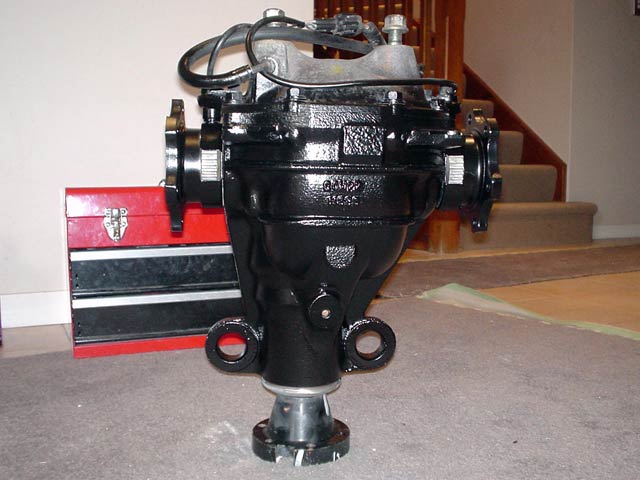
A couple of weeks ago I had to remove a diff for the project from a subframe. This item was from an R33 Skyline GT-R and is a Viscous LSD. Unfortunately it was at the back of the workshop under another two fully loaded subframes. It took a good 30 minutes just to move the one I wanted into a clear area and another hour to remove the differential and half-shafts from the subframe...ugh! I hurt myself in a number of ways while doing this. The reason for going the GT-R diff route rather than a mechanical is that this will be daily and 'grip' driving fun car, not an all out 'drifter', and secondly, I'm running short of funds to purchase a $1500 diff - there's other more important stuff to still get yet.
Once I got the diff and half-shafts home, it was time for a quick de-rust of the diff housing before a rust inhibitor primer and a few coats of the satin black. Looks good too. The rear cover will be replaced with a prepped and painted S13 Silvia one, and the front yoke will be changed to suit the driveshaft. As for the half-shafts, there wasn't so much rust as there was baked-on grease covering the boots. I had a quick go with the prepsol and discovered that with a bit of elbow grease, removal of the nasty grease coating resulted in a new looking boot. Took about 45mins for each half-shaft but the result was worth it, a quick mask and paint and the half shafts were done. At the same time as doing these, I also cleaned and painted up the drive shaft. It's looking pretty schmick, but for the life of my I can't find any photos.
- GT-R Differential Top
- GT-R Differential Bottom
- GT-R Half Shafts
- GT-R Half Shafts Boot closeup
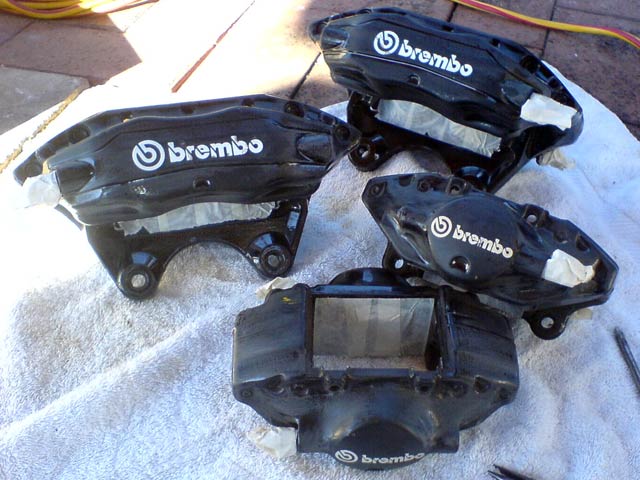
Now another list on the prep list were the Brembos. These are items I kept from the R32 Skyline GT-R that I wrote off a couple of years ago now. They were in top condition and once I decided on colour scheme, it was time for a quick clean and mask followed by 3 coats of the Silver base coat (using VHT Caliper - Cast Aluminium paint). I've now masked up for the new logos to be painted in Red and finally I'll run another 3 coats of the new VHT Clear Gloss Caliper Paint to make it nice and easy to clean the brakes after the hard yards.
- Brembos Prepped and Ready for Paint
- Front Brembo - VHT Cast Aluminium base coat
- Rear Brembo - VHT Cast Aluminium base coat
- All Brembo - hanging in the cupboard
- Front Brembo - Logo Mask
- Rear Brembo - Logo Mask
I couldn't help myself and wait another day to paint the red logo, so have done up a quick and dirty mockup in Photoshop.
Onto another item now. I originally had a China Trust 'Copy' Sump installed on my engine, but after just sitting there for quite a few months, there's evidence of oil leaking. As such, I decided to purchase a genuine Trust/GReddy Oil Pan/Sump. Paid $510 for this from Tanghy on SilviaWA new (thanks Andrew).
- Trust Sump (Top)
- Trust Sump (Bottom)
- Trust Sump (Parts)
Will post up a shot of the Brembo's once finished (like you knew I would anyway).
Cheers
Brendan
Monday, 15 May 2006 | | Categories: Brakes, Exterior, Paint, Suspension
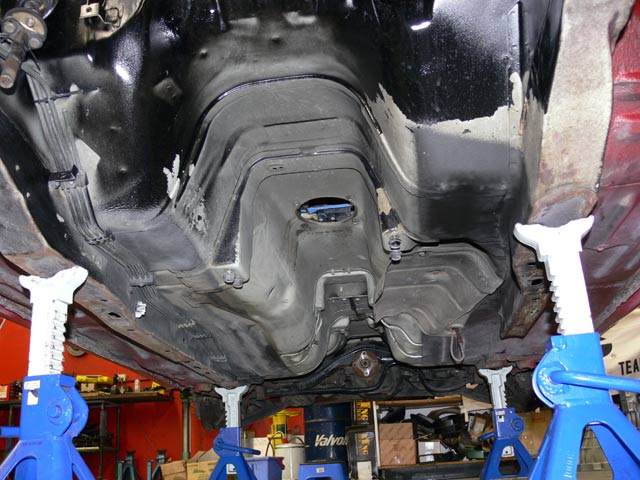
So this Saturday was the start of the final strip. Went out to Bayswater on Friday and picked up some PPC Chassiscoat and PPC Marine Clean. Then once I'd put the wheels back on the car, dropped it, rolled it outside and jacked the front and back up, I proceeded to use the Marine Clean (pretty good stuff) in concert with the Karcher high pressure hose to clean the undercarriage. The photo above is what it looked like after cleaning. It's not 100%, but after a quick wipe over this Saturday with some prepsol, I'll be giving it a nice coat of the PPC Chassiscoat. This paint is specially made for chassis and suspension components as it dries rock hard (a nice Satin Black) and is resistant to stone chips etc.
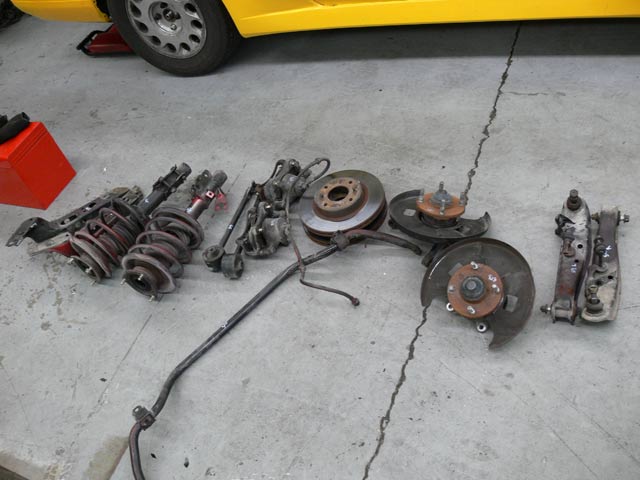
After the clean, a quick blow with the air compressor and it was back inside (after a quick rejig with car positions in the workshop and a mop of the floor - I like a clean working environment after all). Up on stands again, I made quick work of removing the struts, lower chassis rails and finally the front subframe. Dragged out of the road, it was then disassembled so I can clean and paint the subframe (with the Chassiscoat). What you see above is the leftovers that won't be going back on the car, instead replaced with new/used/uprated parts.
- Unpainted front subframe
- Engine bay without subframe
This Saturday it'll be onto removing the rear subframe, clean up the undercarriage a tad more before applying a coat of paint. In the meantime, I've been busy at home. Have cleaned the front subframe, an S15 power-steering rack, front hub knuckles and brake disc shrouds (which will be trimmed so the 330mm Brembo rotors can fit). Will try and spray paint these items before the weekend.
Cheers
Brendan
![]()
![]()
