Category: Audio
Thursday, 28 June 2007 | | Categories: Audio, Interior, Suspension

Didn't the logo come up tops! I'm extremely happy with the way the logo has come out...not to mention the trim so far. The trim is currently in the very capable hands of Chris, Peter and the team over at Trimcare in Welshpool. The rear seats have been trimmed, the vinyl on the door trim has been repaired, and the time the photos were taken, they were still to be resprayed back to factory original colour.
- Door trim insert logo
- Door trim inserts ready for fitting
- S13 Rear Seatback trimmed ready to go

While Trimcare have been working on the cloth trim pieces, I worked on the boot - specifically the rear Cusco Strut Brace and the additional OST brace. Essentially you fit the main brace and centre the bits, then fit the triangulating braces that reach to a plate on the floor. You mark the holes on the floor, drill a nice clean guide hole using a small drill bit, then proceed to drill the main hole. Then get on your back, riggle under the back of the car (mmm, looks so clean under there), and pit the backing plate into position which is just above the differential. I also fitted up the Zenith Boot Brace which ties the ends of the chassis rails together in a similar way to the standard S15 rear boot brace does.
- Holes drilled in boot floor for bottom plate
- Zenith Rear Boot Brace
Of course all these bits will need to come out again, but finding all the bits and making sure it all fits is all part of the process.
Now the plastic trim in the boot usually covers up the top of the suspension towers, so once you fit a rear strut tower brace, it no longer fits. So the solution is to cut holes in the plastic trim so the brace and come through as well as giving enough room to adjust the coilovers damping. With this in mind, and the use of an engraving/dremel tool I set about cutting holes on an already busted set of trims. Using a tape measure and pencil I roughed out a guide to cut. I fitted a 20mm cutting wheel to the dremel and made my first cutouts, cleaning up the corners with a small 8mm diameter grinding stone. Test fitting revealed that the holes could be made smaller, so with that I measured out on the good trims and an hour or so later it was done. These boot trims were also dropped over to Trimcare so that can be refinished in the factory colour. The edges of the holes will get a clean rubber trim put around the edge.
- Suspension tower trim hole (passenger side)
- Suspension tower trim hole (driver's side)
You can see though that the original colour of the car (ie. white) is showing through the holes, so I masked up the area and used some Wurth's Matt Black paint to darken the area. Once the trims go back on, it should look need and tidy.
- Suspension tower painted (passenger side)
- Suspension tower painted (driver's side)
As the paint can was out, I quickly masked up the rear tow loop that sticks out under the rear bar and painted that too. It was looking rather scummy, but I sanded it back and found a cleaner black plastic trim and now it's up to spec. Oh, and considering I was tinkering at the back, I refitted the number plate lights that I had cleaned up. This also involved taking the old tape off the wiring which runs inside the boot and re-wrapping in new tape. With new bulbs in place and a bit of grunting trying to plug them back in (as the plugs are up on top of the steel bumper), all went in without a problem.
- Tow Loop (top)
- Tow Loop (bottom)
- Number plate lights re-fitted
Meanwhile Marc has been completing the wiring loom, the Splitfire coils are in place, the injectors are wired up and there's hardly a wire to be seen thanks to the Marc Palmer Special Service (you really need to look for them). Oh, and all that stereo gear was picked up thanks to Alex at Westside Car Audio in Osborne Park. I got a great deal on the gear, including the DDLinear Flagships. The amps are tiny and much lighter than an older 1000w monoblock is, so it evens out the use of all the dynamat  Now I might have to upgrade my iPod because I need a later version...but that's a tax deduction anyway.
Seeya round
Brendan
PS> Apologies for the later than normal posting date.
Monday, 18 June 2007 | | Categories: Audio, Engine, Interior

Hooray...the last of the dynamat (except rear parcel shelf..dammit) is in the boot (trunk). After I ran out a couple of weeks, it took a few days to order, then more to deliver etc. But Friday I focussed on completing it...meaning the drivers side boot floor, suspension tower, outside guards and rear panel around the lights.
- Dynamat on the boot driver's side
- Dynamat on the boot rear panel
Once that was done, I went and tracked down some rear boot carpet and floor mats. After a good vacuum and clean, the floor mats just didn't seem to be coming up any good. The floor carpet was a little better. I'm going to get the floor mats remade now with a nice plush carpet. There's also a possibility of getting some badges made up for the mats based on the logo I designed, but still waiting back on quotes for them.
Next was to sort out the fuel pump. Now my original plan was to use a Sard single pump surge tank, but due to time restraints, we're just going with an in-tank pump that we'll use in the surge tank later. The pump chosen is the Bosch 044, but in an in-tank installation. The modification and fitting to the standard fuel cage was reasonably straightforward thanks to some instructions from NissanSilvia.com and help from the C-Red team.
- Fuel pump access prior to the dynamat
- Original S13 fuel pump setup
- Bosch 0 580 254 044 (The 044) Fuel Pump
- The 040 vs 044 fuel pumps - swapped over fittings
- Bottom of the bracket removed
- Fuel feed pipe shortened
- Fuel feed pipe attached to 044
- Completed 044 fuel pump assembly
- Completed Pump Install now with dynamat
In addition to these main things, I installed the electric aerial and went and got new (ie. used) license plate holders as mine seemed to have caught the attention of the spray painter's gun.
- License Plate light covered in overspray
- License Plate light in great condition
I'm due to get the seats back from the trimmers sometime later this week so I'll be throwing those in on Friday. Greg was helping out on Saturday too, working on getting the fuel system complete involving the Sard fuel pressure regulator (FPR), fuel filter and fuel lines to the rail and back. Oh, and I got some new pedals too from Natetune on NissanSilvia.com, aren't the purdy.
- Nardi Foot Pedals
Until next week.
Cheers
Brendan
PS> Sorry for the title, was still thinking of all those 'THIS IS SPARTA!' funnies that are running around at the moment (see the movie '300').
Tuesday, 5 June 2007 | | Categories: Audio, Interior

Finally after finishing the Dynamat in the main cabin, it was time to start fitting interior trim pieces back into Sillbeer. I would have been continuing on with the boot Dynamat installation, but I ran out half way through, so have to wait for another box to come from my ebay supplier (billy588). So first up it was through my box of bits and pieces for appropriate trim. Unfortunately that turned up a black for the back seat panel, so I went out to one of the shells and found the whole back section still intact. After a bit of grunting, and saw fingers on those little press studs (they really do fly when they pop out), I had what I needed. The cleaning process for most of this stuff is first to give it a wipe down with a wet sponge to remove the thick layer of dust. Second is a wipe down with some household cleaning spray to remove any dirt and grime. And finally a good wipe over with the tyre shine to give it back some moisture.
- Side interior trim
- Dynamat on rear floor area (driver side)
- Dynamat on rear floor area (passenger side)
The same car provided a lot of other panels, as well as from a few other sources. Rear seat belts were also fitted and test along with finding the hinges for the rear seat back - but they're quite rusty at the moment so will need to give them a quick sandblast before leaving them in place.

Another part of the interior is of course the roof liner (or hoodliner). I had a couple to choose from, but neither were in very good (clean) condition. So I chose the better of the two, and with some newly acquired Armor All interior cleaner, I gave the entire roof liner a good twice over (as well as a good scrub). The results are amazing and gives a nice smell to the roof too.
- Roof liner before cleaning
Saturday morning I attempted to find and fit a set of front seat belts, and I had some success in finding the correct brackets and the correct drivers side belt. Unfortunately the passenger side belt I found was made for another mounting angle so it would not reel out, only retract. This was after 3hrs mind you, so I gave up and have a new set on the way. In the mean time I tracked down a couple of good interior side panels - went through 3 drivers side ones before I found one with minimal scratches and all the clips in place. This is the one you see in the trim picture above.
While I was working (ie. wasting time) on the belts, Greg was in to make up the throttle cable bracket. The reason for a new one is that the GReddy plenum sits high in the engine bay and the mount on the plenum is also offset from the original location. Therefore and new low profile offset bracket was made. It looks mint, and after a lick of paint should be just fine visually too.
Marc at C-Red is working on the electrics this week, getting the wiring loom sorted and tucked away and the ECU plugged in. Hope there to be some news on when we can start her up when I go in on Friday.
Getting exciting now.
Cheers
Brendan
PS> Please note that I do get quite a few questions from people asking about things I have done previously on the car. To help out with this, I've dropped in a Google search for sillbeer.com to track down any info you're after.
Monday, 28 May 2007 | | Categories: Audio, Interior, Wheels/Tyres

Wow, two posts in less than a week...I'm trying to make amends. And so as part of the interior install, between doing the Dynamat and putting the carpets in, the wiring for the impending stereo needed to be installed. So last Friday was the day. First up I went for a quick a trip down to JB Hifi in Cannington to get myself some quality interconnects that run the signal from the deck through to the boot where the amplifiers will be installed. After doing a quick bit of research on what to use, it was down to Stinger and Aepro (?). As luck would have it, JB's had the Stinger Helix in stock...these being their higher end product, and in a nice red to boot. Therefore if they do get seen, at least they won't stand out like dog's bollocks. Back at the workshop the fun begins.
After a quick run down from Marc Palmer (all-round nice guy and electronics whizz, also C-Red Workshop Manager) on where I should be running the cables, I set to work running them out. First up were the Stinger interconnects (RCA's) which have been run down the passenger side of the tunnel, across the back of the rear footwell and up and over the wheel arch into the boot (basically following one of the stock wiring loom paths).
- Stinger interconnects along rear passenger footwell
- Stinger interconnects over wheel arch
Next was a 7-wire multi-core cable which we've run for future needs if they should arise. This was run along the same path as the stock loom on the drivers' side of the car, followed by the speaker cables which run down each side of the car and up and over the wheel arches.
- Speaker wiring in Passenger footwell
- Speaker wiring along Passenger sill
- Speaker wiring along Drivers' sill
- Speaker & multi-core wiring over drivers' rear wheel arch
Also on Friday I received my next box of Dynamat (3rd so far) and before leaving the post office, I had it weighed. It came in at a smidge of 10kg. Not bad really considering that could be the difference between my planned stereo setup, and one with twice as much weight. And of course the amount of deadening in the car really has made a huge difference already.
Saturday I managed to get the rear seat area and wheel arches covered so next up will be the boot. I reckon we're getting pretty close to getting the interior back it. So far I'm undecided on whether to get the rear seats and door trim panels retrimmed before Autosalon. The interior I picked up has the option CA-version velour material with a grey and slightly red stripe patten. It's nice, but the grey doesn't quite match the same grey as the GT-R seats, but I may forego that...but as mentioned, undecided.
For the stereo, I'm looking to go something fairly basic, but still punchy starting out with an Alpine SWX-1042D Type-X 10" Subwoofer. The front splits will be the Alpine DLC-177R DDLinear 6.5" Component 2-Way Speaker System (6.5" mid-bass and tweeter) as after listening to the Type-X splits, these has a more appropriate sound for my liking. The head unit will again be Alpine - and having just spied the new Alpine iDA-X001 Digital Media Receiver on their website, I think that's the winner (oh, it's basically an interface to an iPod and Tuner with no CD player...more info). Now rather than installing some huge amps which weight a lot, I thought I claw some weight savings back from the Dynamat by going for the diminutive Alpine PDX Digital Amplifiers. In this case I'll be going an Alpine PDX-1.1000 Mono Power Amp for the subwoofer and Alpine PDX-2.150 2/1 Channel Power Amp to run the splits. All-in-all a very nicely rounded system methinks. Now I just need to find a place that will give me a decent price for it all.
Oh, and something I didn't mention last week and that's about tyres. I originally had a set of Federal SS595 tyres installed on the rims, but with my plan to do a bit of track work, and the desire to have something that is both street and track pliable in a 50:50 split, I've just had some new tyres put on. These are again Federals, but not the SS595RS Ultra High Performance tyre - this should give me what I'm after. Oh, and an unashamed plug goes to Shane at Exley's Motorsports Tyres down in Willeton for supply and fitting these up.
Until the next episode.
Cheers
Brendan
Thursday, 24 May 2007 | | Categories: Audio, Interior

Jeez I'm slack, another month between posts. Well, I'm slack, just busy...but that isn't to say that work hasn't been progressing. It has, just at a slower rate since I'm back to a few hours on a Saturday morning. But I now have a target to get sillbeer as close to finished as possible by Cabin Autosalon (Perth) on 21-22 July.
So what have I been doing...well changing mind as per usual. This time with regard to my seating arrangements. The original plan was to use a set of Recaro recliners from a Honda DC2 Type-R Integra which I already had (and at great expense I might add). The more and more I thought about it though, the results of using recliners and aftermarket rails in the S13 has just been littered with saw heads. This is because the standard seats have the rails built into the seat itself and they're offset by close to 40-50mm on the inside rail. This basically means that you're never going to get an OEM ride height, and with the need to put a lid on my melon every now and then and being a touch over 6-foot means headroom would be at a premium. Now I've always liked the look of the R34 Skyline GT-R seats, and I knew they'd be a relatively easy fit only requiring the outside rear mount to be lengthened for the S13 floorpan. The only major problem was sourcing them. Thankfully Jeff at C-Red already had a passenger seat, but the driver's side was a problem. After a quick look on Yahoo Auctions Japan I found a possible suiter, and after Jeff arranged how we'd get it and I passed over the fold, I had the driver's seat on its way down.
Now other than a great looking seat, they're also extremely comfy especially for someone with a slimmer frame (such as myself), there's also the added bonus that they have full OEM movement. Meaning you lift the tab and the seats folds and moves forward...great for getting my kids in and out, and keeps the wife happy that everything works as expected. So without ado, here's some special piccy's of the new set:
- R34 GT-R Seat - Test Install in S13
- R34 GT-R Driver's Seat
- R34 GT-R Seat - Detail
- R34 GT-R Seat - Controls
- R34 GT-R Seat - Stitching
- R34 GT-R Seat - Front Outer Mount in S13
- R34 GT-R Seat - Front Inner Mount in S13

As can be seen in the pic above, it's a simple matter of welding on an extended tab to reach the S13 mounting hole. Yippee.

Now, at the moment, all interest is on the interior...with the Dynamat continuing to be spread from here to kingdom come. I've completed both rear passenger compartment sides and the B and C pillars a couple of weeks ago. Last week I removed the old carpet and laid the dynamat down on the main floor area. As can be seen in the photos, it's shiny. You're probably wondering how much weight I'm adding? I don't know, but the amount of deadening I now have is amazing and should make the driving and stereo listening experience that much nicer. The doors now close with a thud and the roof now sounds like a wooden chopping board rather than a tin can when you rap on it.
- Dynamat on floor
- Dynamat on side rear
There's still more to do, but I'm waiting for another box to arrive before continuing. It will cover pretty much everything in the end. On another note, finally went and picked up the door handles. They took about 4 hrs to fit in the end because I had to remove the old latch mechanisms because they'd been painted over and then go find any missing parts. Also needed to shave a bit of the paint from the key hole so the small black plastic key lock surround would mount through the hole (too much paint build up - very tight tolerances required). Fitted new strikers as well (the bits that bolt to the main body) and fitted back the window rubbers and a couple of bits of trim. I tracked down a nice set of horns...as I couldn't well have Sillbeer with a beep beep. It'll now perform a nice loud two tone honk.
- Door handles fitted
- New Alpha Horns
One last thing to report, and that's the child restraint mounts. They've now been fitted in and await the occasion of fitting the seat for my son Kai. Not to mention that they're required for compliancing.
- Child Restrait point from top
- Child Restrait point from bottom
So I'm currently working extra hours Monday to Thursday so I can take Friday off to do a full day in the workshop. Tomorrow will be laying cable for the stereo before I have to put the new carpets back in.
Signing-off
Brendan
Friday, 27 April 2007 | | Categories: Audio, Engine, Interior

First up, sorry about the delay in the posting. I've been on holiday for a week and just haven't had a chance to post up. But now we are now finally able to reveal the BOV setup. This took quite some time to work out mainly because of the size of the GReddy Type-R blow-off valve that I'm using and because I wanted it setup in a recirculating configuration. The pipework was worked up over a couple of days between other things, and then finally painted with the VHT Brake Caliper Silver and Clear overcoat. Jury is still out on whether they would look better in black, but for now they look pretty nice. For the intercooler setup, all the hoses were changed from the blue silicon that came in the Hybrid kit for black Samco silicon hoses. Don't think we've seen another setup like this before but it's neat and tidy.
- Air filer side with Z32 AFM and BOV
- Overhead of GReddy Type-R and pipework
- Intake Plenum intake pipework

The next few weeks I'll be focusing on getting the interior ready for stereo and trim, this means covering as much as possible with Dynamat. Some of you might be thinking about all the extra weight it will add, but then I'll just have to turn the boost up. The main reasons for the Dynamat is sound quality from the stereo, and making the interior livable. Just from putting it on the doors and roof, the difference to the way the roof sounds when you tap and the doors feel in closing is amazing. No more flimsy S13. Feeling much more like a Skyline now.
Dynamat Application Pics:
- Drivers Door
- Passenger Door
- Bootlid
- Roof
The firewall, floor, rear wheel arches and boot floor are still to be done, hopefully the amount I have left should be able to cover it.
Just a little extra bit done was the radiator cap. To match the RG Radiator, I've put on an RG Power Radiator Cap.
- RG Power Radiator Cap
- RG Radiator with Cap
A special thanks to Boney and Josh at C-Red for doing a little after hours work. Boney for helping with welding up the pipe work for the BOV setup/intercooler, and Josh for finding and removing an ECU loom for Sillbeer, thanks fellas (Dally put me up to this).
Cabin Autosalon is fast approaching now, so the aim is to have it all run in and completed by then. If it's not 100% complete, it'll be going in anyway.
Cheers
Brendan
Thursday, 8 February 2007 | | Categories: Audio, Engine, Interior, Driveline

Alright, so a couple of weeks ago, I was lucky enough to start getting some help on moving Sillbeer closer to completion. Enter one Mr Greg Dally. He'll be doing a few days a week working on my car to get things moving along. I have so much work on now just to pay to get it over the line, that I have minimal time to actually work on the car so I'm glad to have his expert hand on the job...and to those who don't know how he works, he's about as anal (if not more) as I am.
So first on his agenda was to complete the gearbox. Now it's really just been a shell for quite sometime now, so with the internals of an S14 5-speed gearbox identified, Greg made up mine to as you see it here. Apparently there was a bit of polishing that took place on some components that will never get seen so that just goes to show his enthusiasm. It just looks mint and with the clear coat, should be relatively easy to keep clean too.
- S13 Gearbox Top View
- S13 Gearbox Closeup Middle
- S13 Gearbox Closeup Rear
- S13 Gearbox Closeup Selector
A little bit that I've done in between other things is to paint the taillight cluster units with a chrome paint. As I'm going to use the 'crystal' clear/red taillight lens, there needs to be a little more reflection from behind so a coating of chrome helps that out. Also to assist in a nice neat seal around the taillight, I cleaned all to old sealer from the taillight surround...using a bit of Rostoff and/or Prepsol and elbow grease, it came off easily enough.
- Taillight Cluster Unpainted
- Taillight Cluster Painted
- Taillight Surround Before and After

As the exterior and mechanicals are coming along now, it was time to start looking at what's happening with the interior. Now I have had a set of 4 Defi-Link gauges for some time, and have been tossing up on how to mount these. I had bought a set of Defi-Link Single Meter Visor's, but I didn't really like the thought of these things sticking out like dog's bollocks on the dashboard. So the only other option was a 3-gauge hood of some sort. Most of the stuff available for the S13 dash looks mighty naff, but those made for the WRX and EVO by Defi are so so nice...cue purchase to ET Performance and they had a Defi Triple Meter Hood in my lap inside a week. Now as this was made originally for a WRX (MY2000+) I will have to modify the dash and the hood appropriately to fit. This could take some time, but after an initial fitting - it'll look mint. Note that it comes in a primed plastic ready to be painted in your own chosen colour. Once fitted, the dash will get reskinned as close as possible to factory so it looks like the cluster was a factory option.
- Defi Triple Meter Hood Profile
- Hood Test Fit Front 1
- Hood Test Fit Front 2
- Hood Test Fit Top
- Hole in Dash
Please note that the dash used is stuffed anyway having had a set of gauges mounted on the passenger side. Once we have the basics sorted, we'll used a fresh dash to work with.

Now there's one thing that may or may not sit well with some people when building a car like this, and that's adding weight in the form of sound deadening. But as this really needs to be a comfortable (as well as quick) car to drive, it will be required...especially when taking into account the sound system planned (will be revealed in a future post). So as is done to all of Chip Foose's cars on Overhaulin', the interior will be fully decked out with Dynamat...improving on both sound and temperature in the cabin. This will be applied to all areas of the boot, the floor, roof and doors. Yes, it'll add weight, but at the same time make the car feel more solid (think thud rather than clink when closing the doors) and liveable especially when driving down south.
Next up for me is to find some components in the engine such as Power Steering pump, A/C compressor, alternator and starter motor and get them ready for fitting. The front and rear window seals should arrive from Nissan any day now and we've also ordered in a new brake master cylinder from a Z32 300ZX in the larger 1 1/16" size. An article on SportCompactCar's web site notes the particular's around using this master cylinder with Brembo's.
Also on the subject of interior, I need to start gathering the pieces that will get refinished (ie. plastic trim) and the bits that will be retrimmed to match the Honda Integra DC2 Type-R Recaro's that will be fitted. So much to do, so little time, but with Dally on the job things are looking great.
Cheers
Brendan
Tuesday, 19 April 2005 | | Categories: Audio

It's been hard for me to come to a decision on how far to go with a stereo install. Considering the last Silvia I had I ripped out the head unit and speakers and the GT-R only had a basic system run off the head unit, I thought it time to look at something a little more serious. After hearing a mate's (Angry13) system with 3-way splits for front stage and single 12" subwoofer - it was a direction I'd be happy to take for the minimal weight it's going to add.
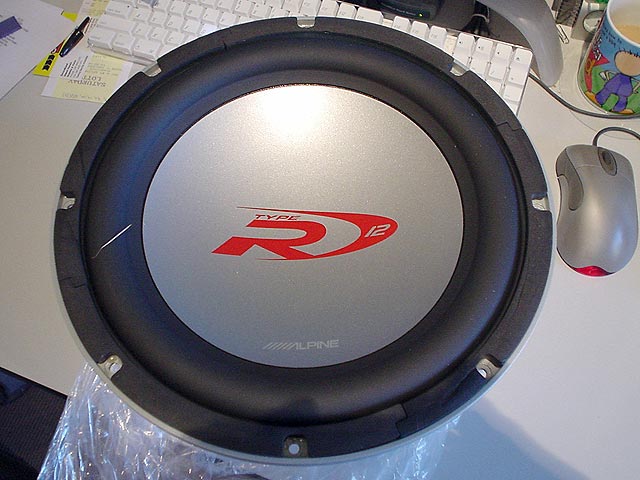
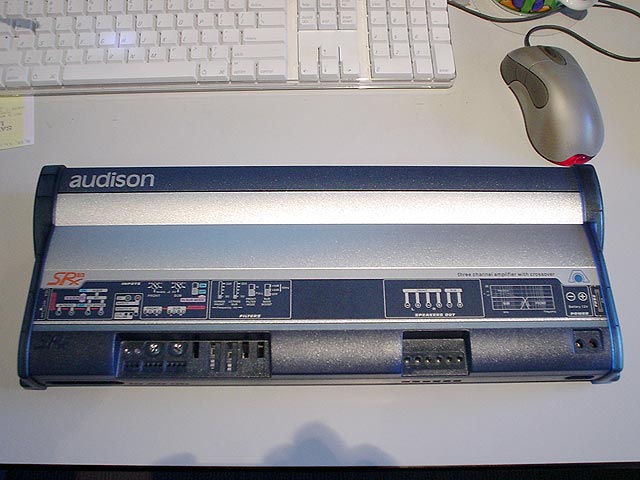
So basically, using the Alpine 2-way splits that came from the GT-R, I'm adding to this an Alpine Type-R 12" Subwoofer (new) powered by an Audison SRx-3 Amplifier. The head unit is yet to be decided but will stay with the Alpine brand and be either a 6835 or 6855 unit. This should allow me to get a decent quality system, with minimal weight addition. The sub box will also be fashioned in such a way that I can easily unplug it and the amp, undo some latches and remove in one piece for track work.
Pics of the proposed components:
- Alpine 2-way Splits & Alpine 3729 2-way Passive Crossover
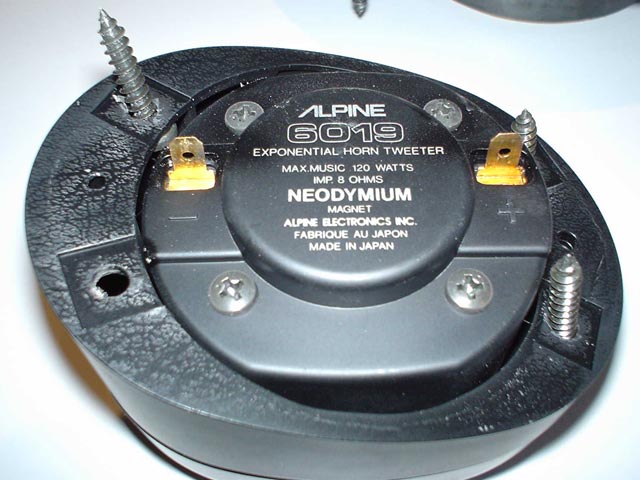
- Alpine 6019 Exponential Horn Tweeter
- Alpine 6058 5.25" Woofer
- Alpine 1241 12" Dual-voice Coil Subwoofer
- Audison SRx-3 Amplifier
Cheers
Brendan
Page 1 of 1 pages


